0

Gear

    Turned On by Hypoxic

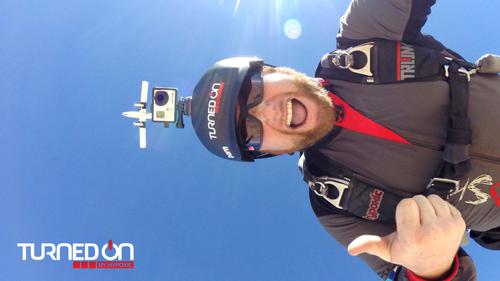
    In May of 2014 the skydiving-focused electronics company Hypoxic began a Kickstarter campaign that sought out a goal funding of $30,000 in order to develop a status indicator for the GoPro action camera. Despite dominating the market for several years, neither GoPro or its primary competitors come with a feature or piece of hardware that allows the user to easily determine the status of the camera or its recording. For sports where the GoPro is mounted out of sight, such as the popular helmet mounting method, this can often cause hesitation when trying to remember whether you may have pressed record or whether you put the SD card back. Hypoxic's goal was to try and provide a useful and easy way of determining whether the camera is functioning as it should, while also removing that hesitation from the minds of the jumper.
    As quoted from the Kickstarter page: "In our sports, these uncertainties are not just unsettling: they’re dangerous. As an athlete, you know: before riding down this line, starting this race, jumping out of this plane, launching down this mountain, you need an absolutely clear head. Nothing good can happen when personal safety takes a backseat to a blinking light."
    By the end of June last year, the Kickstarter campaign had raised $43,049, more than $13,000 over the original target amount. Incentives for backers ranged from stickers for those that pledged $5 or more, to Turned On units with early shipping for backers that pledged over $180.
    Over the past 6 months the Kickstarter units have been sent to the backers of the campaign and were well received. The Turned On units have now begun shipping to outlets and are available for public purchase.

    What Does It Do?
    The Turned On unit makes use of 3 colored LED lights to provide information as to the status of the camera. When the camera is recording, the light will be solid red. When it is on standby a blue light will be displayed. When an error is present it will display either a solid yellow or a flashing yellow light. When the light is flashing yellow, it indicates a potential impending interruption to recording, such as low card space, low battery or high temperature. A solid yellow light indicates an error and in this case, the camera will not be able to record, such as in situations where the card is missing or corrupt.
    The device will work in all modes, and show the active recording light whether you're recording video or shooting a series of images in burst mode.
    What separates the Turned On indicator from other indicators on the market is the detailed level of information provided. Most other indicators simply use an on/off system that will display whether or not the camera is recording or even just whether the power is on, which is often unreliable - especially in cases when the camera may be in stand by mode.

    Compatibility and Support
    Currently there is limited compatibility with the Turned On, and will require one of the following GoPro cameras: GoPro Hero 4 Black, GoPro Hero 4 Silver, GoPro Hero 3+ Black, GoPro Hero 3 Black.
    Supported Versions
    GoPro Hero 4 Black - v1.02.00

    GoPro Hero 4 Silver - v1.0.2.00

    GoPro Hero 3+ Black - v1.04.00

    GoPro Hero 3 Black - v3.00.00
    There are two build of the Turned On available, the H3+/H4 and the H3. The H3+/H4 is designed for use with the GoPro Hero 3+ and GoPro Hero 4 cases, while the H3 model is for use with the GoPro Hero 3 case.
    Hypoxic are already looking to expand the development to include more of the GoPro models and claim to be exploring compatibility that goes back to the GoPro Hero 2.

    Where to Get One?
    Dealers that are listed with selling the Turned On units are as follows:
    Chuting Star - Skydive the Farm, GA

    Patrick Kaye - Skydive Dubai, Dubai, UAE

    Para-Gear - Skokie, IL

    Ranch Pro Shop / Tonfly USA - Skydive the Ranch, NY

    The Drop Shop - Skydive Chicago

    Gold Coast Skydivers - Gold Coast Skydivers, LA

    Sunshine Factory - ZHills, FL

    Rock Sky Market - Chicago Skydive Center, IL

    Xtreme Video - Skydive Carolina, Chester, SC

    HYPOXIC - Chandler, AZ
    As of the release of this article, the MSRP for the Turned On units was listed as $99.
    More information and installation guides can be found on the Turned On Website.

    By admin, in Gear,

    Triax Productions' new Triax T-Stake

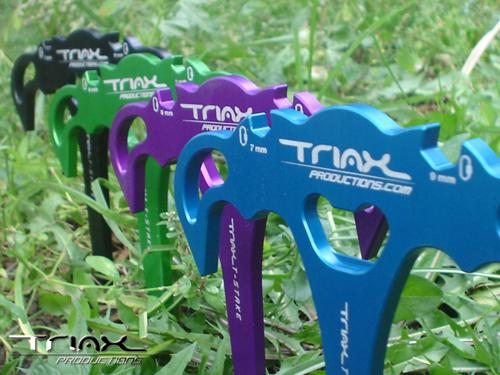
    The Triax T-Stake is a revolutionary new packing multi-tool for both B.A.S.E. jumpers and skydivers. Designed by Triax Productions, the creators of the popular "Continuum" B.A.S.E. jumping DVD series, the Triax T-Stake is of use to anyone who packs their rig outdoors, and is trying to maximize the safety and heading performance of their canopy openings. A full explanation of the Triax T-Stake's features and a link to a short informational video clip can be found below in the article.
    The Triax T-Stake
    As the name implies, the "T-shaped" Triax T-Stake is a tool designed to make your B.A.S.E. and skydiving packing experience easier, faster, neater, and more organized by combining all of your tools into one. "We felt that this product could provide a 'missing link' in the jumping community," said Kenyon Salo, one of the B.A.S.E. jumpers that came up with the idea to design the tool earlier this year. "The Triax T-Stake was a lot of fun to design because we had full creative control from the bottom up, and being end users of the Triax T-Stake, we were able to base our design criteria on literally thousands of pack jobs worth of experience." Salo later added; "I really think that the world is a better place because of the Triax T-Stake. I know it's helped me become a better person!"
    Design Features:

    A specially designed "T-shaped" stake offering many different ways to secure your rig (or multiple rigs) while packing
    Light, durable and compact for easy use and mobility needs.
    Both 7mm (for most skydiving rigs) and 9mm (for most BASE jumping rigs) built-in wrench slots for your French (rapide) links for an easier time of changing slider configurations.
    A classic bottle opener for that cold beer (or soda?) after a long day of jumping.
    Bridge Day 2005
    Triax Productions officially unveiled the Triax T-Stake in October at Bridge Day 2005 in Fayetteville, West Virginia, one of the few legal B.A.S.E. jumping events held in the United States each year. Overall, the Triax T-Stake was found to be a huge success at Bridge Day. Jumpers were seen using it all over the packing areas properly staking their leg straps, three rings or risers to securely anchor their rig for supreme line tension, at the same time providing adequate line separation while packing. During the event, the bottle opener function of the Triax T-Stake was put to the test with an estimated one thousand beers opened in a two-night period. Additionally, the crafty Bridge Day 2005 B.A.S.E. jumpers discovered yet another use for the Triax T-Stake-shot-gunning beers.
    Bridge Day Video Fest
    The pressure was on at this year's Bridge Day Video Fest for Triax Productions to defend their first place win in 2004. Although their entry did not win them a prize, as a way to introduce a little humor into a night of some serious B.A.S.E. movies, Triax Productions debuted their "T-Stake Infomercial," (directed and edited by Chris Pope). The entry went over as an audience favorite and has since become a cult hit. Popular demand has dictated that Triax Productions make their "T-Stake infomercial" available online, and it can now be viewed on the company's web page, http://www.triaxproductions.com/ [The infomercial is in Windows Media format and takes about a minute to download for an average broadband connection] Triax Productions would like to offer hearty congratulations for the winners at this year's Video Fest!
    The Triax T-Stake and Skydiving
    Although designed primarily for B.A.S.E., skydivers have also taken a liking to the Triax T-Stake. Not all skydivers have the luxury of being able to pack indoors all of the time, and for some, particularly on the boogie or swooping circuit, it's a rarity. The Triax T-Stake works equally well for skydiving rigs as it does for B.A.S.E. rigs, making the whole process of getting on with your pack job faster and cleaner, instead of scrounging around for a weight.
    Where to see the Triax T-Stake
    If you weren't lucky enough to be at Bridge Day this year, and want to get more information on purchasing a product, the Triax T-Stake, along with the company's DVD releases and apparel such as T-shirts, hoodies, and chick-tees have been made available for purchase at the Triax Productions web site.

    About Triax Productions
    Triax Productions was founded in 2002 and is made up of Colorado B.A.S.E. jumpers/skydivers Damian Doucette, Chris Pope, and Kenyon Salo. They offer stock footage and complete package action/adventure videography services on their website, counting aerial stunts and camera operation among their many talents. Triax Productions has also been producing some of the world's best B.A.S.E. jumping DVD/videos on the market, including their popular "Continuum" and "Continuum II: Tales From the Edge" DVDs, as well as the Bridge Day event videos for both 2004 and 2005. The Triax crew has just released the 2005 Bridge Day DVD and is currently in production of "Continuum III," tentatively slated for release in September/October of 2006. Plans for the Bridge Day 2006 event DVD are also in the works.
    FFI/contact: http://www.triaxproductions.com/

    By admin, in Gear,

    Top Ten Misconceptions About Zero-P Canopies

    A while back, I overheard a bunch of people discussing their lative merits of different types of canopies and materials for low-time jumpers. I heard some interesting misconceptions about what's dangerous and what's not, what works and what doesn't. In the interest of getting some discussion going, I figured I'd-list my top ten misconceptions about Zp canopies:
    1. Zero-p canopies are dangerous.
    Zp canopies have gotten a bad reputation over the years, since most hp canopies are made of Zp fabric. However, this does not mean that hp fabric itself is dangerous - it just allows smaller canopies to land well, and so is often used for smaller, high performance canopies. A large 9 cell Zp canopy is just as safe a sits same-size F111 counterpart.
    In fact, it is often safer. Zp fabric keeps air from escaping though the top and bottom skins of the canopy, and thus allows better canopy pressurization at a given airspeed. This helps prevent canopy collapse in bumpy winds. In addition, the Zp fabric allows the airfoil to be a bit more efficient, and thus allows you to slow down a little more before landing. During a landing in a bad area (a power station, for example) that slower speed can be a life saver.
    2. Zero-p canopies are harder to land than F111 canopies.
    Not at all. In fact, the opposite is often true. Zp canopies have more lift during the flare, and that extra lift can be used to slow yourself to walking speed before touching down. F111 canopies, especially old ones, often can't do that any more -they become so porous that they stall before slowing you down enough. Often, you will see people with older F111 canopies doing all sorts of tricks to get good landings - front rise ring, taking wraps on the brake lines, and turning low. Generally, such maneuvers are not required with Zp canopies.
    This year I watched maybe 200 landings at bridge day. Conditions were not great - zero wind and an uphill landing. The people who got the best landings were the people with fairly new(i.e. not porous) F111 canopies and the people with Zp (Triathlons, Sabers, even a Stiletto or two). The people with the ragged old Cruise lites and Pursuits were slamming in hard. The canopies simply did not have enough lift left to slow down the jumper before landing.
    3. F111 canopies are a good choice for a first canopy.
    Well, yes and no. A good, fairly new F111 canopy, loaded correctly, is indeed a good first canopy. However, you have two things against you:
    Few people sell good, low-time F111 canopies anymore. Most have 500-1000 jumps on them, and at that age, they become difficult to land. A larger canopy will not be affected by this as much as a smaller canopy, so size matters. A pd230 may still land you well after 1000 jumps, since its forward speed is low to begin with. A PD150 with 1000 jumps will be very hard to land without injury for most jumpers.
      It's hard to resell F111 canopies, for the very reason mentioned above. They are generally retired after about 500-1500 jumps, do you're paying about $1 per jump for them. Zp lasts much longer - you can easily get 2000 jumps out of a Sabre 150 with an occasional line replacement. This ends up costing you around $.60 a jump. 4. Zero-p canopies open really hard.
    This rumor came about mainly because of the performance of the Sabre and the Monarch, two popular Zp 9-cells. It is no longer true. The Sabre was tamed by a larger slider, and mods exist for the Monarch. Newer Zp canopies, like the Triathlon, open quite reliably and comfortably. Some new Zp canopies, like the Stiletto, Spectre and Jedi, are designed to snivel for a longtime, and give extremely soft openings.
    This was a boon for cameramen, who need soft openings due to all the weight on their heads.
    Of course, there's a trade off between too little snivel and too much. But there are Zp canopies available that open at nearly any rate, from rapid to very slow. Packing is an important part of that scale, and between canopy selection and packing technique there should be a wide range of openings to choose from.
    5. You have to get a smaller canopy to get better landings.
    Not true. Many people start out on old F111 canopies, and simply assume that to get nice, soft, swooping landings like the pros, they need a small canopy like the pros. The truth is that nearly any Zp canopy will land you well, if you fly it correctly.The technique you use depends on the loading, as listed below:
     
     
    6. You need to get a smaller canopy to go faster.
     
    While it's generally true that smaller canopies go faster,there are many other options to increase your speed and turn rate without taking away wing area. Wing area is all you have keeping you in the air, and taking it away decreases the canopy's "forgiveness", or tolerance for mistakes. Some ideas for increasing speed/maneuverability without sacrificing area:
    Canopy choice. The Silhouette, for example, is designed to be a faster large canopy. A 170 should give you nearly the same forward speed as a Sabre 150, with the extra forgiveness that the larger size entails.
      Pilot chute. The single best thing you can do for your medium / high performance canopy is to get a collapsible pc. It will do wonders for your glide, forward speed, and flare. I highly recommend this as a first step, before you get rid of that old, doggy canopy. Even older F111's can benefit from this.
      Slider. Figure out how to stow your slider somewhere. There are many different types of collapsible sliders, and they affect performance two ways - by reducing drag, and by allowing the risers to spread out more. Avoid stowing it on your jumpsuit, though - this can prevent a cutaway if you have a problem later, and has led to a few serious injuries.
      Riser tricks. Mini-risers reduce drag a bit, but not a whole lot. Separate riser-keeper rear risers allow the toggles a bit more freedom, and distort the canopy a bit less when you flare, allowing a little more flare power. Front-riser handles allow you to easily add front riser, a good way to increase your speed when trying to buck a headwind (for example.) 7. You should never, ever turn near the ground.
     
    This is a good rule of thumb for your first few jumps.However, there are times when turning near the ground is necessary, and all jumpers should know how to do this safely. Basically there are two ways to turn low - the braked turn and the flare-turn. Practice these! Both allow radical turns without a resulting dive towards the ground. Many jumpers have been killed when they found themselves flying downwind or towards an obstacle on final, and tried to turn without using these tricks.Depending on the canopy, you can safely make a 180 degree turn as low as 50 feet - if you've gotten instruction on how to do it and practiced it up high.
    8. Skydive Chicago puts first-time jumpers on tiny Sabres.
    Not quite, but close. They put first-time jumpers on Mantas(or have them do tandems) for the first few jumps, then transition them to hp canopies. And interestingly, there have not been more injuries as a result. I think this is because many new jumpers learn bad habits on Mantas, and these bad habits are difficult to unlearn. At Skydive Chicago, they transition early on, and get good instruction on how to fly the newer hp canopies.
    This is a good model for transitioning ourselves. Whenever you're going to make a significant canopy transition (i.e.smaller, square to elliptical, etc.) get instruction! It costs little to badger a more experienced jumper or instructor into watching you land a few times, and the advice you get can be invaluable later.
    9. 7 cell canopies are dogs.
    Not any more! The Triathlon and the Spectre are both high performance Zp canopies, and are good choices for jumpers buying their first Zp canopy. The big difference between 7 and 9 cell canopies is aspect ratio - which is just the relationship between wingspan and front to back size. 7 cells have ar's around 2.5 to1, and 9 cells are around 3 to 1. Generally, a higher ar has a better glide ratio, but that's about the only hard-and-fast difference. Zp 7-cells can go as fast, land as well, and plane out as far as their 9-cell counterparts, if they are loaded correctly. They are a bit more forgiving at similar loadings, and are thus a really good choice for a first Zp canopy.
    10. It's really hard to pack Zp fabric when it's new.
    Sometimes this is true, but not always. "South African" fabric, such as the material they use in the Triathlon, is pretty easy to pack from day one. It doesn't seem to last quite as long as the more slippery PD material, though.Some canopies, like the Silhouette and the Turbo-z, mix F111 and Zp material to make a canopy that flies well and is still easy to pack.
    But even a brand new Sabre is manageable, if you work at it.The psycho-pack is a good way to control an unruly canopy, and there's at least one gadget out on the market that helps you pack slippery canopies.
    Copyright ©1997 Billvon Novak, Safety and Training Advisor

    By admin, in Gear,

    Top 5 RSL myths

    I keep seeing the same arguments made against RSL's, over and over. Many of them are just myths, word-of-mouth anecdotal stories passed down for so long that their original meaning has gotten lost. I figured I would list them here:
    1. You should get stable before you open your reserve, and so you should disconnect your RSL.
    First off, you should _not_ be stable face-to-earth when you open your reserve. The Racer manual spells this out explicitly - you should be head-high if possible to ensure a cleaner reserve deployment. Fortunately, you are head high the instant you cut away from your main, and that is the point at which an RSL will open your reserve.
    Secondly, there are two universal truths in skydiving - you won't do it if you don't practice it, and you _will_ do what you trained to do. If you practice "cutting away and getting stable" you _will_ do that in the air, even if you someday cut away at 500 feet. If you do that, the only thing that will save your life will be your RSL.
    Finally, before you decide that it's a good idea to cut away and then get stable, I'd recommend you do an intentional cutaway from a rapidly spinning canopy and see how long it takes. (Hint - it does not take just a second or two.)
    2. You only need an RSL if you're going to forget to pull your reserve.
    Rick Horn, one of the three people in the US who trains all AFF-JM's, once needed his RSL due to rig distortion. He could not find his reserve handle. If you are more current at cutaways than a man who teaches them every month, and have more jumps than him (6000?) that might be a valid point, but I think few people are.
    3. If you cut away on the ground on a windy day and you have an RSL, your reserve will inflate.
    Simply not true. Try it next time you need a repack - go outside in the wind and pull your reserve handle. The PC will come out, the freebag may fall on the ground - and that's it. Unless you have decided to jump in a hurricane, even 25kts of wind (way more than most people will jump in) won't inflate a reserve.
    Of course, you can disconnect your RSL once under canopy to prevent the reserve from opening at all if you have to cut away on the ground. That's a convenience issue, not a safety one.
    4. You can practice cutting away on the ground, so how hard can it be?
    RSL's are not for normal cutaways. They are for madly spinning mals where you can barely see one of your handles. They are for mals while wearing a wingsuit, where you have fabric flying in your face and you can barely see. They are for cutaways at 600 feet when someone sets up a hook right into your canopy and destroys it. These are the situations where RSL's save lives.
    If you will never be in such a situation, great. But I have discovered that those situations find you, rather than the other way around.
    5. You have to "fall away" from your main to guarantee you won't entangle with it.
    Simply untrue. I've watched an awful lot of rig testing, and the physics just doesn't let that happen. Even in a malfunctioning canopy, the forces work to separate the main and the jumper/reserve.
    And if you postulate a bizarre scenario where the reserve PC can somehow entangle with the main? The reserve will simply open faster.
    All that being said, there are still reasons not to use an RSL. We disconnected all our tandem RSL's a while back because there had been some problems with broken risers, and that's a risk when you use a one-sided RSL. If you're doing something bizarre (like jumping a 46 sq ft canopy and opening at 5000 feet) an RSL will probably not help you much, and if you're doing intentional cutaways or CRW, it makes sense to simplify your gear and be able to fall away from something before you open your reserve. But for a lot of people it makes sense.
    Personally, I recommend everyone use one until they get to 200 jumps and/or have their first cutaway from a spinner. At that point they will have the experience to make a good judgement on their own.
    -bill von

    By admin, in Gear,

    Toggles Matter

    It is often the little things in our skydiving day that change the way things go. Paying attention to the details can make all the difference when it comes to preventing malfunctions, and when we get lazy, tired or complacent, our attention gets fuzzy and unfocused. That is when we make mistakes that we regret. One area that often results in malfunctions is errors in stowing our toggles, and there are quite a few ways in which we can perform this seemingly simple act incorrectly, only some of which will be discussed in this article.
    The most obvious aspect of this necessary part of packing that we can mess up is the depth of the toggle in the keeper. If we do not push the toggle sufficiently into its fabric keeper, the toggle will eventually unstow during deployment.

    Premature brakes releases result in countless cutaways each year. Each time we chop, we risk losing our main canopy and our freebag; a very expensive mistake.
    Another facet of stowing our toggles that can result in a premature “brake-fire” is insufficient tension on the portion of the brake line that leads to the canopy.
    This slack can allow a sharp tug of the brake line near the toggle, causing it to pop out of the keeper, and even snap the line itself. A healthy practice when setting your brakes is to pull upward on the brake line above the toggle, ensuring that everything is loaded against the toggle properly.
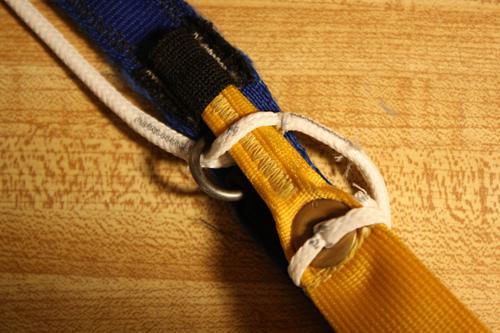
    Yet another common error when stowing the steering toggles is to pass the toggle through the brake line above the guide ring.
    This will almost always result in a premature brake release. It will also usually result in damage to the fabric toggle keeper, as the load on the brake line will go directly to the keeper rather than to the guide ring. I see this one quite a lot, and the jumper is always blown away when I point it out while they are packing. Better a moment of embarrassment on the ground than a premature brake fire in the sky.
    On that note, if you experience a premature brake release, or snap a brake line during deployment, your canopy will turn. On many parachutes, this turn can be quite fast, and it is likely to increase in both airspeed and rate of rotation. This means that time is of the essence when dealing with this kind of malfunction. This, however, does not mean that the correct response is to claw for the stowed toggle like a crazed monkey. Yes, you do need to unstow the remaining toggle, but having this singular goal in mind has resulted in many cutaways, AAD fires and even some fatalities. When you open up in a spin, your first job is to try to stop the spin, while remaining aware of your altitude. If you apply opposite harness input or simply pull the rear riser on the side of the canopy that has experienced the toggle release or broken line, you will slow the situation down. By holding a heading, you will be losing much less altitude, and will afford yourself the time and brain power to properly execute whatever procedure is next.
    Also key to your safety is the condition of your equipment. For instance, if the toggle keeper has become loose due to wearing over time, even sufficiently stowed toggles will unstow prematurely. Since we stow the toggle in the same way every time, the toggle eventually becomes deformed, narrower at the load point, which can cause the toggle to jam when you try to release it.
    Also contributing to this possibility is the inevitable shrinkage of the “cat’s-eye” hole in the brake line on spectra lined canopies. This is caused by heating of the line due to friction as you unstow your toggles. The melting point of spectra is 297 F and the material’s response to heat is shrinkage, unlike George Castanza. Most cat’s eyes begin at about 25 millimeters on new canopies, and by 3 or 400 jumps, it reduces to a 19 or 18 millimeter passage. When combined with a narrow point in the toggle, a brake-lock malfunction is quite likely. This problem can easily be avoided through regular replacement of the mid and lower brake lines, and pinching of the toggle with plyers to create a uniform width.
    When the tip of the toggle fails to extract from the cat’s-eye, it is possible that the jumper unstowed the toggles in a gentle, slow motion, allowing the friction to hold the toggle in place inside the brake line. This phenomenon can often be avoided by making it a habit to always unstow the toggles with a sharp, snapping motion. This method has served me well for many years, and has totally eliminated the “stuck toggle” malfunction for me.
    On the topic of toggles that do not want to release, we have another malfunction that shows up from time to time. There are many things you can do with your excess brake line, depending on your particular riser design and your personal preferences. Some skydivers choose to pass the excess line through keepers on the opposite side of the riser. This is perfectly acceptable. If, however, the free end of the brake line is passed down through the keepers and then around the bottom of the toggle, a complete failure to release is possible.
    This occurs when the upward relative wind blows the brake line up over the toggle during opening.
    The jumper then can grab the toggles below this loop of line and unstow, causing an irreparable knot around the keeper loop on the opposite side of the riser.
    Another way that jumpers sometimes cause a toggle-lock is by passing the excess brake line through the soft links, and then securing the end of the loop through the tip of the toggle. Although this method has proven to be perfectly safe, and may make it easier to pull the slider down after opening, a serious danger exists. If the soft links are not sewn in place with tack-cord, the loop of brake line can get caught on the tab or ring on the soft link, causing a locked toggle malfunction.
    It is true that a toggle-lock does not need to result in a cutaway. If the jumper cuts the brake line with a hook knife, the parachute will fly straight. Nevertheless, this fix requires the canopy pilot to land with a rear riser flare, something that many are not prepared to do. If you have never performed this maneuver in premeditated circumstances, you are not likely to perform the task well in an emergency. As I often say, there is no such thing as an emergency if you have practiced the solutions; it is just a change of plans.
    The last toggle-related problem that I will discuss is failure to stow the excess brake line at all. It is true that many jumpers have been leaving “free range” brake line for many years without incident. In most cases, these are jumpers with small canopies who have very little excess brake line to deal with due to the size of their parachutes. Regardless, it is my experience that it is just a matter of time before this free line snags on something. It might be your GoPro. It might be someone else’s GoPro. It might be the door of the airplane or something even worse that I can’t even think of. The bottom line is, the procedure of stowing your excess line costs you only a few seconds, but it can save your life. Deal with it, please.
    It is the smallest of details that usually result in the worst and best experiences on the dropzone. Skydiving is a sport of tiny issues that add up to big consequences, and if we continue to enjoy the process of paying attention to these little particulars, we can continue to enjoy the sport for a very long time. If we flippantly skip off the tops of the waves so-to-speak, and pretend that the danger does not exist, this sport will prove us wrong in the most painful and terrifying ways. We are always at risk when we skydive, but fear is not what keeps us safe. It is attention to the details, and the positive emotions that come as a result of knowing that we are doing everything we can think of to stay alive. If we are happy, we are more skillful, and skill definitely increases the chances of a happy landing.
    About the Author: Brian Germain is a parachute designer, author, teacher, radio personality, keynote speaker with over 15,000 jumps, and has been an active skydiver for 30 years. He is the creator of the famed instructional video "No Sweat: Parachute Packing Made Easy", as well as the critically acclaimed book The Parachute and its Pilot. You can get more of Brian’s teaching at Adventure Wisdom, Big Air Sportz, Transcending Fear, and on his vast YouTube Channel

    By admin, in Gear,

    Todd Shoebotham Talks Pilot Chutes

    Todd Shoebotham, Owner and President of Apex BASE, Helps Jumpers Get the Details Right
    Note: This article discusses pilot chutes in a BASE environment and should not be used in relation to skydiving.
    Ah, the pilot chute.
    Our beloved little workhorse, it’s the first thing we take out and the last thing we put in. It gets dragged around. It gets abused. For all the obsessive fawning we do over our canopies, our pilot chutes get surprisingly little love.
    If you’re looking to change that--and learn a little more about the sizes and styles of pilot chutes that you should invite on your BASE jumping adventures--then you’ve come to the right place. We pinned down the inimitable Todd Shoebotham and picked his brain about it in order to share his infinite wisdom with our beloved public. We’re pretty sure you’re going to learn a few things, so lean in and listen!
    1. Keep your fingers out of harm’s way.
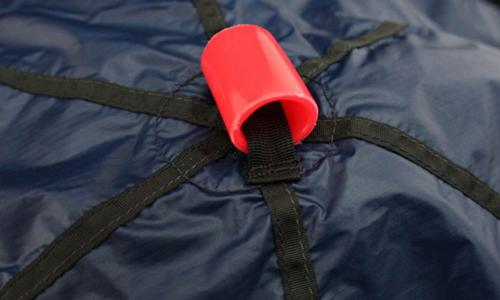
    Does your pilot chute have a tube handle? According to Todd, the data suggests that fingers have an uncanny tendency to make their way into that little tunnel at pull time, which can make for some seriously awkward Chinese-finger-trap deployments. “A few people have reported reaching back and going up to the knuckle into the PVC,” Todd says. “Or getting their fingers underneath the handle. When you’re reaching back, that’s certainly not what you want.”
    This problem can be solved in multiple ways. If you do have a PVC-style handle with a potential finger trap, Todd recommends taping over the ends in order to eliminate this possibility. Apex pilot chutes forego the tube for handles that wrap rubberized, textured fabric around a solid foam cylinder.
    “Compared to the old-style PVC handle, this is much lighter, too,” Todd explains, “And that lightness helps the pilot chute get orientated properly.”

    2. Travel with a well-curated collection.
    Since pilot chutes are available in everything from little 32-inch versions to behemoth 52-inchers, it can be challenging to determine what you really need to carry in your gear bag as a traveling jumper. Todd suggests that carrying a quiver of three to four will reliably cover your bases.
    “On the smaller end, we typically set people up with 36-inch pilot chutes,” he explains, “But we still stock the 32s. The 32-inch PC is probably the least-popular one in our range, because we believe they only belong on the lightest parachutes.”
    “We used to see 36s on wingsuit-specific rigs,” Todd adds, “But we’ve been seeing a lot of people with wingsuits favor bigger PCs because of their lower airspeed at deployment.”
    From there, Todd suggests having a 42--”the workhorse in the middle”--which covers your standard Potato Bridge jumping, and a 46- or 48-incher, depending on the size of your canopy, for objects more along the lines of a low cliff or structure.
    If you have a little more room in your luggage and you’re looking to jump a lot of subterminal objects, Todd suggests a 38-inch pilot chute. “Most people aren’t going to be using a 36 or a 38 handheld,” he says. “If you’re in that 5-to-6 second range, it’s a nice pilot chute to have, the 38. It is a slightly different pilot chute. It is not as strong of a pull, but you still have plenty of room there. I might not use it on all 400-foot objects, but definitely on some of them, and it is a little nicer flying with a slightly smaller pilot chute.”
    3. Make adjustments to compensate for your choices.
    According to Todd, there are mistakes to be made here in both directions. On one hand, unnecessarily oversizing is an easy mistake to make. While it’s not necessarily dangerous, it can negatively affect your jump if you don’t keep your delay relative to your PC choice (and create unnecessary distortion to the canopy during extraction, to boot).
    “If you don’t have the appropriate pilot chute for your jump and you don’t adjust your delay accordingly,” Todd says, “You might not like the results. If you were going to extremes in exposing a big pilot chute to a lot of airspeed, you would be stressing out parts of the canopy and your body. For instance: if you should really be using a 42 but you have a 46, you’d better go a little short on this one and enjoy the view from under canopy a little longer rather than taking your normal delay for that jump. I know you don’t want to, but that’s the pilot chute you’ve got.”
    “Also keep in mind,” he continues, “That we have seen peculiar behavior when some large pilot chutes are jumped slider-up. You can get some pretty weird interaction if you do that; the slider just seems more reluctant to come down. Personally, I think it has to do with the distortion that the canopy went through during line stretch; at any rate, we do not recommend it.”
    Take object familiarity into consideration.
    Since larger pilot chutes generally provide snappier openings, Todd asserts that object familiarity is a major factor to consider when choosing a pilot chute.
    “If it is your local object and you’ve really got things dialed in, I can see downsizing,” Todd says. “But if you’re a visiting jumper, you’re going to probably need to treat it a little differently. For example: If all the locals are using a 46, I’ll probably be using a 48 to stack the cards in my favor. If I make enough jumps there to become comfortable with the surroundings, I can see transitioning down to the 46.”
    “At the end of the day,” he insists, “You have to remember: In BASE jumping, really small changes in performance do matter. Make sure you’re prepared.”

    By admin, in Gear,

    The Vampire V-1 by Phoenix-Fly

    The result of 6 continuous years of research and development, Phoenix-Fly proudly introduces the Vampire V-1 wingsuit.
    The PF Vampire V-1 wingsuit features:
    A revolutionary CAD-designed 3D arm wing
    Semi-rigid plastic ribs inside the arm and leg wings
    Newly designed leg wing leading edge
    Advanced leg wing design with increased surface area
    Increased back deflector size
    Integrated arm wing sleeve design
    Redesigned wingtip grips
    Adjustable arm tension swoop cords
    New low-drag materials
    New wing release handles The Vampire V-1 was designed with both skydivers and BASE jumpers in mind. All V-1 features are highly beneficial for both disciplines.
    For skydivers, the V-1 will enable you to fly further, faster, hang out in the clouds longer, with more controllable flocking dives flown in tighter formations.
    For wingsuit BASE jumpers, the V-1 is the ultimate choice, offering the best performance available and permitting longer flights, both in distance and delay.
    The V-1 is not an “off the shelf” product, but rather a tailor-made suit designed to fit exact flyer measurements. Each suit is unique and customized to fit your body, which maximizes comfort and performance.
    Price: 990 Euro or 1,250 USD
    With new revolutionary design, low-drag materials, custom-tailoring and higher performance, many people might wonder how the Vampire V-1 can be priced comparably to other wingsuits. Is this too good to be true? Absolutely not! Because of streamlined option offerings and scaled-down color selection, manufacturing complexity is greatly reduced. In addition, Phoenix-Fly’s overhead and operating costs have been simplified – a savings that is passed directly to our customers.

    The V-1 will be available beginning December 1, 2004 and order forms will be available on www.phoenix-fly.com from November 30.
    Note on lead times: During the initial launch phase of the V-1, Phoenix-Fly will be faced with the challenge of trying to keep up with demand. As observed with the initial launch of the PF Pants and Jackets, lead times may be up to 8-10 weeks, during which we will endeavour to keep you updated on status. Once order volume has stabilized, we’re aiming for a 6-8 week lead time. We ask for your patience during this time and promise that you will be rewarded with an exceptional state-of-the-art wingsuit that far surpasses anything that you’ve ever flown.

    By unclecharlie109, in Gear,

    The Tonfly Camera Converter

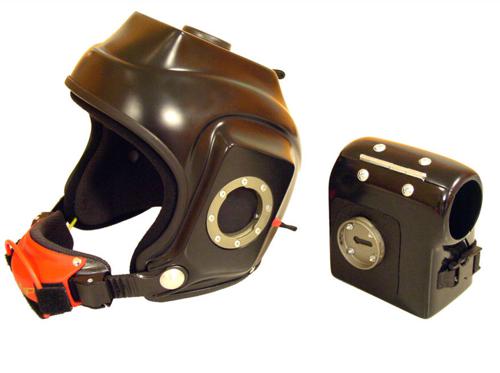
    Action sports camera helmets are more than just protective gear that hold a camera, they're tools of the sports trade and action videographer. Just any old helmet can be used to hold a camera, and many videographers do exactly that. For those that are a bit more serious about their action photography, a helmet designed specifically as a camera mount system is needed. Tonfly is the newest player in the camera helmet manufacturing world.
    Hailing from Slovakia, this small manufacturer may be new, but they've researched the needs of the typical action sports videographer very well and offer a wide lineup of products. The staff at Tonfly are predominantly from Italy, and the design of the helmet is Italian.
    In this review, we'll look at a Tonfly Converter (CC1), which I purchased specifically for the purpose of wingsuiting.
    The Tonfly Converter is brilliant in its design, given how the camera mounts to the helmet, and we'll examine those features in a bit. First we'll dig into the very important features like the fit, design, and safety functions.
    The helmet fits well. It's quite thin, and one of the lightest helmets in its class. It's also very sturdy in spite of the thinness of the helmet. The helmet slips on easily, and is snug all the way around for an average head-type. I have a ponytail, and this helmet doesn't lend itself well to my hair being tied up inside the helmet without the helmet being too tight. People with shorter hair won't have this problem, of course, and Tonfly do offer various sizes.
    The Tonfly Camera Converter helmet is one of the most innovative designs available to action-POV camera operators today.
    Light-weight, strong, form-fitting, and comfortable, this helmet offers the most peripheral eye-space of any helmet in its class.
    Another favored aspect of this helmet that is easily overlooked, is how far back the side of the helmet is cut. The sides of the helmet allow for much greater side-to-side vision than most camera helmets do, and this is particularly an important feature when flying camera for tandems when others may be joining in. Freeflyers will enjoy the wide peripheral view as well. Ski goggles will fit well in this wide-view cut, as the sides of the helmet won't interfere with the larger goggle sizes.
    Built in pockets can hold audible altimeters for the skydiving videographer. The audible pockets come pre-cut for the typical sized audibles. A small bit of gaffers tape will hold the audible altimeter in place until the foam lining is replaced with the audible device in the pocket.
    The Tonfly Converter comes with the audible pocket already cut to fit most popular audibles. (Photo)
    A cutaway system is critical for many action sports, particularly for skydivers. This allows the helmet to be immediately removed/cut free from the body in the event of an accident that involves some sort of entanglement. The Tonfly cutaway system is a bit different than most as it has the cutaway handle facing upwards, which feels very natural and ergonomically placed. Unlike other cutaway systems that use looped nylon to release the latch, the Tonfly system uses a metal button that is drilled out. On initial inspection, this was a concern, but the truth is that the cutaway system works and feels no different from any other cutaway system. The metal containment system may even last longer.
    The Tonfly cutaway system is unique in placement and method, but works identically to any other cutaway system. (Photo 1, Photo 2)
    What makes this helmet truly unique is the way in which the camera mounts are inserted. Entirely flush with the helmet, the receiver side of the mount is installed so that if there is no camera mounted, the helmet can be completely flat (Tonfly provides small inserts that stick out approximately .25, but are smooth and pose no snag hazard). With the camera box mounted to the side of the helmet, the camera box is flush to the helmet and poses no snag hazard. I ran a bit of Spectra line over the edge of the helmet and there was no sticking/locking point of the line due to this very tight connection.
    The mate point for a still camera is identical, however the top of the helmet isn't as wide as a Canon Rebel XTi, so it is possible, although not likely, that a line could snag in the area where the top plate isn't as wide as the camera body.
    Another aspect of the Converter Camera mount is the ability to rotate the camera box in small degrees to compensate for head position when freeflying, doing tandem camera, or RW work. Each of the base ring (male ring) has a series of small holes drilled to fit a pin in the insert link (female receiver side), that is spring-loaded. The spring is very tight, there should be no worry that the pin will release on its own.
    Note the spring-loaded pin in the female/helmet side of the connection, and note the three drilled holes in the male insert. These holes allow for user-positioning of the camcorder or still camera mount. (Photo 1 , Photo 2)
    The pin isn't entirely responsible for holding the base ring. there is a rotational cuff that holds tight when the male ring is inserted in the female receiver plate, and it requires a full 90 degree turn of the male ring to remove the camera box or stills mount from the system, assuring that even in the event of a pin/spring failure, the box or still mount would not separate from the helmet. The pin is released by pulling back on a small nylon loop found at the back of each of the camera mount plates.
    Tonfly has responded to another potential snag point problem with remarkable simplicity. Many camera helmets have a possible snag point in the ladder/clip attachment at the chincup. This leads some videographers to cut the ladder strap short, which is no big deal, other than it sometimes affects the ease of attachment on some helmets. Tonfly have addressed this challenge by opening up the chincup, allowing for any excess from the ladder strap to be concealed inside the chincup.
    Any excess from the ladder strap fits neatly inside the chincup. (Photo)
    The Flaws:
    The helmet isn't entirely perfect and some changes could be made on the part of Tonfly, or perhaps by users themselves. For example, some of the options Tonfly offers could be more readily identified as "important." For instance, most buyers should want the Carbon Look finish or at the very least, ask for a lacquer coat. From the model I received, it became immediately apparent that the finish will scratch quite easily, and all I was doing was mounting a Schumacher removable ringsight bracket. Drilling a hole for the HypEye Mini cable further demonstrated this.
    Mounting the Schumacher articulating arm, I realized just how easy it is to scratch the flat finish. (Photo)
    Another aspect of the helmet that users will want to be mindful of; until the helmet is worn in, a small amount of silicon lubricant will help with the mating of the insert ring to the receiver plate. On my helmet, I found that the pin release loop is a touch small for my large fingers. Using a pencil or pen inserted to the loop helped me get a better grip on it. I'm sure once the spring is more worn in, it won't be quite so difficult.
    Small challenges aside, the Tonfly helmet is very well designed for skydiving and other action sports, offering a width of view and light weight that is very impressive. With prices ranging from around $500.00 USD to as high as $750.00 with all options, these helmets are investments rather than frivolous purchases. Until the dollar rises again, it'll be a while before they're competitive with helmets manufactured in the USA in terms of cost.
    Congratulations to Tonfly for a very well designed, well-built helmet. This is one camera helmet model that any POV sports photographer should consider when choosing a helmet mounted camera system.


    Check out the YouTube stream that shows how the Tonfly Camera Converter works. Built for:
    Skydivers
    Ski photographers
    Kayaking
    Rock Climbing
    Chase bicycles
    Mountain cyclists
    BASE Jumping
    Paragliding
    Ground launching
    Other hands-free sport photographer Rock on!

    -douglas spotted eagle
    For more reviews, video, audio, streaming and surround training visit VASST

    Tonfy CC1 website

    Write your own review of a TonFly helmet

    By admin, in Gear,

    The Slickest Rigs From PIA 2017

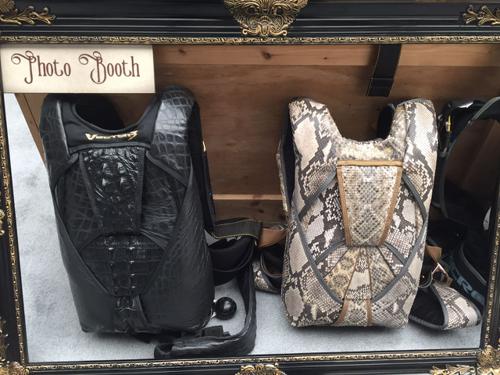
    Each year some of the manufacturers show off some unique and exciting rig designs at PIA, sometimes these rigs are actually able to be put into use, while others are simply demo rigs to show off some really cool design concepts.
    This year saw a couple of really awesome looking rigs, with a transparent rig from Sun Path and an amazing "steam punk" rig from the guys at United Parachute Technologies.
    United Parachute Technologies


    Sun Path


    Which of these rigs would you most like to be flying?

    By admin, in Gear,

    The RSL and Skyhook Debate

    Image by Mike Barta So…you just crushed an 8-way angle jump, stacked tight and flying fast. Damn that feels good. Or maybe it was a Sunday night sunset BFR with all the sky-fam that stuck around till the very end of another awesome weekend at the dropzone. Perfect! Or maybe you’re six jumps into a busy day, flying camera for tandems, and you’ve just finished break-off and are watching that giant tandem wing smack open as you sink away. Whichever it is, if what happens next involves a turbulent mess of canopy flapping and flailing above you, or spinning-you-up violently beneath it, its decision time…and fast.
    But, if you’re anything like me, and find that in that moment your brain is still rapidly processing the various factors in play (as opposed to immediately switching into survival mode and initiating an instinctual, muscle-memory-based set of EPs), it’s possible that one of your first thoughts will be “is my RSL connected”? And, if so, “if I chop this, is my reserve headed directly into this bag of shit as it deploys”?
    I’ve only personally dealt with this scenario twice. The most recent occurred under a rapidly spinning mal while wearing a (small-ish) wingsuit and flying what most would consider an inappropriate canopy for wingsuit skydiving (my bad, I know). And while my canopy choice may have been shameful, I’m not ashamed to say that this experience had my heart rate pounding…but not because of the malfunction. And not even because of the violent spinning and inevitable disorientation. I quickly realized that I hadn’t disconnected my RSL – which I typically do when flying my wingsuit – and was afraid that if I employed my standard emergency procedures my main and my reserve were about to get really friendly with one-another.
    Luckily, that didn’t happen, and I lived to fly another day (under a much safer and more suitable wing I might add). However, since that experience, I’ve spent a lot of time thinking about and discussing the use of RSLs and Skyhooks with jumpers of all ages and disciplines, wherever I fly. And while there is no debate that both RSL and Skyhook technology save invaluable time and altitude in many malfunction situations – and there is ample data available to prove just that – their use remains a polarizing issue, with certain skydiving disciplines disproportionately biased for, or against, the use of these now-standard safety features.
    If you don’t believe me (or perhaps had never given it much thought) take a look around the next time you’re at a big dz and take note of who’s using RSLs and who isn’t…and what type of flying it seems like they’re doing. You may be surprised at what you observe. Or, if you’re even braver, try bringing it up around the campfire or at the bar after a few post-jump beverages. Warning: be prepared for the shit-storm you may have just lit.
    At any rate, to better present both sides of this debate, I asked a few friends to share their views and their own reasoning as to why they choose to use, or shun, RSLs and Skyhooks. What follows is a series of brief quotes and explanations from these conversations.
    Justin Price – Justin is a PD Factory Team member, a Flight 1 instructor, and a world-class canopy pilot who competes at the pinnacle of the sport.
    JP: “I think the Skyhook and RSL are great backup devices for the everyday skydiver. However, if you are jumping a highly loaded canopy (2.8 range or higher) having a skyhook could lead to some unforeseen malfunctions. I don't believe the manufacturers have done any real testing with canopies loaded this much having spinning malfunctions with the Skyhook. I have seen 1 skyhook reserve deployment from a spinning canopy loaded around 3.0 where an entanglement could be present.”

    Image by Mike McGowen Think about the configuration of a skyhook deployment, you have the malfunctioning canopy at the apex attached to the bridle with a free bag, still with the locking stows, on one side of the bridle and the spring loaded pilot chute on the other side. Now as the spinning main is deploying the system there seems to be the possibility of the main spinning violently enough to have the reserve pilot chute wrap underneath the free bag trapping the locking stow from coming out. So until some real testing has been done proving that this is not possible I’m not going to be the first skydiver to have that malfunction while doing hop n pops or if jumping something loaded that high.”
    Sandy Grillet – Sandy is a very prominent sales rep for UPT, who’s also recognized to be among the best belly organizers in the biz. He has decades in the sport and his skydiving resume speaks for itself.
    Sandy: “OK - in the last 5 years I lost two really good friends because they had the same thoughts as you. One of them had a spinner out of control and before he could get cutaway hit another jumper under canopy. He ended up cutting away still high enough to get a reserve but not high enough to reactivate his AAD. He pulled just high enough to go-in at line stretch. We believe the body-to-body collision under canopy dazed him enough to slow his reflexes on both the cutaway and the reserve pull.

    Image by Henrik Csuri The sad thing is that he and I had an hour long conversation about Skyhooks and RSLs 10 days before. The guy he hit was another friend of ours and he is convinced a Skyhook would have saved him. I've lost a lot of friends over the years but that one was tough to wrap my mind around.
    I truly believe that if more people understood the physics behind what happens during normal cutaways without RSLs - cutaways with normal RSLs and then cutaways with Skyhooks - everyone would use them. As you said, it’s personal preference. I would be happy to have another conversation with you to give my perspective of the physics.”
    Scotty Bob – Scotty likely needs very little introduction. His exploits in wingsuit BASE are accessible and heavily viewed online by skydivers, BASE jumpers, and whuffos alike. And his current involvement with wingsuit skydive coaching (both as a load organizer, private coach, and now most recently with Squirrel’s ‘Next Level’ program) has him bouncing from one dz to the next – along with his crew of usual suspects – to help raise the next generation of little birdies right.

    Image by Dan Dupuis Scotty: “They are a great idea, and have definitely added to the safety net, especially for younger jumpers. That being said, their use should not be mandatory due to the ever changing aspects of our sport. The option to be in direct control of one’s emergency procedures from start to finish should be in the hands of each individual jumper, not a blanket rule.

    I currently do not use an RSL. I want to activate my reserve opening with my reserve handle. Just a personal preference.”
    Anthony TJ Landgren – TJ is an all-around badass. There is very little at which he doesn’t excel in the worlds of canopy sport and body-flight. He’s an OG swooper, a wingsuit ninja, an elite tunnel coach, and now a highly sought-after XRW guru.
    TJ: “Over the years a lot of people asked me would I, or have I ever, jumped with an RSL? My answer is yes I have jumped an RSL, but only for 1000 jumps or so. I had an RSL back when I jumped a Sabre. I was told that RSLs are great when you are new in the sport and as an extra safety precaution.
    Once I started jumping a Stiletto, I was told they can cause more harm than good. Stilettos were the first fully elliptical canopy and they were awesome. The only problem was that if you got line twist it was a bitch to get out of them because the canopy will dive and pick up more speed. I had a really low chop when I had 2000 jumps on a stiletto 135, I was spinning hard once I cut away I needed to get away from the canopy and open my reserve. I was so happy not to have an RSL because two weeks prior to that my friend Cris cut away a stiletto 150 with an RSL and he had 4 line twist on his reserve and barely time to get out of his reserve line twist before hitting the ground. That's when I knew I would never use an RSL ever again.

    Image by Raymond Adams I believe in pulling a bit higher so that I have more time to deal with a malfunctioning parachute. I feel RSLs and Skyhooks give people false security in pulling low, which I try to avoid. I was told that when dealing with a malfunction: check your altitude, deal with the situation, and always have hard deck that you know you can't fix this malfunctioning parachute and it's time to get rid of it.
    I have 16 cutaways in over 26,000 jumps and 1 was an RSL save (not by choice).
    I Believe people that have over 1000 jumps or jump a high performance canopy should really think about whether an RSL is going to help, or if it will only make things worse. I hope this help you to make an educated decision about RSLs and Skyhooks.”
    Will McCarthy – Will is the closest thing here to an “average” skydiver. Although, having grown up on a dz, and grown into the DZO of my favorite dropzone in Canada (Skydive Gananoque), he’s been around the sport long enough to know and have seen a thing or two. Most days, Will is hucking drogues and/or flying camera, but he’s done it all over the years – from AFFI, to belly big-ways, to wingsuit, to CRW and swooping.
    Will: “As a DZO and our S&TA;, my reply is always, it depends. For people learning to skydive, including tandem students, I think they're a great legal out, as in "we use every piece of safety equipment available". And if you're going to use an RSL, spend the extra money and get a MARD/Skyhook. For experienced skydivers, I personally feel that the use of an RSL or MARD/Skyhook system unintentionally promotes complacency.

    Image by Justin Dempsey The number of times I've personally seen an incorrectly routed/assembled RSL leads me to believe that the complacency is getting worse. People are afraid of doing anything to their gear, (assembly or even packing it, in a lot of cases) and a blind faith in the technology increases the risk that when something outside a "normal" malfunction occurs, it won't be handled correctly.
    I don't use one unless I'm jumping a tandem rig. But we also don't allow them to be used on paid camera slots or CRW jumps, either.”
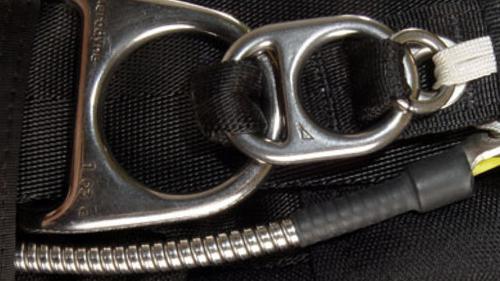
    My final thoughts on this reflect much of what was said above. Both of my rigs have an RSL because I like to have the option of using it for specific types of jumping. While I hate to admit it, there are certain jumps where I know that I’m going to be pulling lower than usual – flying my tracking suit solo on a hop-and-pop is one such example. And in situations like that, where I’m under a Sabre 150 and feel pretty confident that it’s not gonna spin-up-on-me or toss-me-around violently, I like the comfort of knowing that if I do have to chop, my RSL will likely save me some valuable altitude. However, when I slap on the big wingsuit, I feel far less comfortable having the RSL connected. In that instance, I make sure to disconnect it and secure it (safely and correctly) to the cable housing. Also, as TJ similarly pointed out, I’ll be deliberately pulling higher on big wingsuit flights so that I have ample altitude to deal with, and separate myself from, any malfunctions that might arise.
    Hopefully reading this will have given you cause to consider where you’re at in your own jumping – taking into account an honest self-assessment of your level of skills and experience – but also your specific discipline(s) of choice and, thus, what makes the most sense for you. To borrow a mantra from wingsuit BASE, a safe-bet for many styles of jumping is fly fast and pull high. If you can abide by those two tenets, regardless of your choice as to whether or not to use an RSL, you’ll be all-the-better for it.
    Stay safe folks.

    By admin, in Gear,

0