0

Gear

    10 Things To Note Regarding Malfunctions

    Image by Juan MayerWhen are you going to be alone in the sky with a useless bag of laundry and two little handles?
    If it hasn’t happened yet, it’s going to. Sure, there are skydivers with thousands of jumps who have never had to make alternate nylon plans. But don’t be fooled: your first reserve ride is not a question of “if.” It’s a question of “when.” If you don’t feel ready, you’re not alone. Here are ten proven ways to boost your confidence and safety.
    1.Stay current
    Long lapses between jumps are dangerous. Time on the ground dulls skills, sharpens apprehensions and weighs down your jump with the clammy fog of unfamiliarity. Most importantly, it unravels the easy muscle memory you’ve spent so much time and effort to develop -- and muscle memory is of primary importance in the event of a reserve ride. Especially at the beginning of your skydiving career, you’ve got to make the effort to jump at least every couple of weeks.
    2. Give ‘er a spin
    Do yourself a favor and deploy your reserve for every repack. You’ll learn the unique direction of pull for your gear, and you’ll be able to feel out the force you’ll need to exert. If your rigger watches the process, he/she can keep an eye on the deployment and identify potential problems. (Even if you have deployed your own reserve, a repack is an unwasteable drill opportunity for a refresher.)
    3. Just touch your stupid handles, Mr. Bigshot, OK? Sheesh
    Touch your handles in sequence before you enter the plane. It is not beneath you. Being blasé about basic safety doesn’t make you more awesome -- it just makes you more blasé. While you’re at it, check that your reserve handle is seated (so you don’t end up on a reserve ride without the yeehaw fun of a malfunctioning main).
    4. Don’t overthink it
    It’s simple, really. If you believe that your main is unlandable, you’re going to have a reserve ride. Sure -- lots of skydivers have landed under reserves only to realize in hindsight that they could have solved the problem. However, lots of skydivers have gone in while striving to sort out malfunctions that did not improve. If those are the choices, which would you rather be?
    5. Get your priorities straight
    Do not worry about stability. This is the very least of your problems. Worry about altitude. cutaway) handle no lower than 1,000 feet. Initiating a reserve ride below 1,000 feet isn’t always deadly, but it has an unnerving tendency to be. Don’t take the chance.
    6. Hold on tight
    After you pull your handles out completely, hold on to ‘em. You’ll save some money, and you’ll save face when you land.
    7. Make sure it’s out
    This is kinda your last shot at nylon, so you’ll want to be sure it’s working. Arch and look over your shoulder for the reserve pilot chute. Reserves deploy fast, so this head position is gonna butter your bread – but if the pilot chute is somehow caught in your burble, this should either shake it loose or make it clear to you that you need to do some burble intervention, stat.
    8. Don’t chase after your ex(-parachute)
    I’m going to go out on a limb here and tell you not try to run after it and grab it in the air. (People have, y’know, died doing that.) You broke up with each other for a reason, after all; you can reconcile after everybody’s had a little time to cool down. Instead, get your head together and use landmarks to identify where the gear is headed. Then take a deep breath, leave it to the fates, and work on navigating your meat to a safe landing.
    9. Tell the peanut gallery to sit and spin
    When you land a reserve, you’re going to be the talk of the DZ (for about five minutes, usually). During that five minutes – longer, if the loads are turning slowly – you’ll probably be approached by a receiving line of would-be mentors. They’re gonna question your malfunction, and they’re gonna be eager to discuss your decision to cut away.
    My advice: speak to your trusted mentors and co-jumpers about your little adventure in private, and tell the rest to go suck an egg. You were there. They were not. When you need to save your life in the sky, you are absolutely alone. In the entire world, there exists only you and two handles. Your cutaway is your business.
    10. Go to the liquor store
    Buy a bottle of posh booze for the rigger who packed the reserve you rode. It’s tradition.

    By admin, in Gear,

    Voyages of a Skydiver

    Captain’s Log 2010, 0210, Manifest asks for proof of currency and jump numbers, along with the reserve data card from my rig…These are the voyages of Average Skydiver.
    Many of us grew up hearing a similar introduction to Star Trek episodes, as required by Starfleet Command. A captain’s log is nothing more than a logbook chronicling the journeys and adventures of a spaceship, boat, airplane, or other craft that carries persons or cargo.
    Logbooks are the basic standard of proving jump numbers in the world of skydiving. Jump numbers are a basic indicator of skydiving experience. A logbook may also be a means of keeping track of where you’ve been, what you’ve done, and who you did it with. Logbooks may be fun, or they can be boring.
    Skydivers are required to keep a logbook of sorts at the least until an A or other beginning license is achieved that indicates the “student” status has passed. Many dropzones require a written logbook if a visiting jumper wishes to jump. The logbook not only demonstrates the number of jumps, but should indicate skydiver currency as well.
    If the goal is to become an instructor of sorts, logbooks must be kept until 500 or even 1000 jumps, depending on where the skydiver lives. Riggers are required to keep logs of reserves packed, and it’s a good idea to keep a log for any major repairs done to any skydiving equipment for purposes of “present recall." The same can be said for keeping student logs, or at the least, logging information about students you've taught. Something may come up later in their jumping career. Remember your Coach course?
    Logbooks might be as simple as a logging audible that keeps track of jumps and as complex as handwritten journals that contain every last detail about each jump, and everything in between.
    A logbook is a journal of skydiving history. For some, bragging rights related to jump numbers may be enough. For others, recalling who was on a jump, the type of jump, the formations achieved, length of freefall, and much more become part of the bigger picture.
    Every AFF instructor learns how to fill out a logbook with encouraging information and reinforcement of a student jump while providing “code” so that any subsequent instructor has some information about the strengths and weaknesses of the student. Students will generally improve faster if provided specifics in their logbook, and the logbook will serve as a historical record of their first jumps.
    Logbooks also preserve records for those that come after someone has retired or deceased. A most special moment was at the memorial service for Gary Douris, where some of his logs were brought out for the attending public to view. Howls of laughter rang across the courtyard at S’nore as people read log entries saying that “So and so had been grounded” and “XXX couldn’t arch but he deployed OK, so he was ready for a longer delay."
    Samplings of logbooks can be seen here, courtesy of Eike Hohnendahl and myself.
    Some folks have expressed shock and awe at Eike’s logbooks, which are as meticulous as the man himself. Each jump is logged for place, date, exit point, landing point, participants in the jump, any exciting or interesting moments in the jump. Also included are copies of any payment for a jump, type of main used, and any special equipment used. In many cases, photos of the jump are also included. These logbooks take time, time that most are probably not willing to put into logging each jump. The skydiver making 15 jumps in a day likely isn’t able to log with such tremendous detail.


    Some skydivers may wish to only keep jumps logged in an electronic logger as mentioned above, and never enter data into any computer or logbook. This is perfectly fine too.
    CHEATING JUMPS
    A famous logbook entry, referred to as the “P-51” entry, is named for the kind of pen used to fill in the logbook with false/padded jumps.
    Although meant in fun, inflated jump numbers are no joke. Lying in a logbook is predominantly a game of lying to yourself, but may carry over into falsification of records, if the logbook is being used to affirm and prove jump numbers for the purposes of achieving ratings or participation in an event. Ultimately, falsified logbooks impress only yourself and no one else.
    INSTRUCTOR AND SPECIAL JUMPS
    My own method has been to keep a detailed record of every jump using the L&B; Jumptrack software, until I became an instructor. I keep a separate log of students and the type of instructional jump ie; Coach Jump, AFF jump, Wingsuit FFC, Wingsuit Coach, etc. The Instructional Logbook is kept in paper form, and in most instances I ask the student to sign the logbook, simply because I enjoy re-reading the logbooks at later points, and being able to show students “lookie here, remember when you did your AFF Cat D jump with me? That was a fun ride, yeah?”
    CHOOSING A LOGBOOK
    When choosing a logbook, consider how you’d like to log jumps. If you like to write, be sure the logbook has enough space and is comfortable to write in. Do you want to be able to put photos in the logbook? Be sure it’s large enough to hold those photos. If electronic logging is preferred, there are several applications available, including software as simple as Excel or other database software. Software tools like Paralog and Jumptrack interface directly with electronic loggers such as the Neptune, Altitrack, or ProTrack altimeters/audibles. Some logbooks allow for the import of GPS data for tracking jumps, wingsuit flights, or long distance canopy flight. The logging software may display a graph of exit point, speed, deployment, and offer fields to store indexed data such as total freefall time, type of skydive, aircraft used, etc.
    No matter how jumps are logged and chronicled, it’s a good idea to keep a logbook for at least the first 500 or 1000 jumps, if ratings are to be achieved. If nothing else, logbooks can provide great entertainment during the off-season or after a day’s jumping has occurred. They’re a great place to store phone numbers, email addresses, photos of special jumps, and to remember all those “beer” experiences.
    And when you're sitting around on a dark windy day with nothing to do but make up lies (No sh**, there I was) and drink beer with friends, a well-kept logbook will only add to the fun.

    By DSE, in Gear,

    Less Weight, Feels Great

    Tonfly is well known for their camera helmets. Designed in Italy, built in Slovakia, their carbon fiber helmet designs are a bit different than everyone else.

    When Giovanni Suzzi, president of Tonfly, offered up an opportunity to review his newest helmets, I was expecting them in the mail in two separate boxes. When UPS dropped the package at my door, I was certain an error had been made due to the lightness of the single package. I was shocked to find two helmets inside. These helmets weigh almost nothing, but yet are incredibly strong, solid, and as protective as any skydiving helmet I’ve ever worn.
    “The helmets are made from a tighter carbon fiber weave,” says “Sonic” Bayrasli, exclusive distributor for Tonfly in the USA. “This contributes to a marginally higher cost.”
    The 2X and 3X helmets are definitely a unique grade of helmet. The exceptional lightweight means less fatigue at the end of a long day of skydiving. This also allows for a thicker padding inside, thus quieting the helmet more than any helmet of the same class.
    Both helmets sport an audible pocket over the right ear, made specifically for the L&B; Optima, Solo II, or Protrack devices. This unique pocket allows for external access without crowding the wearer’s head. There is also room for a second audible over the left ear, perfect in size for a Flysight (wingsuiter’s tool) or other standard size audible.
    The ladder-strap chin cup provides for a secure mount. However, I discovered that if the chin cup isn’t reasonably centered in the ladder straps/on the chin, the release catches can easily be knocked loose. Equal tension on both sides of the chincup is fairly important for the most secure fit. As with earlier models of the Tonfly helmets, the 2X and 3X helmets use a carbon fiber chincup covered with a vanity cup emblazoned with the Tonfly logo. This vanity cup is available in many colors to match any custom color scheme a buyer might come up with.
    Speaking of custom… Tonfly offers the 2X and 3X in all sorts of custom colors with logos put in place as designed by a buyer. I asked for some unique logos and color combinations and Tonfly was more than obliging.
    Both helmets are designed for mounting a single camera on top. Neither helmet is designed as a helmet for both video and stills; these are made to be as light as possible. A Zkulls mounting ring is provided on both helmets (optional) along with a molded space for the GetHypoxic HypEye camera controller (optional). The 3X also provides a debrief port for the HypEye control/debriefing system (optional). This is very useful for team debriefs, viewing video immediately after a jump where a DV, HDV, or AVCHD camcorder is used and an HDMI cable isn’t available. This also means that the AV connector on the camera won’t need to be disconnected, thus saving wear and tear on the camera connector (a common point of failure).
    Two very unique features set the 3X apart from it’s brother; the air pump system that allows the base of the helmet to conform to the wearer’s head, and a “crown” that allows the user to quickly shift the angle of the camera by as much as 15 degrees forward or back.
    The air pump system is terrific for wearers with long hair; it makes the helmet ‘feel’ like a full face helmet in the way it contains hair. Those with short hair will appreciate the additional quiet that the custom conformation option provides. It takes 4-5 pumps to make the helmet tight against my head, and I have medium-length hair. The small air release nipple next to the pump provides an instant release of air, but in truth, it’s impossible to make the helmet uncomfortably tight, even with the air pumped as tight as the internal bladder allows.
    The slotted mounting plate allows users to change the camera angle, albeit not instantly. This is very useful for wingsuit pilots or freeflyers. Wingsuiters will like the ability to shift a camera forward (angled more downward) which allows for easier capture of a formation in a vertical slot, and freeflyers will like the additional angles for flying close in small groups. Changing the angle of the platform requires a slotted screwdriver and a couple of minutes. It’s very easy. However, the screws are also extremely light weight, so use care when turning them so as to not strip their threads.
    As mentioned before, the adjustable camera platform also provides access to the video debrief port found on the HypEye camera control system. On a personal note, I’ve found this feature invaluable not only because it reduces wear/tear on the camera AV port, but also because it allows for a very fast connection to both television and computer monitors (if equipped with a composite input).

    Wingsuit students use Tonfly Helmets at Skydive Elsinore. Each is equipped with a custom-color L&B; Optima, courtesy of L&B.; Both helmets share the same chincup and ladder characteristics.
    What I don’t like about these helmets:
    The screws that hold the camera platform to the 3X are thin metal and easy to strip. Tonfly could address this by including a couple of extra screws/receivers with each helmet (they’re very difficult to find here in the USA).
    The ladder straps on both the 3X and the 2X don’t hold as well as their older brothers in the CCM/CC1 realm.
    What I do like about these helmets:
    Super comfortable on the head. No pressure points anywhere.
    Extremely lightweight (hence the “X” in their name, perhaps?)
    Very strong. I’ve been knocked in the head by several students, one of them wearing boots sharp enough to chip the paint on the helmet, but I didn’t feel a thing. I was also hit by a newbie wingsuiter hard enough to cost me a battery, lens, and destroyed camera; one can only imagine how much of my skull was protected by this lightweight helmet.
    The fit. I don’t know what Tonfly does exactly, but I appreciate the way this helmet fits. Students often comment on how much they love the fit of the helmet too. Mine is a size 59; it seems to be an average size.
    The camera system on the 3X simply rocks. I love how it works, how it feels when I’m flying, and provides the angle I prefer with wingsuit students.
    Quiet. The 3X is the most quiet helmet I’ve ever jumped. Read more of DSE's writing on his blog.

    By DSE, in Gear,

    How To Show Your Three-Ring System You Care

    Three-ring systems look pretty tough. They’re made of thick, heavy metal, after all – what could possibly go wrong? Bad news: lots.
    The rings are husky little guys, that’s true. However, they depend on the webbing behind them–and the cutaway cables that fasten them in the ready position–in order for them to work. It behooves you to know when and how to maintain the system.
    How Sloppily Maintained 3-Ring Systems Can Cause a Bad Day
    Nylon webbing, the material used to make skydiving (and BASE, for that matter) risers, stiffens over time to conform to the position in which it’s usually stored.
    Sometimes, they “set” so firmly in that position that the risers can’t flex the backing nylon–and can’t detach from the harness when the jumper engages the cutaway system, especially during a low-drag malfunction (such as a streamer).
    This, of course, is a very bad thing.
    The B-Sides
    You’ve probably gotten used to looking at the little snowmen of your three-rings during your preflight gear checks. Great! How often do you look behind them? The loop that connects the cutaway cable to the three-ring system can get dangerously abraded over time. You should peek at it every time you pack.
    The Deep Tracks
    To keep your three-rings in proper working order, the three-rings need to be manually disassembled, the cables checked and the webbing treated to a little massage.
    For skydivers, this is the stuff of riggers. According to Federal Aviation Regulation Part 65-111, skydivers “must be under the supervision of a rigger when performing any maintenance on a parachute system.”
    Don’t let your rigger have all the fun, though. Having a hand in the process has the significant benefit of familiarizing you with the operation of the system and increasing your confidence that it’ll be there when you need it. The best advice is to go through these steps every three months, whether or not you’ve been jumping the rig.
    Check your user’s manual for specific instructions. You can always find this on the manufacturer’s website.
    Pull the cutaway handle. Set the cutaway and connected cables on a clean surface. (Do not pull the reserve handle – unless you need a repack, of course.)

    Inspect the Velcro on the cutaway handle and the seating on the harness. You may need to use a stuff brush to “fluff” the Velcro and clean off any adherence-preventing dirt, especially if you jump at a dusty drop zone.
    Check the ends of each cutaway cable to be sure they haven’t developed any kinks or rough edges.
    Run a microfiber cloth over each cable. While you do, check for smoothness.
    Disassemble the risers.
    Carefully check each riser for signs of wear. Look especially carefully at the white loop that “locks” the cutaway cable to the three-ring system. (You should be checking this loop each time you pack the rig, but this process gives you a better, closer look.)
    Twist and flex the webbing of each riser near the ring system. You can safely be vigorous. You’ll likely feel the problem-causing stiffness as you do this.
    Reassemble the system. Refer to your user’s manual to ensure you’ve done it correctly.
    Before your next jump, have an experienced jumper or a rigger confirm that the system is correctly reassembled.
    Enjoy a little more gear confidence, dear reader. You’ve earned it.

    By nettenette, in Gear,

    The RSL and Skyhook Debate

    Image by Mike Barta So…you just crushed an 8-way angle jump, stacked tight and flying fast. Damn that feels good. Or maybe it was a Sunday night sunset BFR with all the sky-fam that stuck around till the very end of another awesome weekend at the dropzone. Perfect! Or maybe you’re six jumps into a busy day, flying camera for tandems, and you’ve just finished break-off and are watching that giant tandem wing smack open as you sink away. Whichever it is, if what happens next involves a turbulent mess of canopy flapping and flailing above you, or spinning-you-up violently beneath it, its decision time…and fast.
    But, if you’re anything like me, and find that in that moment your brain is still rapidly processing the various factors in play (as opposed to immediately switching into survival mode and initiating an instinctual, muscle-memory-based set of EPs), it’s possible that one of your first thoughts will be “is my RSL connected”? And, if so, “if I chop this, is my reserve headed directly into this bag of shit as it deploys”?
    I’ve only personally dealt with this scenario twice. The most recent occurred under a rapidly spinning mal while wearing a (small-ish) wingsuit and flying what most would consider an inappropriate canopy for wingsuit skydiving (my bad, I know). And while my canopy choice may have been shameful, I’m not ashamed to say that this experience had my heart rate pounding…but not because of the malfunction. And not even because of the violent spinning and inevitable disorientation. I quickly realized that I hadn’t disconnected my RSL – which I typically do when flying my wingsuit – and was afraid that if I employed my standard emergency procedures my main and my reserve were about to get really friendly with one-another.
    Luckily, that didn’t happen, and I lived to fly another day (under a much safer and more suitable wing I might add). However, since that experience, I’ve spent a lot of time thinking about and discussing the use of RSLs and Skyhooks with jumpers of all ages and disciplines, wherever I fly. And while there is no debate that both RSL and Skyhook technology save invaluable time and altitude in many malfunction situations – and there is ample data available to prove just that – their use remains a polarizing issue, with certain skydiving disciplines disproportionately biased for, or against, the use of these now-standard safety features.
    If you don’t believe me (or perhaps had never given it much thought) take a look around the next time you’re at a big dz and take note of who’s using RSLs and who isn’t…and what type of flying it seems like they’re doing. You may be surprised at what you observe. Or, if you’re even braver, try bringing it up around the campfire or at the bar after a few post-jump beverages. Warning: be prepared for the shit-storm you may have just lit.
    At any rate, to better present both sides of this debate, I asked a few friends to share their views and their own reasoning as to why they choose to use, or shun, RSLs and Skyhooks. What follows is a series of brief quotes and explanations from these conversations.
    Justin Price – Justin is a PD Factory Team member, a Flight 1 instructor, and a world-class canopy pilot who competes at the pinnacle of the sport.
    JP: “I think the Skyhook and RSL are great backup devices for the everyday skydiver. However, if you are jumping a highly loaded canopy (2.8 range or higher) having a skyhook could lead to some unforeseen malfunctions. I don't believe the manufacturers have done any real testing with canopies loaded this much having spinning malfunctions with the Skyhook. I have seen 1 skyhook reserve deployment from a spinning canopy loaded around 3.0 where an entanglement could be present.”

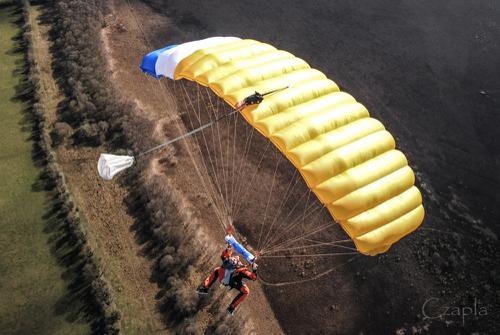
    Image by Mike McGowen Think about the configuration of a skyhook deployment, you have the malfunctioning canopy at the apex attached to the bridle with a free bag, still with the locking stows, on one side of the bridle and the spring loaded pilot chute on the other side. Now as the spinning main is deploying the system there seems to be the possibility of the main spinning violently enough to have the reserve pilot chute wrap underneath the free bag trapping the locking stow from coming out. So until some real testing has been done proving that this is not possible I’m not going to be the first skydiver to have that malfunction while doing hop n pops or if jumping something loaded that high.”
    Sandy Grillet – Sandy is a very prominent sales rep for UPT, who’s also recognized to be among the best belly organizers in the biz. He has decades in the sport and his skydiving resume speaks for itself.
    Sandy: “OK - in the last 5 years I lost two really good friends because they had the same thoughts as you. One of them had a spinner out of control and before he could get cutaway hit another jumper under canopy. He ended up cutting away still high enough to get a reserve but not high enough to reactivate his AAD. He pulled just high enough to go-in at line stretch. We believe the body-to-body collision under canopy dazed him enough to slow his reflexes on both the cutaway and the reserve pull.

    Image by Henrik Csuri The sad thing is that he and I had an hour long conversation about Skyhooks and RSLs 10 days before. The guy he hit was another friend of ours and he is convinced a Skyhook would have saved him. I've lost a lot of friends over the years but that one was tough to wrap my mind around.
    I truly believe that if more people understood the physics behind what happens during normal cutaways without RSLs - cutaways with normal RSLs and then cutaways with Skyhooks - everyone would use them. As you said, it’s personal preference. I would be happy to have another conversation with you to give my perspective of the physics.”
    Scotty Bob – Scotty likely needs very little introduction. His exploits in wingsuit BASE are accessible and heavily viewed online by skydivers, BASE jumpers, and whuffos alike. And his current involvement with wingsuit skydive coaching (both as a load organizer, private coach, and now most recently with Squirrel’s ‘Next Level’ program) has him bouncing from one dz to the next – along with his crew of usual suspects – to help raise the next generation of little birdies right.

    Image by Dan Dupuis Scotty: “They are a great idea, and have definitely added to the safety net, especially for younger jumpers. That being said, their use should not be mandatory due to the ever changing aspects of our sport. The option to be in direct control of one’s emergency procedures from start to finish should be in the hands of each individual jumper, not a blanket rule.

    I currently do not use an RSL. I want to activate my reserve opening with my reserve handle. Just a personal preference.”
    Anthony TJ Landgren – TJ is an all-around badass. There is very little at which he doesn’t excel in the worlds of canopy sport and body-flight. He’s an OG swooper, a wingsuit ninja, an elite tunnel coach, and now a highly sought-after XRW guru.
    TJ: “Over the years a lot of people asked me would I, or have I ever, jumped with an RSL? My answer is yes I have jumped an RSL, but only for 1000 jumps or so. I had an RSL back when I jumped a Sabre. I was told that RSLs are great when you are new in the sport and as an extra safety precaution.
    Once I started jumping a Stiletto, I was told they can cause more harm than good. Stilettos were the first fully elliptical canopy and they were awesome. The only problem was that if you got line twist it was a bitch to get out of them because the canopy will dive and pick up more speed. I had a really low chop when I had 2000 jumps on a stiletto 135, I was spinning hard once I cut away I needed to get away from the canopy and open my reserve. I was so happy not to have an RSL because two weeks prior to that my friend Cris cut away a stiletto 150 with an RSL and he had 4 line twist on his reserve and barely time to get out of his reserve line twist before hitting the ground. That's when I knew I would never use an RSL ever again.

    Image by Raymond Adams I believe in pulling a bit higher so that I have more time to deal with a malfunctioning parachute. I feel RSLs and Skyhooks give people false security in pulling low, which I try to avoid. I was told that when dealing with a malfunction: check your altitude, deal with the situation, and always have hard deck that you know you can't fix this malfunctioning parachute and it's time to get rid of it.
    I have 16 cutaways in over 26,000 jumps and 1 was an RSL save (not by choice).
    I Believe people that have over 1000 jumps or jump a high performance canopy should really think about whether an RSL is going to help, or if it will only make things worse. I hope this help you to make an educated decision about RSLs and Skyhooks.”
    Will McCarthy – Will is the closest thing here to an “average” skydiver. Although, having grown up on a dz, and grown into the DZO of my favorite dropzone in Canada (Skydive Gananoque), he’s been around the sport long enough to know and have seen a thing or two. Most days, Will is hucking drogues and/or flying camera, but he’s done it all over the years – from AFFI, to belly big-ways, to wingsuit, to CRW and swooping.
    Will: “As a DZO and our S&TA;, my reply is always, it depends. For people learning to skydive, including tandem students, I think they're a great legal out, as in "we use every piece of safety equipment available". And if you're going to use an RSL, spend the extra money and get a MARD/Skyhook. For experienced skydivers, I personally feel that the use of an RSL or MARD/Skyhook system unintentionally promotes complacency.

    Image by Justin Dempsey The number of times I've personally seen an incorrectly routed/assembled RSL leads me to believe that the complacency is getting worse. People are afraid of doing anything to their gear, (assembly or even packing it, in a lot of cases) and a blind faith in the technology increases the risk that when something outside a "normal" malfunction occurs, it won't be handled correctly.
    I don't use one unless I'm jumping a tandem rig. But we also don't allow them to be used on paid camera slots or CRW jumps, either.”
    My final thoughts on this reflect much of what was said above. Both of my rigs have an RSL because I like to have the option of using it for specific types of jumping. While I hate to admit it, there are certain jumps where I know that I’m going to be pulling lower than usual – flying my tracking suit solo on a hop-and-pop is one such example. And in situations like that, where I’m under a Sabre 150 and feel pretty confident that it’s not gonna spin-up-on-me or toss-me-around violently, I like the comfort of knowing that if I do have to chop, my RSL will likely save me some valuable altitude. However, when I slap on the big wingsuit, I feel far less comfortable having the RSL connected. In that instance, I make sure to disconnect it and secure it (safely and correctly) to the cable housing. Also, as TJ similarly pointed out, I’ll be deliberately pulling higher on big wingsuit flights so that I have ample altitude to deal with, and separate myself from, any malfunctions that might arise.
    Hopefully reading this will have given you cause to consider where you’re at in your own jumping – taking into account an honest self-assessment of your level of skills and experience – but also your specific discipline(s) of choice and, thus, what makes the most sense for you. To borrow a mantra from wingsuit BASE, a safe-bet for many styles of jumping is fly fast and pull high. If you can abide by those two tenets, regardless of your choice as to whether or not to use an RSL, you’ll be all-the-better for it.
    Stay safe folks.

    By admin, in Gear,

    6 Ways to Be Less Dumb When You Buy Used Skydiving Gear

    Image by Lukasz SzymanskiPaul Iglin has been brokering used skydiving gear for more than a decade. He’s seen it all.
    He has definitely seen your kind before, and wants you to know a few things about the buying process, so you don’t make the same mistakes he’s seen over – and over – and over. I asked him what people need to know about buying used skydiving gear when they begin the process, and he had plenty of sage advice to share. Here’s what he has to say about it.
    1. Curb your enthusiasm.
    “Your job as a buyer is to get the right gear at the right time and at the right point in your skydiving career. It’s not as easy as it sounds.
    Every once in a while I have had people contact me who have not actually started skydiving yet. It is very rare, but it happens. They are clueless – and they are dangerous to themselves from a financial standpoint, because they have no idea what they’re buying. I tell them to go to somebody else; I won’t sell them gear. Before you start shopping for gear, you need to know what you are shopping for. So, if you don’t: Stop right there.
    Good shape, good brand, good used gear at the right price: Make no mistake; that’s hard to find. In skydiving gear, the supply-and-demand curve is really messed up. There’s very little supply and very high demand.
    It’s also seasonal. Come March and April, everybody rushes to find gear, and then demand stays strong all the way through end of the season around September. Try to shop outside that time frame if you can.”
    2. Don’t trust your friends.
    “Man, people get their advice from some terrible sources. A lot of the time, they’ll just go to their friends. But when you’re a new jumper, most likely your friends are also newer jumpers who basically don’t know jack****. Their understanding is very, very narrow; they have blinders on. Like: they bought themselves a brand-new Infinity rig with a brand-new Optimum with a brand-new Sabre 2, and it works for them, so that’s what they tell their friends to get.
    Now, it doesn’t necessarily mean that the gear they’re recommending is the worst. It just means that these people don’t have a statistically relevant sample, so their opinion doesn’t really count for anything. And they always tell whoever’s asking that ‘this is the best,’ as opposed to making the correct statement: ‘This is the one I have, and it works well for me.’”
    3. Do your homework.
    “All of this ties into the fact that people often just don’t do proper research. How do you do proper research? Well, whenever people ask me this question, I tell them this: Look at the gear as tier A, B and C as far as manufacturers, quality and pricing. I’m going to go ahead and throw some manufacturers’ names out there. You have your tier-A manufacturers: your Vectors; your Javelins; your Mirages; your Infinities. All those guys have been around for a long time. There are no questions about quality. They are very reputable. All the options are available.
    Then you have your tier-Bs: Icons, Wings, Perigees, whatever Dolphin became and a whole lot of other brands that are either obscure or very localized to another continent or a particular country. Avoid the latter if you’re a new jumper, because you don’t know what the **** you’re doing.
    You may have somebody try to sell you another brand that’s technically TSO’d, but you’re really going to suffer when you try to resell. You’ll have a hard time finding replacement parts if you are outside of the country of manufacture – and you’re going to get killed on shipping, and support is going to be pretty crappy. Be aware.
    Your can ask any rigger what the tier-C manufacturer is. They’ll tell you.”
    4. Make peace with your pants size.
    “One of the biggest mistakes I see people make is being a over-optimistic about their weight. It happens a lot, because it’s usually people who are just slightly overweight that make the biggest mistakes. For example: a 5’10”, 180-pound person says, ‘I am going to be exiting at 210 pounds, so I should get a 210, But I’m going to work out and lose weight, so I’m going to go with a 190.’
    I immediately tell them not to shop for the future. You shop for right now. If you need a 210 based on your current body weight, for chrissakes get a 210. Because in my experience -- and this is 15 years of skydiving speaking -- it is very unlikely that you will actually get to that goal weight. Sorry. It is possible, sure, but nobody has ever gotten hurt because their canopy was bigger rather than smaller. Don’t be stupid about it.”
    5. Then add to that number. More than you think.
    “The other problem that I see a lot of people early on in their careers -- and a lot of times even as they become experienced skydivers with a couple of hundred jumps -- is that people don’t account for exit weight. People add a couple of pounds and call it a day, and that’s completely wrong.
    You step out of the shower, and that’s your body weight. Then you put on your clothes. You put on your boots. You put on your rig. You put on your helmet and whatever suit you wear and your cameras and whatever else you’re jumping with. Then you step on the scale, and that’s your exit weight. You know all that already.
    Even knowing that, a lot of people don’t bother with the scale and egregiously underestimate what their rig weighs. A lot of people estimate 15 pounds for gear. Seriously?! What the **** are you talking about? You are going to put on 10 pounds just of clothing and boots alone. Then a canopy weighs about eight pounds. Your container weighs 8-12 pounds, depending on the amount of hardware. Your reserve? About six pounds. Your AAD, even, weighs six ounces. Your jumpsuit is going to add another couple of pounds. None of that stuff is magically
    weightless.
    Add 30 pounds for your gear. Maybe more. Don’t underestimate! You’re only hurting yourself.”
    6. Consult the chart.
    “The loading chart that I share with my customers – Brian Germain’s chart -- is the easiest one that I think is out there. I’m not necessarily saying it is the best one; I just think it’s the easiest to grasp. What he says is this: If you have 100 jumps or less, you should load one-to-one or less. For every 100 jumps, increase your wing loading by .1. That means that if you have 300 jumps, there is no reason you shouldn’t be jumping the 1.3 wing loading.
    Of course, you have caveats. People who jump at high-altitude dropzones and people who jump in very windy areas will need to choose different gear than people who jump at sea level, and so on and so forth. If you live in Colorado, you should probably jump a bigger canopy, because the air is thinner. If you jump where it’s really, really windy, you may get away with a slightly smaller canopy because you really do need the speed.
    Also, keep your head.
    “If you get a 170, you weigh 210 pounds and you’re 50 jumps into the sport, you are not doing anybody any favors. You may survive. You may not. But I certainly won’t be the person selling you a 170-square-foot canopy.”
    In general, please: Don’t go into it blind. Ask very experienced people for advice. And if you come to me as a buyer, expect me to tell it like it is. Because I will.”

    By nettenette, in Gear,

    Robert Harris Explains His Homemade Wingsuit Project

    We recently talked with Robert Harris, who took it upon himself to build his own homemade wingsuit. After years of motocross racing, Robert started skydiving five years ago, and since then has attained over 1600 jumps, his D-license as well as AFF and coach ratings. However, what made us want to talk to him, was having seen that he had developed his own DIY wingsuit at home. He talks to us about what inspired him, how he made it and most importantly, how it flew.
    What made you want to develop this DIY wingsuit?
    I have always liked knowing how things are made, when I was a kid I took everything apart to try and figure out how it worked and hopefully put it back together before my parents found out. This didn't stop as I got older, although it changed to learning, so I could make things.
    Shortly after I started wingsuiting I decided I was going to make a wingsuit someday. So last year I asked for a sewing machine for Christmas and didn't get one as no one knew what kind I wanted and I didn't either. I had gotten to use a sewing machine back in middle school home ec class but didn't care about learning sewing, wish they had told me I could make parachutes and wingsuits back then as I would have paid way more attention.
    After talking to my dz's rigger Sally and some other people and decided to get a singer 20u, after over a month of trying to buy one I found one on Craigslist from an old lady that really never used it for 400$. Then I started sewing. First a pillow case, then a miniature version of my Leia that I made into a traction kite, a belly band, canopy continuity bag, and weight belt. After all of those projects I finally decided it was time to start my wingsuit project.
    What experience do you have in aeronautics or aviation product development?
    I don't really have much, but I have started an online class on Aeronautical Engineering to learn more about designing airfoils. I hope to learn to do some equations to determine glide and speed of a given airfoils parameters and hopefully eventually learn CFD(Computational Fluid Dynamics) to push the envelope of what can be done in wingsuits I make later.
    What were your expectations when starting this project?
    I was told by quite a few people that I was crazy for wanting to make a wingsuit or that it was too hard and I didn't have a chance. I didn't really care about the designing process when I first started I just wanted to assemble a suit and fly it. I didn't care if it was the best performing suit I just wanted to say I had done it. Although I think I have caught the bug, now I want to make another one and try some new ideas we haven't seen in the wingsuit world yet.
    Could you explain your creation process to us?
    When I started I picked one of my wingsuits as a starting platform. I took measurements all over the outside of the suit, and decided to change the arm wings completely as I didn't want to outright copy the suit. I simplified some parts trying to make it out as few as pieces as possible. After all the outside pieces were made came the challenging part of making the ribs. I was originally going to make it with back fly vents so tried to make an airfoil shape that would be as good either on back or belly. I drew out where the ribs would be placed and measured how long they would need to be on the top and bottom skins and as far as thickness goes I knew how wide I wanted the thickest one and the thinnest, to figure out the rest I used some math to taper from the biggest to smallest.
    After I started sewing I scraped the backfly vents but left the ribs how they where as after putting the fronts on I didn't want to deal with the headache of the backfly ones as well. I spent a couple days making patterns and writing everything down as I did it to make it easier for possibly making another one. After the patterns were all done and checked for fit against each other I started cutting them all out of some parapac I got from JoAnn's fabric with my new hot-knife my girlfriend got me for my birthday. This part went relatively quickly and only took about a day total. Then came the weekend and jumping time, it was hard to pull myself away from my project but I needed to train for the last swoop meet of the season. As weather got crappy I started the sewing. I figured it would be best to get the hardest part done first the arm wings as if I couldn't get those done there was no point in even making the tail.
    I started with sewing the ribs to front or bottom skin of the suit and quickly learned the sewing the ribs and vents on together was a pain. I did every step on both wings at the same time so I could try and make it as symmetrical as possible and knew they where both put together in the same order. I felt really accomplished when I finished both arm wings and was ready to push through the tail wing quickly before my swoop comp. The tail wing went together pretty easily after making the arm wings and before I knew it I had 3 wings that needed to be put together. After missing a couple of weekdays jumping as I sat busy behind my blue Singer I had finally finished! I was so excited after 23 hours of sewing to go jump it but jumping had already stopped for the day.


    And how did it fly when you took it out?
    I really wanted to get some outside video of its (cough cough) first fight. Go figure, none of the normal wingsuiters where around, I eventually asked my friend Paul who has done only a handful or two of wingsuit jumps if he would try. I gave him an I-bird I use for teaching and rig to borrow so he wouldn't be jumping his velo. We talked about the dirt dive and manifested for a load. As we climbed to altitude all I could think about was my family and girlfriend and how dangerous this could be. I did a lot of practice touches of all my handles and went through my emergency procedures as I always do but did way more of them.
    On the 2 min call we did all the normal handshakes and then I buckled my helmet and zipped up my arm wings. As all the other jumpers were getting off the plane my heart started racing, I used all my yoga experience to get my breathing in check as I walked to the door of the Twin Otter, I could tell Paul was nervous as well. I had him exit before me as I wanted a nice exit shot, as I hopped out from a poised position in the door all I could think was please don't let the suit blow apart! I made sure to keep all my wings shut down on exit and waited to see the tail before I ever so slowly opened my wings.
    I got my wings open and started flying, I was ecstatic at this point as the suit was staying in one piece. I started my first turn shortly after and was surprised at how stable it was. It took a little bit for Paul and I to get together but around 10k we got together shortly after my practice pull to see if there would be any issues and it was the easiest one I have done in awhile. We flew with each other for a bit and then about 7k I wanted to see what I could do with it.
    I started a small dive then went in max flight. I decided I would pull higher then normal as I was still jumping my normal wingsuit canopy a Jfx 84 at 4,500 feet. I came in to land with 90 degree turn for nice little swoop. Shortly after Paul landed close by and celebrated an awesome jump!
    I have never been so excited and nervous on any of my 1600 plus skydives or 4 base jumps yet alone together. After I landed I had to message family and girlfriend to let them know I was ok, they were all pretty scared about me doing it. Since the 1st jump I have only done 1 more on the suit and it was a time run, I got 2 min and 20sconds out of it, which was defiantly shy of the 3-3.5 min I should have gotten out of that size suit. Turns out the fabric I used was my biggest downfall, it didnt have a coating on it like parapac used in other suits so it was constantly bleeding air out and never achieved max pressure.
    What was the biggest challenge in creating your wingsuit?
    The biggest challenge by far was trying to figure out what order everything gets put together in, I spent a couple days alone trying to piece it together in my head to figure it out. Although I had to unpick a few parts because of misalignment I did not have to unpick anything because of the order I put it together in.
    Do you feel that your venture was a success?
    In the end I feel I achieved my goals I set out for the project and learned tons along the way! I look forward to starting my next suit when I return from visiting my girlfriend in London. I already have tons of things I want to try try and do but the major thing will be a fabric that has zero porosity.
    About Robert Harris (D-31584): I grew up racing motocross at a early age and after many years of racing I stopped because I was tired of breaking myself. I still rode and one day on the way from riding I got a call about getting to do a free tandem. Of course I said yes much to my parents dismay, they thought skydiving was too dangerous at the time and realize now its more dangerous then motocross. I had loved motocross for the jumps as I loved the feeling of flying through the air. Skydiving was just that pure flying and as soon as I landed I signed up for Aff. One year after I started I had 200 jumps and started wingsuiting on jump 201. My 2nd year in I had my D-license and got interested in Canopy Piloting as well. Since then I have gotten my coach and Aff ratings and am currently on my 5th year of skydiving and have just over 1600 jumps.

    By admin, in Gear,

    Apache Wingsuit Modifications

    8 February 2013 - Editors Note:

    After this article was published, TonySuit released a Service Bulletin regarding the Rebel and Apache Wingsuit that addresses the concerns raised below. If you use the Apache or Rebel for skydiving, TonySuits offers a free modification that will relocate your harness and emergency handles to the outside of the suit. See the image below. Download the full Service Bulletin.
    Wingsuiting is a new discipline that is ever-changing in terms of equipment, general DZ knowledge, and practices within the discipline. This can lead to a great deal of confusion about what is what, and how the equipment operates.
    One such example is the Apache series wingsuit, manufactured by Tonysuits Inc. This series of wingsuit is advertised as "for BASE jumping"and as the "biggest wingsuit in the world", the manufacturer "observed that placing the parachute harness inside the suit improved performance by reducing drag." This wingsuit places all components of the main lift web (MLW) inside the wingsuit, making the chest strap invisible, and leaving handles inaccessible unless modifications are made to the suit, parachute system/rig, or both.
    The manufacturer’s website also indicates:
    NOTE: This suit is for BASE jumping only. Having the harness inside the suit excludes it from being used for skydiving. Expert wingsuit skydivers could choose to modify the Apache to mount the emergency handles on to the suit itself under the guidance of a qualified rigger but TonySuits does NOT recommend any modifications!
    The process of jumping this system in the skydiving environment requires one of three actions;
    Rig Hidden In The Wingsuit
    The first option is to do nothing and jump the suit as it is with the rig entirely hidden within the wingsuit system as seen in this image below. Handles are entirely covered, and inaccessible without first unzipping the wingsuit. This is a legal means of jumping the wingsuit/rig system. Whether it is an ideal or safe method is determined by a pilot or S&TA.;
    The above method is not addressed in the FARs nor PIA Technical Documents. Various DPRE’s (Designated Parachute Rigger/Examiners) commented "No one at the PIA or FAA level ever anticipated we’d have jumpers covering handles with a jumpsuit; we now need to address this topic."
    Emergency procedures in this system:

    Unzip wingsuit.
    Crossdraw handles (Left hand to cutaway release, right hand to reserve ripcord). The "fully covered handles" method may be the only method not addressed in a FAR or PIA Technical Document, yet this method fails to take into account situations such as:
    Aircraft emergency requiring instant access to a reserve handle
    Missing hackey/handle, requiring a straight-to-reserve deployment
    Pilot Chute in Tow
    Hard pull
    Canopy collision requiring a cutaway
    High ground winds, where a cutaway is necessary
    Adding "Chicken Handles"
    Another method has been to put "chicken handles" on the wingsuit, essentially Rapide links attached to the cutaway release and reserve ripcord system. This changes the angle of cable travel (inducing a double 90 degree bend in the relevant cable) significantly increasing pull force.
    TSO (Technical Standards Order, administered by the FAA) requires that pull force be not greater than 22lbs of pull. In testing, the cutaway release required approx 45lbs of pull force, and the reserve system would not release with 60lbs of pull force applied (this was the limit of the scale used for the pull test.
    The "Chicken Handle" system was discussed with several rig manufacturers, Technical Chairs, former Technical Chairs, Rigging Chairs, and former Rigging Chairs of PIA. All agree this system is a violation of manufacturer TSO as expressed in FAR 65.111, and PIA TS 135 4.3.3 Table 2.

    In order to legally use this deployment system, the system must be tested and certified according to FAA TSO specification as set forth by the PIA. The definition of testing for certification requires:
    "4.3.3 HUMAN FACTORS AND ACTUATION FORCE TESTS:

    An anthropometrically diverse group of individuals (consisting of a representative group of no less than 3 males and 3 females) from the intended user group shall be employed for all human factors tests in 4.3.3. All individuals shall be able to operate the subject device without any undue difficulty. Table 2 lists the required test conditions and number of tests for each particular component. Additional information for the component tests is listed below.
    TESTS: Under normal design operating conditions, all devices tested under this paragraph shall result in a positive and quick operation of the device within the following load range applied to the handle:
    (a) a load applied at the handle of not less than 5 lbf (22.2 N), applied in the direction giving the lowest pull force,
    (b) a load applied at the handle of not more than 22 lbf (97.9 N), applied in the direction of
    normal design operation,
    (c) for chest type parachute assemblies, the maximum pull force shall be 15 lbf (66.7 N),
    (d) the primary actuation device shall be tested in accordance with Table 2,
    (e) the emergency/reserve drogue release (if used) shall be tested in accordance with Table 2."
    Table 2 includes standing, hanging in harness etc.
    The above system was never tested prior to being put into the marketplace. The challenges with this system were discovered in the field, as seen in the video link below.
    Pull tests were performed at various angles and configurations, with a Master Rigger in attendance.
    As of March 2012, the manufacturer has recommended that skydivers immediately discontinue use of this system.
    Moving Handles from the Rig to the Wingsuit
    A third modification requires moving handles from the parachute rig system and relocating them to the wingsuit body via the use of Velcro. The rig is then connected to the wingsuit via ties/cords that are tied above and below the cheststrap/handles of the rig.
    Due to pull forces and the random/chaotic nature of a deployment, this system has suffered multiple two-out scenarios across the country. Multiple dropzones have banned this wingsuit system from being jumped from their aircraft.

    Tony Uragallo of TonySuits has responded to concerns, saying: "I am changing the Apache system to be similar to the Squirrel suit system." Squirrel suits have found a novel way of dealing with these risks by adding zippers that allows the rig to worn inside the suit (for BASE jumping) as well as outside the suit, with handles fully exposed. (for skydiving)
    The vast majority of skydivers often don't give much thought to TSO's or FARs, and most have likely have never heard of PIA TS 135. These are the "rules of the road" for parachute gear in the skydiving world. These rules regulations and laws are there to protect skydivers from unsafe practices equipment, to provide standards of performance, and the safe operation of a dropzone and to prevent problems within the skydiving and non-skydiving community through standardized rules, laws and industry practices.
    The FARs put aircraft pilots directly in the crosshairs when a problem occurs; this is why skydivers must demonstrate repacks when visiting a dropzone, for example. Should any incident occur, it falls on the pilot-in-command. Yet most aircraft pilots are unaware of what is or isn’t legal, as the dropzone assumes responsibility for equipment being legal and reserves in-date.
    In this instance, a wingsuit designed specifically for BASE being used in the skydiving environment and requiring modifications to a rig or the rig operation is a violation of TSO and by extension, the FARs. This creates a legal headache for dropzone operators, S&TA;’s, rig manufacturers, and other skydivers on the lookout for standard equipment.
    Wingsuits designed for BASE jumping are exciting, fun, and provide an added edge of adrenaline. Some skydivers may take the approach of "So what? It's an individual choice." Any reasonable jumper, base or skydiver, will conclude that skydiving is a different environment than BASE (which has no rules). In the skydiving environment, the manufacturers assure the FAA and the DZO that gear meets safety standards via the TSO certification. DZO's in turn, assure the pilot that equipment being used in the skydiving environment is legal, in-date, and approved. As skydivers, we assure each other's safety by using equipment that is legal, safe, and approved for the activity.
    If you are considering jumping any product that may involve relocating handles or other modifications, first contact the manufacturer of the harness to verify the legality of doing so - and check with your DZO or S&TA; for any local policy.

    By admin, in Gear,

    Introducing The Safire 3 by NZ Aerosports

    NZ Aerosports released the original Icarus Safire in 1999. They followed up in 2001 with the release of the Safire2, and she went on to become their biggest selling mainstream canopy, and one of the most popular beginner and intermediate canopies on the market.
    About five years ago, there began to be rumours of a Safire 3 and Crossfire 3 being developed, but the development of Petra and Leia stole the limelight and the research and development hours, and kept the company preoccupied for a few years. But last year NZ Aerosports started making some noise about them again, and since there's been a few teaser posts on their Facebook page about these new wings.


    Everyone wants to know when the Safire 3 and Crossfire 3 will be released, but the team at NZ Aerosports are staying tight lipped on that one. They have stated that the Safire 3 will be first to go public. And they've released a bit of information about what we can expect to see in the Safire 2's successor. They say they are also working hard on the Crossfire 3 project and that it’s going to be ready later in the year than the Safire 3, but it’s looking pretty good!
    The starting point for the Safire 3 project was reshaping the Safire 2 in the same software and using the same 3D design technique used to design Petra and Leia. They’ve kept the crossport design and repartition the same, to reduce surface distortion and improve load bearing, and the 3D lineset design, which gives a more accurate shape in flight. They’ve used the same elliptical lobe, so the shape of the canopy given by the way the lineset attaches now follows a true ellipse. And they’ve added their statement Powerband that flattens the 3D panels more accurately and reduces fabric stretch to keep the new design true to it’s shape in flight.


    These are some of the design changes you can expect from the Safire 2 to Safire 3:
    New planform totally reshaped through true 3D design
    Proportionally tuned air inlets that open wider in the centre of the canopy and less toward the tips
    New brake configuration, providing a more efficient flare It won't be more 'high performance' than the Safire 2, because it is aimed at the same type of pilot that flies them now, but she will be more efficient and responsive, have a better glide and an even more powerful flare.
    The Safire3 Project: Opening Progression from NZ Aerosports Ltd on Vimeo.
    When the Safire 3 comes to market she will be available exclusively from NZ Aerosports in New Zealand, and NZ Aerosports dealers.

    By admin, in Gear,

    GoPro HD Hero 3 Announced

    GoPro have just unveiled the specifications for their new generation of mounted sports cameras. The GoPro Hero 3 will likely grab an even tighter hold of the already dominated market, where GoPro have found themselves leading over the past few years. Other companies have tried to revitalize their products in order to keep up with the ever popular GoPros, but ultimately have not yet managed to capture the power, functionality and quality that GoPro manage to pack into their cameras.
    The HD Hero 3 looks to focus on creating a smaller and lighter camera, while at the same time increasing the features and enhancing both video and photo quality. It's difficult not to be impressed by the Hero 3 by looking at what it provides, at least on paper. The Hero 3 range is said to be at least 30 percent smaller than the HD Hero 2, and 25 percent lighter. They have also included built in wifi, which while of limited use to some, is a huge positive advancement for many others. The processor of the camera is claimed to be twice as fast as it's predecessor, this makes the camera able to handle higher quality video at higher frame rates. The higher end of the Hero 3 range allows for 4k resolution video at 15 FPS, while supporting 60fps at 1080p, 100fps at 960p and 120fps at 720p. This is a vast improvement from the Hero 2 which recorded at a maximum of 48fps at 960p and 30fps at 1080p. This information would support the claim that the Hero 3 can in fact double the performance of it's predecessor, the HD Hero 2.
    The design of the GoPro Hero 3 is similar to that of the Hero 2, though slightly slimmer. It's good to see GoPro sticking to a design that has proven to be successful, while only making minor cosmetic changes, most of which are due to design enhancements, one of which is a new, flatter lens. There are currently 3 models in the range, the entry level model which is referred to as the 'White Edition', the intermediate model which is called the 'Silver Edition', and then the top of the market model which has all the bells and whistles - the 'Black Edition'. Another impressive feature is the ability to control up to 50 cameras from a distance of up to 600ft using a remote. This remote is included in the Black Edition, while can be purchased separately for the other Hero 3 models for around $80.
    Due to the fact that the Hero 3 has only been announced hours ago, there aren't really any performance tests out yet and will likely come in at a later stage, though the claims are that the Hero 3 (Black Edition) is twice as sharp, twice as powerful as before when under low light conditions and all models also have received a reduction in the wide angel distortion.
    The photographic specifications on the GoPro HD Hero 3 are slightly enhanced from the Hero 2, in specific models. The entry level model, as with the Hero 2, comes with a 5 megapixel sensor, while the intermediate model has been bumped up from an 8 megapixel to an 11 megapixel sensor, while finally - the top of the line model has been bumped up from an 11 megapixel sensor to 12 megapixels. All three models have the ability for burst shots, with the White Edition offering a maximum of 3 shots per second, the Silver Edition providing up to 10 shots per second with its burst mode feature, while the Black Edition takes the cake with an amazing 30 shots per second burst firing option.
    GoPro HD Hero 3 - Specifications


    GoPro HD Hero 3 (White Edition)


    Specs
    Included


    Built in Wifi
    1080p/30fps, 960p/30fps, 720p/60fps
    5MP photos
    Up to 3 shots per second burst mode
    Improved Housing
    $199 MSRP


    HERO3: White Edition Camera
    197’/ 60m Waterproof Housing*
    Rechargeable Li-ion Battery
    QR Buckle
    1 Curved Adhesive Mount
    1 Flat Adhesive Mount
    Assorted Mounts and Hardware
    USB Charging Cable


    GoPro HD Hero 3 (Silver Edition)


    Specs
    Included


    Built in Wifi
    1080p/30fps, 960p/48fps, 720p/60fps
    11MP photos
    Up to 10 shots per second burst mode
    Protune & White Balance
    Improved Housing
    $299 MSRP


    HERO3: Silver Edition Camera
    197’/ 60m Waterproof Housing*
    Rechargeable Li-ion Battery
    QR Buckle
    J-Hook Buckle
    3-Way Pivot
    1 Curved Adhesive Mount
    1 Flat Adhesive Mount
    Assorted Mounts and Hardware
    USB Charging Cable


    GoPro HD Hero 3 (Black Edition)


    Specs
    Included


    Built in Wifi
    4k/15fps, 2.7k/30fps, 1440p/48fps, 1080p/60fps, 960p/100fps,
    720p/120fps
    Remote Control
    12MP photos
    Up to 30 shots per second burst mode
    Protune, Continuous Photo, White Balance and Picture in Video
    Improved Housing
    $399 MSRP
    GoPro App Compatible
    Pro Low-Light Performance


    HERO3: Black Edition Camera
    197’/ 60m Waterproof Housing*
    Wi-Fi Remote + Key Ring
    Remote Charging Cable
    Rechargeable Li-ion Battery
    QR Buckle
    J-Hook Buckle
    3-Way Pivot
    1 Curved Adhesive Mount
    1 Flat Adhesive Mount
    Assorted Mounts and Hardware
    USB Charging Cable


    The waterproof housing for the Hero 3 has been developed to be smaller and fit close to the new flatter lens. Lens distortion under water is often a factor in wide angle underwater photography or filming, and it may have been one of the driving forces behind the decision to adopt a flatter lens in their design.
    The storage and ports have changed slightly since the previous releases and now contains a mini-USB for syncing and charging, while having micro HDMI for video output. The Hero 3 will use a micro SD card, as opposed to the regular SD cards used in previous versions.
    The big question for many GoPro owners is going to be whether it is worth them upgrading their current setup for the new Hero 3. For the most part the White and Silver editions are along the same lines as the Hero 2, the Silver Edition just having a few new tweaks and enhancements, which may be enough for some to consider the upgrade. But from what we've seen on paper, the Hero 3 Black Edition looks to be a different beast and we have high expectations for the results of any tests that are going to be performed with this camera in the near future.

    By admin, in Gear,

0