0

Gear

    Brent Chandler Discusses Dekunu's Feature Filled Altimeter

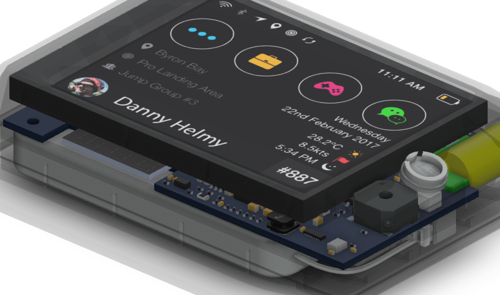
    Australian start-up Dekunu Technologies have spent much of 2017 teasing the release of a new breed of altimeter. A cool, but somewhat cryptic marketing campaign has generated a great deal of excitement but so far is light on actual details. Why? Behind the project is Brent Chandler - entrepreneur, skydiver and life-long coder. He joins us to shed a little light on the Dekunu project - how it got started, and where it is going.
    Can you begin with a little bit of personal background?
    “Without going into too much detail, I created a technology-based business within the hospitality industry in Australia, and over the last nine or ten years developed it to the point where it now runs itself. Once I reached the point where I had successfully built myself out of the company I found myself looking for something that ticked all the right boxes - a tech project that I was passionate about and would allow me to retain a lot of freedom to travel and skydive. After about six-months of conceptualising various different ideas, Dekunu stood out as the obvious choice. I have been passionate about technology my whole life, and although I have always struggled to ever learn say - a second spoken language, computer languages stick with me. For me programming is logical and makes sense. I can see it.”


    What were the first steps in making this idea into a real project?
    “Hardware technology. It was a tech genre I had never experienced before. Tech for me had always been software, writing code onto a screen - whereas with Dekunu we are creating concepts, schematics and then a physical product. This was super exciting for me to sink my teeth into, but admittedly intimidating as well. Before we got started I had little idea about what was involved. We got some electronics kits, and a year ago I made the first prototype. The first four prototypes were really just experiments in my understanding. We were using off-the-shelf components and writing code to get them to talk to each other. One of the biggest hurdles was when we moved on to writing our own complete board - where every wire, component, capacitor, resistor and transistor needed to be meticulously arranged. I wasn’t aware of how complicated that process was going to be - even now most days I will have hour-long conversations with our hardware engineers about the placement of one little half-millimetre sized component.”


    What challenges have you faced creating hardware that needs to work reliably in a skydiving environment?
    “Earlier in the prototyping process we didn’t have much consideration for things like operating environments - large temperature differentials, humidity requirements, impact resistance or anything like that. We just wanted it to work and then figure out where it was going to break. Being meticulous through all the various versions means that now we can very be specific about our requirements. We need to know what happens if someone leaves their device in the front of the plane under the engine bay and it gets to seventy degrees, or if it gets left outside somewhere below freezing. We have to be very thorough. The devices currently have 285 individual components - if any one of them goes wrong it could potentially harm someone. For Prototype 10 we did a lot of testing ourselves. All of the devices were jumped and the data compared before they were sent off to our team of testers and friends around the world - our Dekunu ambassadors. We decided to run the ambassador programme for a couple of reasons - it is a great marketing opportunity to have influential flyers from around the world running our equipment, but the vital part is exposure to testing environments that highlight things we simply cannot learn from jumping in Byron Bay every day. We have the luxury of being able to make mistakes with the prototypes, but cannot once we start selling the devices. We receive a lot of emails from people voicing their frustration that they cannot yet get their hands on one, and sure - we could capitalise on the engaged audience but to do so too early could very well result in shooting ourselves in the foot.”

    Everyone wants to know what it does. What does it do?
    “Without revealing some big, soon to be announced, functionality, the device is going to be all encompassing due to the infrastructure we are creating. Imagine that you come down from your jump and have not plugged into a computer or anything and you have access to all the information it has recorded - a lot of which at the moment without a SmartAlti is dominated by guess work, ego and bias. People will be able to answer a lot of questions with complete accuracy and answer them in the landing area. What was the exit separation? Exactly how hard was that opening? Why did people land off? What was the wind doing? Did we track in the right place? Did we open too close to each other? We want it to be so intuitive and connected that it works seamlessly with every type of device. You don’t have to be plugged into a computer for hours afterwards - you can be in the bar with your friends and have the whole experience on your phone. Also not just your information - a single dot on a screen. All your mates on the jump as well. The entire experience.
    For many things in skydiving, simple is best. Does a device that is packed with features run the risk of over complicating things to the point of distraction?
    “This is something we have discussed at length. No matter what happens - as soon as you jump it switches mode and there is nothing you can do on the device except see the altitude on a massive screen. At the moment the device enters a Plane Mode showing heading, ground speed and some other neat features like simple safety tips and reminders on the way to altitude such as when to remove your restraint, check your gear, get a pin check - things like that. We also have a version of the software that includes a student mode - which removes any unnecessary complications. Student mode could, for example, include the important things they need to remember about their jump plan. We are working on making this the best possible device for all users. We’ve saved the complications for our number crunching servers behind the scenes”

    Brent is more guarded about some of the far reaching potential that fully networked, intelligent altimeters might have for the future of skydiving - sensibly circling back to the importance of the unit itself being success before the big plans happen.
    “We have done an enormous amount of work on the backend and the visualisation systems - this data that people will have access to is going to allow them to learn so much more from their jumps. It is important for everything to be as intuitive as possible - if we create a system that is good but time-consuming for people to use, then they are not going to use it. We haven’t created this just for the technologically adept - we want it to be the default choice for all skydivers and not just those who like gadgets and want their altimeter to have a touchscreen. Our core ethos is about how this is going to bring more awareness to the sport of skydiving. More data, more transparency - that is really the focus. We see things progressing to the point where, such as with an AAD - if you don’t have a networked altimeter then you are not jumping. The idea being that this will become as normalised as owning any simple altimeter in the way you are required to now - the pricing is not much different, and the information will be so valuable that this is absolutely the way forward for the sport.”
    The more elaborate details of what the Dekunu device does, and could do, remain to be seen and proven - but anyone who uses a modern phone is able to imagine the prospective gains that one of our mandatory pieces of safety gear becoming fully networked and similarly sophisticated could mean. Within recent history mobile technology has profoundly altered the way our daily lives operate, and transporting this potential into the skydiving environment is a very exciting prospect that could well have an amazing effect on how well we do what we do - how quickly we learn and how safe we all are. Brent and the Dekunu team are hard at work turning these ideas into reality.

    By admin, in Gear,

    Introducing The Squirrel Snatch BASE Pilot Chute

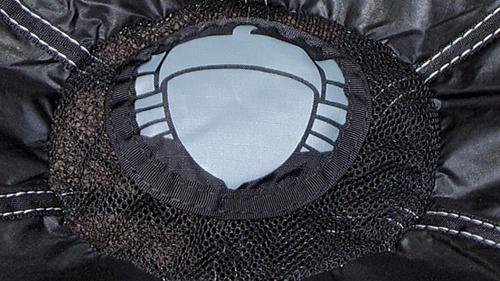
    The Squirrel Snatch is a revolutionary new product that sees the first BASE targeted development of a toroidal design for a pilot chute. Although the design has been used extensively in the development of non-sport parachutes for over 40 years, until now it's never been manufactured for BASE or skydiving. The idea was born from a discussion between the company's co-designer and CRW expert, Jim Rasmussen.
    The toroidal design (also known as a Pulled-Down-Apex design) that the Snatch uses, is a complex and costly product to produce and was no small undertaking by the company. The Snatch has a three dimensional partial toroidal shape and is joined together with two mesh cones, allowing for extremely high drag co-efficiency. Squirrel Wingsuits discuss the differences between the shape of a toroidal design and that of the common pilot chute by saying, "Traditional PCs are two circles sewn together around the edges, typically one of ZP and one of mesh, with a piece of line or webbing connecting the center of each circle together at a specific distance. When pulled from the center of the mesh circle and dragged through a fluid, it inflates into a rough approximation of a pulled-down-apex shape, but with a large amount of distortion and error, with a wrinkled and asymmetric circumference. Imagine crumpling up a single piece of paper until it forms the 3D shape you want to design - it won't look good, nor be an accurate representation of a 3D surface. Yet that is the current basis of traditional PCs: an approximate and inefficient 2D design meant to perform a task that requires a 3D shape."
    Squirrel used an ellipse with a 7:10 (H:W) ratio, with an axis offset of 20% of the width in the development of the torus. The tangent formed with the cones and partial torus was calculated precisely to ensure that the ZP had a smooth transition with the mesh. This allows for the ability to maintain a smooth error-free perimeter on the pilot chute.
    Innovation aside, the most impressive part about the Snatch is the enhanced performance over regular double circle pilot chutes. Because of the shape of standard pilot chutes, the surface area is usually met with an imbalance of stress, with some areas being pulled more than others, and material being "loose". The randomness aspect that is present in these regular pilot chutes gets minimized with the toroidal design of the Snatch. Unlike normal PCs which are constantly changing shape as airflow moves around the creases and wrinkles, the toroidal design inflates to its intended shape and remains that way, without the pulsing that is usually witnessed.
    When inflated, the Squirrel Snatch takes the shape of a 3D object, with specifically calculated gores.
    This increase in inflation performance is easily seen in testing where far superior stability was witnessed in both wind tunnel and field testing.
    Symmetry is one of the most important factors in the performance of a pilot chute, and each Snatch is guaranteed to be symmetric, with the build tolerance being set at a stringent 1mm +/-.
    The focus with the Snatch has not only been on general performance and innovation, but also on safety. Squirrel decided that due to the suggested risks involved with heavy handles, and their involvement in entanglements, that they wanted to produce the lightest possible design, without compromising on durability. The decrease in weight means that bridle entanglements become less likely. The Snatch uses hexagonal carbon-fiber handles for sizes 32, 34, 36 and 38. The 42 featured a pad-patch top with no carbon, while the 46 and 48 are handle-free, for hand held use.
    The Snatch already has several skydivers wondering whether or not they will be able to use it on their skydiving rig, or whether the company plans to release a skydiving specific toroidal PC in the future, as well as whether or not this is a development that could change the development and focus of PCs in general.
    Squirrel have open sourced the design, in the attempt to get more BASE jumping what they consider to be a higher performance and safer design. For those looking to build their own toroidal PC, you can get in contact with Squirrel via e-mail and they will provide you with the 2D patterns for all sizes.

    By admin, in Gear,

    Alti-Force Sensor Pack - GoPro Addon

    With the increased popularity of action cameras over recent years it's not surprising that we've seen an increase in the manufacturing of third party hardware that makes use of the GoPro camera to add additional value to users. Hypoxic recently released their Turned On product, which allows skydivers to see whether or not their camera is recording or whether there's any errors, without having to ask their buddy.
    The company Alti-Force has just released a product of their own that attaches to the GoPro camera and like the Turned On device, will seek to add some extra value to skydivers. When in use the Alti-Force Sensor Pack will be able to overlay information about your flight over the video. The device is able to record and display both altitude and the acceleration/G-Force of your jump.
    The visual representation of Gs can be useful for those looking to maximize performance, by using the information to identifcal optimum body positioning and technique.
    Features

    Subtitled video playback for your GoPro® camera
    Altitude subtitles selectable as feet or meters
    Acceleration G-force subtitles selectable as X-Y-Z axes or total magnitude
    Compatible with GoPro® Hero4 Black and Silver, Hero3+ Black and Silver, or Hero3 Black
    Fits in GoPro® cases with BacPac™ backdoor² (not included)
    Compatibility

    GoPro® Hero3 Black – YES – firmware v03.00
    GoPro® Hero3+ Silver – YES – firmware v02.00
    GoPro® Hero3+ Black – YES – firmware v02.00 | v03.00*
    GoPro® Hero4 Silver – YES – firmware v02.00.00
    GoPro® Hero4 Black – YES – firmware v02.00.00
    All efforts will be made to maintain compatibility with future firmware versions but cannot be guaranteed

    *v03.00 disables camera’s USB mode, use of memory card reader is required
    Any that support .SRT subtitle files (check your player’s specifications)

    Includes most TVs and VLC media player (for all OS platforms)
    Video must be played via USB mode or memory card reader
    If copied off camera, video .MP4 and subtitle .SRT files must be copied to same location
    Note: Windows® Media Player and QuickTime do not support .SRT subtitles
    Camera Modes
    The Alti-Force Sensor Pack records data/subtitles in Video Mode only.
    All standard video resolutions and frame rates are supported.
    The Alti-Force Sensor Pack does not support Time Lapse and Looping video modes, and is disabled in all Photo modes.

    Mechanical
    Size: 2.36 x 1.38 x 0.40 in (60 x 35 x 10 mm)
    Weight: <1 oz (18 g)
    Electrical
    Standard camera voltage: 3.6v (powered from camera)
    Minimal current draw: <2 mA typical
    Accelerometer
    Tri-axial | ± 16 G’s | 0.1 G resolution
    Barometer
    Absolute Pressure: 300 to 1100 mbar | ~0.1 mbar resolution
    Altitude range: -2000 to 30,000 feet | 1 ft resolution
    Pressure to Altitude conversion assumes standard conditions.
    Sampling RateHero 3/3+: approx 4.5 samples per second
    Hero 4: approx 6.5 samples per second
    Subtitle Settings
    Altitude: Feet | Meters | Both | None
    Acceleration: XYZ axes | Total magnitude | All | None
    G-bar: On | Off
    Temperature: °F | °C | None
    — Additional options —
    Data CSV file (saves all raw sensor values): On | Off
    Altitude offset: Feet only
    More information on the Alti-Force Sensor Pack can be found on the Alti-force website.

    By admin, in Gear,

    Understanding your AAD

    With all the recent issues that have been brought up by the Argus AAD ban by multiple container manufacturers, I wanted to make sure that everyone knows that while most modern AAD’s have a similar design, based on that of the CYPRES1 which was introduced in the early 90’s, they all have very unique differences, and these differences can cause major issues if you are unaware of them. Also, this is a good time to remind people about best practices to use if you have an AAD in your rig.
    Because of safety concerns right now it looks like most container manufacturers have
    at least temporarily prohibited the ARGUS in their containers, so this article predominantly relates to the CYPRES and the VIGIL. If the ARGUS is approved again for most containers, updated information will then be made available. Although not widely seen, there are also the FXC Astra (electronic with cutter), and the FXC-12000, an older bulky mechanical pin-pulling device. Introduced at the recent PIA Symposium, the MARS M2 from the Czech Republic and being imported by Alti-2, is another newcomer to the AAD market, which may be available sometime this year once the container manufacturers approve it for use.
    All the modern electronic AAD’s currently on the market in their “Expert mode” work by activating a cutter that severs the reserve closing loop when the user is falling at or greater than a given speed (typically around 78 MPH or faster) and at or lower than a given altitude (typically around 750 feet). This cut closing loop should then allow the reserve to begin its opening sequence. This is all the AAD will do (cut the loop). If the reserve has been correctly packed, the cutting of the loop should initiate the reserve opening sequence, and hopefully a reserve canopy will open between 200-500 feet AGL (barring a pilot chute hesitation, etc).
    KNOW YOUR EQUIPMENTAs always, consult the user manual for your specific make/model, and discuss any of your AAD questions with a qualified rigger. We are lucky to have SSK Industries, Inc., the US service center for CYPRES units located in Lebanon, Ohio, so please feel free to contact SSK for any CYPRES questions also.
    The first major difference between AAD’s is “active” mode. This is the altitude above the ground that the AAD would allow itself to activate if the conditions were met for an activation. The CYPRES\CYPRES2 arms at 1500 feet AGL. The VIGIL\VIGIL2 will move to active mode at 150 feet AGL. Both of these have different rationale behind their decisions. While a CYPRES will not active if the airplane only gets to 900 feet and you have to do an emergency exit, a VIGIL moves into active mode at a lower altitude and this has caused issues when the door of the airplane accidentally opened which caused a pressure difference that triggered activation. Counterpoint to this for the VIGIL is if you exit at 1200 feet and hit your head on the tail the unit is already in active mode and is able to potentially fire to start the reserve activation sequence. (Note that CYPRES is armed if you climb to arming altitude, then descend lower prior to exit.) The CYPRES also disarms when it goes below ~ 130 ft. AGL. The VIGIL will also disarm at ~130 feet on the way down
    A second major difference is in the shutdown timing. A CYPRES until has a hard shutdown at 14 hours after the startup sequence. This means even if you are on the airplane climbing to altitude or in freefall when that time is reached the unit will shut down. In this method of shutdown timing you must do a manual shutdown and restart of the unit if you are approaching the 14 hours since startup to ensure that the unit will remain active for any skydives that you are intending on doing. The VIGIL checks to see if it is at its “Ground Zero” altitude and if you are 150 feet or higher or lower than that altitude via pressure readings then the unit will remain on until you reach “Ground Zero” altitude again. This can cause an issue if you take your rig home and you live more than 150 feet above or below the field elevation at the airport since the VIGIL might remain on for days or weeks. Specifically this can cause issues if you are frequently traveling and leave the DZ at the end of the day and travel to a different DZ the next day since the unit might still be on and is using the altitude of the other airport as its “Zero” point. This could cause the unit to fire much higher or lower than expected. As a reference point Middletown Hook Field, the home of Start Skydiving is at 650’ MSL, Columbus (CMH) is at 815’ MSL, Indianapolis (IND) is 797’ MSL and Covington (CVG) is 896’ MSL. All of these areas may be at a large enough altitude difference that you may need to manually turn your VIGIL off when you leave the dropzone to keep it turned on until it is returned to Start Skydiving. Leaving the VIGIL on for extended time periods can lead to the battery going dead prior to the expected life of the unit or the unit failing to realize the difference in “Zero” altitude if you travel to another dropzone.
    A third difference is the way that the altitude reference offset data is stored in the units.. If you are doing an offsite demo jump, or jump at a DZ with an airfield with an elevation different from the landing area, there exists an option that, if you know you are going to be landing at a location that is hundreds of feet higher or lower then where you are taking off from, allows you to adjust the AAD so it knows about that difference, so it still will activate at ~750 feet above the ground at the intended landing location. Because of the CYPRES automatic weather correction feature, it will re-zero itself on the way back to the take-off location, so it is necessary to switch it off and reset the DZ altitude reference prior to each jump at the remote airfield. At the end of the self-test procedure, CYPRES-2 displays the previously set altitude offset so that it can be easily selected again. The CYPRES(1) unit does not have a memory of a programmed offset and will forget the difference each time the CYPRES is turned off. CYPRES automatically tracks weather changes throughout the day, and if the airfield and landing site are nearby and at the same elevation there is no need to reset it every time you need to re-zero your altimeter. If you travel by car back to the DZ, or walk back from a different elevation after landing with your CYPRES, it is recommended to reset it (switch off/on). As the VIGIL does not automatically track weather changes in the same way, it will retain the offset information in its memory until you go back into the menu and change it back to zero even if the unit is shut down or it reaches its 14 hour point and shuts off. The upside is if you are frequently jumping at a location that involves needing to input an offset the offset is saved for you. The downside to this is if you program in an offset and forget to reset it you could have the unit activating incorrectly since it thinks it still needs the offset. The VIGIL also recommends resetting the unit if you travel with it in a car or walk back from a different elevation.
    Yet another difference is the “Function” of the AAD. CYPRES units come in four versions that are easy to tell the difference of at a glance. CYPRES Expert units have a Red button, Speed units have a Red button that has SPEED printed on it. Student units have a Yellow button and a Tandem unit has a Blue button. Each of these models has unique activation parameters so refer to the user manual for specific information. A CYPRES-2 unit can be reprogrammed by SSK or the factory to change its functionality and it’s done at no charge. The VIGIL is a multifunction device that allows for the user to change it from “Expert” to “Student” or even “Tandem” in the startup sequence.) You do need to make sure the unit is in the right mode to get the correct activation parameters loaded. You can tell the mode the VIGIL is in by looking at the display once the unit is turned on and it will tell the currently active mode. Tandem Instructors especially need to ensure if the rig they are about to jump has a VIGIL installed that it is in the right mode since having the unit activate at the EXPERT or STUDENT parameters may not ensure the canopies will open in time to save your life.
    There are additional differences so please read your User Manual to really understand all the details of your AAD. While we try to use the “Set it and Forget it!” attitude towards AADs, they are somewhat complicated devices that you need to understand the details of, so that you can properly use the unit if it is installed in your container.
    Modern AAD’s since they were introduced with the CYPRES1 in 1991 have saved hundreds of lives. They have also caused issues and even fatalities when inducing two canopy out situations at times where jumpers have opened their main canopies very low or other complications. AAD’s have a very high success rate when needed but they are not 100% flawless either. Just by having an AAD installed does not mean that you are now perfectly safe. Many jumpers inform their friends and families that “I have this little device that will pull for me if I don’t” as a way of reassuring them around the dangers of skydiving. While it is true that having an AAD does increase your safety factor it is not to be relied on and the true risk involved in skydiving does need to be considered.
    Reminder of Best Practices for use of your AAD no matter which brand you use:
    1) Only turn your AAD on at the takeoff site, do not turn it on at home then drive to the DZ since it will think your home is “Zero Altitude” and may fire higher or lower than expected because of this.
    2) If a “multimode” device, ensure the unit is in the correct “Mode” for the skydive you are about to do.
    3) Notice any errors during the start up or during operations during the day and alert your rigger before completing another jump on the unit.
    4) Be aware of the shutdown timing on the AAD and if needed turn it off before you leave at the end of the day. Also be prepared to reset the unit if you will be doing more than 14 hours of jumping (Night jumps especially are of note on this)
    5) Only configure offset information into the unit if you are truly jumping at an altitude different than you are taking off from. Also be sure you know whether the unit retains the offset information or not.
    CYPRES2 User Manual:
    http://www.cypres-usa.com/userguide/CYPRES_2_users_guide_english.pdf
    or
    http://www.cypres.cc/index.php?option=com_remository&Itemid;=89&func;=download&id;=182&chk;=5ca53a980b98700d976eb51f9e1fc9c3&no;_html=1〈=enVIGIL User Manual: http://www.vigil.aero/files/images/ENGELS___DP_JUN_2010.pdf

    VIGIL SB on this topic: http://www.vigil.aero/files/images/Information_Bulletin___Airborne_Status_.pdfWith all the recent issues that have been brought up by the Argus AAD ban by multiple container manufacturers, I wanted to make sure that everyone knows that while most modern AAD’s have a similar design, based on that of the CYPRES1 which was introduced in the early 90’s, they all have very unique differences, and these differences can cause major issues if you are unaware of them. Also, this is a good time to remind people about best practices to use if you have an AAD in your rig.
    Because of safety concerns right now it looks like most container manufacturers have
    at least temporarily prohibited the ARGUS in their containers, so this article predominantly relates to the CYPRES and the VIGIL. If the ARGUS is approved again for most containers, updated information will then be made available. Although not widely seen, there are also the FXC Astra (electronic with cutter), and the FXC-12000, an older bulky mechanical pin-pulling device. Introduced at the recent PIA Symposium, the MARS M2 from the Czech Republic and being imported by Alti-2, is another newcomer to the AAD market, which may be available sometime this year once the container manufacturers approve it for use.
    All the modern electronic AAD’s currently on the market in their “Expert mode” work by activating a cutter that severs the reserve closing loop when the user is falling at or greater than a given speed (typically around 78 MPH or faster) and at or lower than a given altitude (typically around 750 feet). This cut closing loop should then allow the reserve to begin its opening sequence. This is all the AAD will do (cut the loop). If the reserve has been correctly packed, the cutting of the loop should initiate the reserve opening sequence, and hopefully a reserve canopy will open between 200-500 feet AGL (barring a pilot chute hesitation, etc).
    KNOW YOUR EQUIPMENTAs always, consult the user manual for your specific make/model, and discuss any of your AAD questions with a qualified rigger. We are lucky to have SSK Industries, Inc., the US service center for CYPRES units located in Lebanon, Ohio, so please feel free to contact SSK for any CYPRES questions also.
    The first major difference between AAD’s is “active” mode. This is the altitude above the ground that the AAD would allow itself to activate if the conditions were met for an activation. The CYPRES\CYPRES2 arms at 1500 feet AGL. The VIGIL\VIGIL2 will move to active mode at 150 feet AGL. Both of these have different rationale behind their decisions. While a CYPRES will not active if the airplane only gets to 900 feet and you have to do an emergency exit, a VIGIL moves into active mode at a lower altitude and this has caused issues when the door of the airplane accidentally opened which caused a pressure difference that triggered activation. Counterpoint to this for the VIGIL is if you exit at 1200 feet and hit your head on the tail the unit is already in active mode and is able to potentially fire to start the reserve activation sequence. (Note that CYPRES is armed if you climb to arming altitude, then descend lower prior to exit.) The CYPRES also disarms when it goes below ~ 130 ft. AGL. The VIGIL will also disarm at ~130 feet on the way down
    A second major difference is in the shutdown timing. A CYPRES until has a hard shutdown at 14 hours after the startup sequence. This means even if you are on the airplane climbing to altitude or in freefall when that time is reached the unit will shut down. In this method of shutdown timing you must do a manual shutdown and restart of the unit if you are approaching the 14 hours since startup to ensure that the unit will remain active for any skydives that you are intending on doing. The VIGIL checks to see if it is at its “Ground Zero” altitude and if you are 150 feet or higher or lower than that altitude via pressure readings then the unit will remain on until you reach “Ground Zero” altitude again. This can cause an issue if you take your rig home and you live more than 150 feet above or below the field elevation at the airport since the VIGIL might remain on for days or weeks. Specifically this can cause issues if you are frequently traveling and leave the DZ at the end of the day and travel to a different DZ the next day since the unit might still be on and is using the altitude of the other airport as its “Zero” point. This could cause the unit to fire much higher or lower than expected. As a reference point Middletown Hook Field, the home of Start Skydiving is at 650’ MSL, Columbus (CMH) is at 815’ MSL, Indianapolis (IND) is 797’ MSL and Covington (CVG) is 896’ MSL. All of these areas may be at a large enough altitude difference that you may need to manually turn your VIGIL off when you leave the dropzone to keep it turned on until it is returned to Start Skydiving. Leaving the VIGIL on for extended time periods can lead to the battery going dead prior to the expected life of the unit or the unit failing to realize the difference in “Zero” altitude if you travel to another dropzone.
    A third difference is the way that the altitude reference offset data is stored in the units.. If you are doing an offsite demo jump, or jump at a DZ with an airfield with an elevation different from the landing area, there exists an option that, if you know you are going to be landing at a location that is hundreds of feet higher or lower then where you are taking off from, allows you to adjust the AAD so it knows about that difference, so it still will activate at ~750 feet above the ground at the intended landing location. Because of the CYPRES automatic weather correction feature, it will re-zero itself on the way back to the take-off location, so it is necessary to switch it off and reset the DZ altitude reference prior to each jump at the remote airfield. At the end of the self-test procedure, CYPRES-2 displays the previously set altitude offset so that it can be easily selected again. The CYPRES(1) unit does not have a memory of a programmed offset and will forget the difference each time the CYPRES is turned off. CYPRES automatically tracks weather changes throughout the day, and if the airfield and landing site are nearby and at the same elevation there is no need to reset it every time you need to re-zero your altimeter. If you travel by car back to the DZ, or walk back from a different elevation after landing with your CYPRES, it is recommended to reset it (switch off/on). As the VIGIL does not automatically track weather changes in the same way, it will retain the offset information in its memory until you go back into the menu and change it back to zero even if the unit is shut down or it reaches its 14 hour point and shuts off. The upside is if you are frequently jumping at a location that involves needing to input an offset the offset is saved for you. The downside to this is if you program in an offset and forget to reset it you could have the unit activating incorrectly since it thinks it still needs the offset. The VIGIL also recommends resetting the unit if you travel with it in a car or walk back from a different elevation.
    Yet another difference is the “Function” of the AAD. CYPRES units come in four versions that are easy to tell the difference of at a glance. CYPRES Expert units have a Red button, Speed units have a Red button that has SPEED printed on it. Student units have a Yellow button and a Tandem unit has a Blue button. Each of these models has unique activation parameters so refer to the user manual for specific information. A CYPRES-2 unit can be reprogrammed by SSK or the factory to change its functionality and it’s done at no charge. The VIGIL is a multifunction device that allows for the user to change it from “Expert” to “Student” or even “Tandem” in the startup sequence.) You do need to make sure the unit is in the right mode to get the correct activation parameters loaded. You can tell the mode the VIGIL is in by looking at the display once the unit is turned on and it will tell the currently active mode. Tandem Instructors especially need to ensure if the rig they are about to jump has a VIGIL installed that it is in the right mode since having the unit activate at the EXPERT or STUDENT parameters may not ensure the canopies will open in time to save your life.
    There are additional differences so please read your User Manual to really understand all the details of your AAD. While we try to use the “Set it and Forget it!” attitude towards AADs, they are somewhat complicated devices that you need to understand the details of, so that you can properly use the unit if it is installed in your container.
    Modern AAD’s since they were introduced with the CYPRES1 in 1991 have saved hundreds of lives. They have also caused issues and even fatalities when inducing two canopy out situations at times where jumpers have opened their main canopies very low or other complications. AAD’s have a very high success rate when needed but they are not 100% flawless either. Just by having an AAD installed does not mean that you are now perfectly safe. Many jumpers inform their friends and families that “I have this little device that will pull for me if I don’t” as a way of reassuring them around the dangers of skydiving. While it is true that having an AAD does increase your safety factor it is not to be relied on and the true risk involved in skydiving does need to be considered.
    Reminder of Best Practices for use of your AAD no matter which brand you use:
    1) Only turn your AAD on at the takeoff site, do not turn it on at home then drive to the DZ since it will think your home is “Zero Altitude” and may fire higher or lower than expected because of this.
    2) If a “multimode” device, ensure the unit is in the correct “Mode” for the skydive you are about to do.
    3) Notice any errors during the start up or during operations during the day and alert your rigger before completing another jump on the unit.
    4) Be aware of the shutdown timing on the AAD and if needed turn it off before you leave at the end of the day. Also be prepared to reset the unit if you will be doing more than 14 hours of jumping (Night jumps especially are of note on this)
    5) Only configure offset information into the unit if you are truly jumping at an altitude different than you are taking off from. Also be sure you know whether the unit retains the offset information or not.
    CYPRES2 User Manual:
    http://www.cypres-usa.com/userguide/CYPRES_2_users_guide_english.pdf
    or
    http://www.cypres.cc/index.php?option=com_remository&Itemid;=89&func;=download&id;=182&chk;=5ca53a980b98700d976eb51f9e1fc9c3&no;_html=1〈=enVIGIL User Manual: http://www.vigil.aero/files/images/ENGELS___DP_JUN_2010.pdf

    VIGIL SB on this topic: http://www.vigil.aero/files/images/Information_Bulletin___Airborne_Status_.pdf

    By PhreeZone, in Gear,

    Wearing Earphones While Skydiving

    If you're wanting audio on your jump a frustrating issue you may face is the matter of achieving clear and loud quality (via headphones or speakers) inside your helmet during freefall. The loud noise and intense conditions both inside the plane and during freefall require a certain volume, clarity, and portability that many audio setups simply won’t provide. In this article we will walk you through some different audio setups that can keep the music or communications flowing while in freefall. The audio setup for you is going to depend on how you spend your time in the sky, so keep that in mind when looking for the right audio gear for you!
    What if I want to listen to music while skydiving or parachuting?
    Firstly, we'd like to make it clear that when it comes to skydiving with music we realize that there are contrasting opinions on whether it is safe or not. We'd suggest that anyone who wishes to jump with earphones in are aware of potential safety risks. We asked the guys over at outeraudio.com to make some recommendations on what one should look for when buying earphones to jump in.
    Ask yourself, what is it I want to hear while skydiving? If it is music, most wireless Bluetooth headphones will work when connected to your music playing device or cell phone. There's a few styles of headphones that can fit in your helmet, but in-ear headphones will typically fit a wider range of helmets. The quality of the earphones will change between both make and model, and taking a look at an audio review website will usually make you more confident in your purchase. Many skydivers complain about the hassle of a headphone wire, and you should know that Bluetooth headphones may encounter connection difficulties under the conditions experienced when jumping, so be aware of that ahead of time and look for products which are reputed for their bluetooth connection quality. You should also be careful if you intend to use AirPods or true wireless headphones that aren’t connected to one another as they will be prone to falling out of your ears! The best way to mitigate this is by using fitness/ergonomic fit earbuds that cling to your ears.
    Hearing any audio in general during freefall can be quite difficult. Between the high speeds and loud noise, you will need to either have a high volume or a really well fitting earphone which isolates outside noise well, you may even want to look into a cheap headphone amplifier if you find that you're unable to get the volume that you want from the default setup. We recommend a cheap one because headphone amps can be quite expensive, and the intense conditions you are in while skydiving may lead to you losing your amp or breaking it. If you do opt to use an amplifier, you should consider housing it away from the waist, or anywhere that is likely to have impact from an imperfect landing.
    Another option for listening to music in the air while skydiving is motorcycle helmet speakers. These speakers are designed to fit inside most varieties of motorcycle helmets, so they may or may not fit your particular helmet. That being said, these speakers are created with discrete designs so that they can slip tightly inside a typical helmet. In addition to their small and thin shape, these speakers usually come with adhesive and mounting hardware so that the speakers stay snugly attached to your helmet for extended periods of time.

    When looking at options, here's a few manufacturers which you can consider:
    JBL Sony  Sennheiser Panasonic Philips  Bose What about In-Air Communication?
    The above example audio set up will work just fine for audible GPS interfacing, I recommend wired earbuds because there is simply less of a chance that your very important audio signal is lost mid-air compared to Bluetooth headphones. Using Bluetooth headphones is still a possibility of course. If you are using a device like a FlySight or another audio GPS system, a headphone amplifier may be your new best friend if you find the signal to be too quiet during noisy conditions. Many skydivers manually attach their headphones to the inside of their helmets for added stability during their descent, this could be a possibility for you as well! And it's pretty easy to create a quick DIY solution.
    Canopy Relative Work relies heavily on communication. Audio signals cutting out or becoming disconnected during a jump will make this sport impossible to do because of its heavy reliance on constant communication. CRW will require very high quality in-helmet communication equipment that goes beyond your average pair of headphones and you should consult with an experienced jumper for recommendations regarding this type of communication heavy gear.
    What’s the best solution for you?
    Depending on your specific needs you will probably choose a different setup for your audio source in the air. Look at your current gear and what you already own and ask yourself, what you will be doing after you successfully bring your audio rig with you up into the sky? In many cases it may be as simple as buying a high quality set of bluetooth earphones that can work with your mobile device. In other cases you may want to do a little DIY work inside of your helmet to set up an audio situation where you have the best possible quality, with the most comfort possible.

    Do you use any earphones or speakers inside of your helmet? Whether you're an experienced CRW jumper or just a music fanatic, leave a comment below and let us know what you use inside your helmet.

    By Administrator, in Gear,

    How To Clean Your Container

    A Spa Day For Your Skydiving Rig
    Image by Andrey VeselovCharlie Chaplin has nothing on you. That landing was nothing less than *art*.
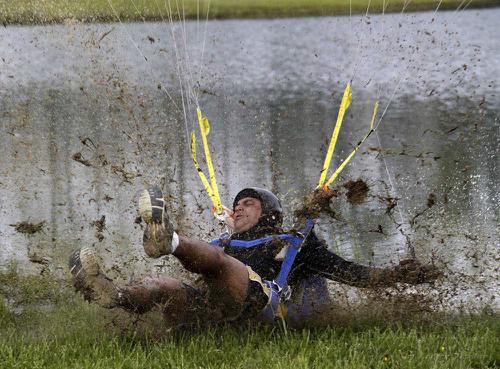
    You managed to use that doofus downwind setup to milk every last opportunity for comedy out of your return to earth. You nailed the exaggerated “uh-oh” expression. You executed the perfect shortbus flare. You transitioned majestically from a banana-peel touchdown to a ten-foot skid through the one spot of mud in the landing area.
    You, my friend, are awesome.
    Now, you’re going to have a nice laundry day. Here’s how.
    Wait for it.
    If you’ve managed to drag your beautiful gear through the mud, you’re going to have to stare at it in shame for a while before you make a move. Wait for it to dry completely -- which may take a couple of days -- then scrub off what you can with a dry brush.
    Take it apart.
    Remove both canopies from the rig. (Do this after performing a practice reserve deployment -- as you always do before a repack, right?) Remove your AAD from the rig. Remove all hardware: reserve handles, risers, RSL, hook knife, etc. If you’re not comfortable doing this yourself, ask for help from a rigger.
    Treat your rig like a dog.
    ...or, at least, like you’re administering a doggie bathtime. Gather a big plastic tub, gentle detergent (such as Woolite or castile soap) and a nylon scrub brush. Fill the tub about halfway with lukewarm -- not hot -- water. Dunk your empty rig and agitate it in the soapy water, but don’t let it sit and soak. After the container is fully saturated, go at it with your scrubber. Repeat the dunk-and-shake cycle. Once your rig is good and scrubbed, empty the tub and refill it with soapless, lukewarm water. Dunk and dunk and dunk, emptying and refilling the tub as necessary, until not even the tiniest hint of soap remains. (Dried-on soap is a filth magnet.)
    ...Or treat your rig like fine lingerie.
    You can machine-wash a rig, but you’d better make sure you act like it’s a set of ridiculously fancy, spendy underthings. (Ridiculously fancy, spendy underthings with hip rings, of course, that need to be strapped up with athletic tape to keep them from denting the inside of your machine…) Put your empty, hardwareless, Velcro-mated rig in a mesh laundry bag and run it with gentle detergent on the delicate cycle.
    String it up.
    Hang your wet skydiving container in a dry place that isn’t exposed to direct sunlight. As you get it set up, straighten every flap and fold to prevent wrinkles from locking in. Keep tabs untucked. If your rig has Cadmium hardware, you’ll need to do a thorough hand-drying pass with a towel at the very beginning to prevent rust.
    Stop time.
    Okay. You can’t stop time. You can, however, encourage the time between cleanings to maybe slow down a little bit.
    After your rig is spotlessly, white-glove-test-ready, make-your-mama-proud clean -- and as dry as the beer truck at the end of the Skydive Arizona Christmas Boogie -- you can apply a single coating of fabric protection, such as Scotchgard, to shield it against redirtying. Check the manufacturer’s recommendation for application before you get all spray-happy. That said, the general advice is to apply three whisper-light coats of protectant, making sure each coat is dry before applying a new one. Make sure you do this in a well-ventilated area (lest you waterproof your lungs).
    Get out, damned spot.
    Keep a baggie of stain-removing wipes in your skydiving gear kit. They’re a lifesaver for little oopsies.
    Take a canopy course.
    ...or start working at a laundromat to save money. Your call, Charlie.

    By nettenette, in Gear,

    Derek's Gear Tips


    Image by BoonhuckDerek Vanboeschoten is a Senior Rigger, Tandem Master and AFF instructor with more than 3300 jumps. Derek also moderates the Gear & Rigging forum on Dropzone.com where he first posted this list of Gear Tips. It is republished here for your convenience.
    Use Performance Design's Slinks for the main and reserve canopies instead of Rapide links. Slinks are stronger, lower bulk, easier to install and remove, and won't damage the slider grommets.

    Clean cutaway cables every 30 days with Ace Pure Silicone Lubricant, sold at Ace Hardware stores, to keep cutaway pull forces low.

    Inspect cutaway cables every 30 days and replace nicked or kinked cutaway cables with a new cutaway handle/cables.

    Flex 3-rings every 30 days to prevent them from taking on a "set" and hanging up during a cutaway.

    Inspect Rapide links and bumpers or PD Slinks every 30 days. Always use slider bumpers with Rapide links to prevent damage to the slider grommets, "Lock-Tite" to keep the link from loosening, and nail polish to torque-stripe Rapide links.

    Use metal, capped, and tacked riser inserts for the excess cutaway cables, regardless of main size or type. They prevent difficult or impossible cutaway resulting from the channel "gripping" the cables or from line twists that include the excess cutaway cables.

    Replace the main closing loop early and often. Adjust main closing loop so that the closing pin is snug. Use a stainless steel washer thick enough that it won't bend when closing the container.

    Have Velcro replaced every 100-200 uses.

    Use a kill line pilot chute, regardless of the size/type of main canopy you have. Check the length of your main pilot chute kill line every 30 days. The kill line should have a little slack in it when the pilot chute is "cocked" and the bridle is under tension. If it doesn't, have it fixed.

    Replace a damaged or old kill line pilot chute with a new one.

    "Cock" a kill line PC after laying the cocooned canopy on the ground and just before putting the canopy in the deployment bag.
    Take the twists out of steering lines every jump or, at a minimum, after the last jump of the day.

    When setting the brakes, set them so that the steering line is to the inside (between the risers) and the excess is to the outside. This will put the excess to the bottom of the riser channels, helping to protect the excess steering line.

    Keep gear out of the sun as much as possible.

    Use Velcro-less toggles/risers. Velcro requires replacement every 100-200 uses, and Velcro damages the steering lines, risers and anything else it comes into contact with.

    Replace mini-risers every 500 jumps or less. Inspect them every 30 days for wear.

    While packing, check your line trim every 30 days or less. When new, all the "A" lines are the same length (on 'most' canopies, check with the manufacturer). Spectra shrinks from the heat from friction with the slider grommets, pulling the canopy out of trim. Pay special attention to steering/control lines. Replace line sets that are significantly worn or out of trim.

    Use the proper size rubber bands, 'Sky Bands', or 'Tube Stows' and do not double wrap them.

    Have your rig washed every 500 jumps or so, more if jumping in a sandy or salt-water environment.
    What to do After Landing Your Reserve:
    First, place the toggles back on the Velcro. This will prevent the hook half of the Velcro from damaging the lines. Second, daisy chain the lines. Use the slider to keep the daisy chain from unraveling. This will keep the lines neat and untangled. If you have an RSL, remove it from your main canopy and re-mate the Velcro to keep the hook Velcro from damaging your gear.
    Be very careful with the canopy. Get it out of the sunlight and into a large plastic garbage bag and then into your gear bag. Be careful when zipping the gear bag shut to not get any fabric caught in the zipper. As long as it is clean, put the reserve pilot chute and free-bag in the center of your rolled up reserve. This will protect the spring inside the reserve pilot chute from damage.
    Do not take the main canopy off of the risers to untangle it. It got tangled on the risers, it will come untangled on the risers. Taking the canopy off the risers, or worse, the lines off the links, will only make the job of re-assembling the main more difficult.
    Put the cut away cables and reserve ripcord back into their housings and the handles back in their pockets. This will prevent any dirt on the cables from getting on the reserve or the Velcro from damaging lines, the container, or the reserve. If you lost one, or both handles, order them and have them shipped to your rigger. Also, if the free-bag and reserve pilot chute was lost, order a new one and have it shipped to the rigger. Make sure when ordering handles or free-bag to order the correct size for your harness/container.
    In the gear bag, put a card with your name, address, phone number(s), and any special instructions, such as "install/replace soft links", "wash the container", "remove/install RSL", "I need the rig by this weekend", etc.
    If you have a Cypres, check your reserve packing data card to see when the scheduled maintenance and 2 year battery replacements are due. If the maintenance is due (4 and 8 years +/- 3 months (+/- 6 months for Cypres "2") from DOM), make arrangements with your rigger to ship the unit or have your rigger remove it and ship it yourself (your rigger will need the original Cypres box to ship it). If your batteries are due (two years since installation for the Cypres1), check with your rigger to see if they have new batteries or if they will need to be ordered. The batteries will have to be replaced if there is less than four months remaining in the two-year cycle, for a Cypres "1". Cypres2 batteries are replaced at the 4 and 8 year maintenance by the factory.

    By admin, in Gear,

    Drift Innovation Release Drift HD Ghost

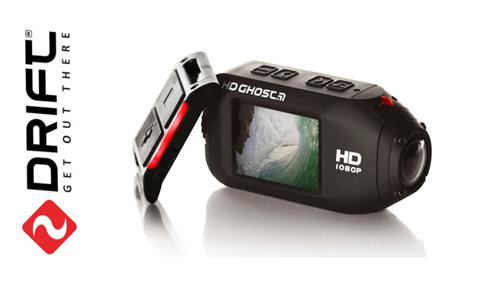
    Just a mere few weeks after GoPro released the new HD Hero 3, another popular POV camera manufacturer has too released a new product. Drift, which has had quite successful sales with their previous model have announced the release of the "Drift HD Ghost", a new and more powerful product when compared to their award winning and commercially popular model, simply named the "Drift HD".
    It is clear from the start that Drift were putting their focus on the features with the HD Ghost, being quick to highlight their new two-way LED remote control. The selling point for Drift, when it comes to the Ghost HD, is the concept that while many other POV cameras come with accessories included, that these other products will often require a number of aftermarket accessories to achieve the results desired by the consumer. Drift say that the HD Ghost will include 'everything sports enthusiasts need to capture professional quality video immediately".
    The above mentioned LED remote controller is one that is designed to allow the user to understand what current settings his HD Ghost is set to. Where most remote controls work one way, sending information to the camera, but not receiving it, this two way remote controller system is something that is new to the POV camera market, the question as to whether this will be a feature that will be adopted by other manufacturers in future or whether it will be seen primarily as a gimmick is yet to be seen, but if the system works in practice as it does in theory - it will certainly allow for a much easier and comfortable mode switching experience when one is using the remote to control the camera functionality.
    There is a 'Drift Flashback (TM)' function on the HD Ghost which will record video in a loop, and only save the file when the user 'tags' it. This can come in useful in situations where you're looking for 'that' shot and are expecting a number of failed attempts before catching it. I'm sure many of all are all too familiar with running out of recording space just when you need it, a curse that seems to extend to still photography too.
    The Ghost HD comes with a 2-inch LCD screen which allows for video playback and editing. The LCD is also covered in Gorilla Glass(R) which prevents scratching and keeps the camera rugged. A 7 element lens design is said to help increase the vibrancy and clarity of the HD Ghost as opposed to previous models, and brings better image quality to the 1080p, 960p, 720p and WVGA recording modes. The camera is also able to shoot stills while recording video footage.
    Stills are able to be captured in three different formats: 5, 8 or 11 megapixels. Or 2 megapixels when taking a still shot while recording.
    Also of interest is the ability for the Ghost to switch between 170°, 127° and 90° field of view.
    The device comes with wi-fi connectivity and soon Drift are said to be releasing an iOS and Android mobile app which will allow Ghost HD owners to control their camera's recording, settings and playback directly from their mobile devices. This is seem as a way of making it even easier for users to record footage and share it with social networks. In essence, one could record a video, transfer to their smart phone and then upload directly to social networks within mere minutes of the recording.
    The Drift Ghost HD is made with 3 meter water proofing when used without a case, this means that general water sports with the exception of things like scuba diving, don't have to invest in an extra housing case, though there is the option for deep water protection by purchasing one of Drift's special underwater housings, which are water proof until 60 meters.
    Drift claims to boast the longest lasting battery for any POV camera currently on the market, with 3 hours of recording time, using a 1700 mAh lithium-ion battery.
    The current retail price on the Drift HD Ghost puts it in the same market as the GoPro HD Hero 3, meaning that Drift see the HD Ghost as a serious contender in the action camera market. And from early reviews it seems that the Ghost is able to capture some quality footage, whether that footage is as good as the Sony AS15 or the GoPro HD Hero 3 is yet to be seen. But we do think that the Drift HD Ghost is a big step up from their previous Drift HD, which didn't perform too well compared to some of the competition in our action camera comparative review.

    By admin, in Gear,

    PD Demo Program: make it work for you!

    So you want to try a new canopy, and you have already asked what your friends, gear dealer, and local sky gods think about the subject, and they have given their opinions-repeatedly. When it comes to gear, pretty much everyone has a strong opinion on the matter. Unfortunately, as you have probably found, opinions have a tendency to be subjective rather than objective. Lucky for you, most manufacturers now have demo programs, such as the Performance Designs Demo Program, so that you can sift through others' perceptions, and create some of your own.
    The basics:
    The Performance Designs Demo program sends out the canopy of your choice directly to you to be used over the course of two weekends. The cost is currently $30. You receive it, you jump it, you send it back, the canopy is re-inspected, then put back into the demo program; lather, rinse, and repeat.
    The details:
    It's a rather simple process to get a demo. Go to www.performancedesigns.com and fill out the demo request form which can be found on the "support" page. Otherwise, use the direct link, http://www.performancedesigns.com/demorequest.asp
    The demo form will ask some questions pertinent to your jump history, to better enable PD's Demo Queen, Anabel Durham, to assist you with your demo needs. As a side note, yes, it is official, the most beloved Demo Queen of all time, Kolla Kolbeinsdottir, has relinquished her throne. Shed no tears, though, as Kolla has moved on to other projects within marketing at Performance Designs, while leaving the demo program in Anabel's capable hands. But, I digress...
    Following the submission of the demo request, you will be contacted by Anabel. She will discuss your options and the availability of the requested canopy. If it is available, she will ship it to wherever your little heart desires. After a few days of longingly gazing out the window after the Fed Ex truck, the truck will stop, and with that stop will come the knowledge that you will soon feel like a kid in a candy store with your very own PD Demo to use over the next two weekends. Though PD does understand the sort of bond that is forged between jumper and canopy, we do request that you refrain from sleeping with the canopy as it may result in the degradation of the material-save it for the one that you buy.
    Following the two-week romance, you will say that sometimes tearful goodbye, and ship the demo back to the PD Factory, where it will begin its journey all over again.
    How to best make the program work for you: When selecting a new model of canopy to try, it is a good idea to select the same size as what you are currently flying. This will make it possible for you to make a legitimate comparison between the two canopies. Having a controlled aspect between the two canopies, such as size, will better enable you to determine the true differences in the flight characteristics of the canopies. If you change both the size and model of canopy, there is nothing in common to compare. You now have apples to oranges for your test group. When downsizing, try to avoid downsizing by more than one size at a time, as each size has valuable lessons for the avid skydiver.
    The fear factor:
    Many jumpers feel trepidation when considering the possibility of that first reserve ride. Or you just aren't sure of whether or not you are going to be comfortable under that smaller reserve that would fit so much more nicely in your cute, new backpack-sized container. The PD answer to this and many other uncertainties? Try it!! The Performance Designs Demo Program also has PD Reserves set up as mains so that jumpers can give their reserve a whirl, too. It is a fantastic opportunity to try out your reserve in a controlled environment. *Sigh* You really can't put a price on reassurance… oh wait, you can, and that would be $30, as well!! That's a bargain for peace of mind. ; )
    Be realistic about your abilities. The one certainty about skydiving is that there will always be another load and another day, if you conduct yourself in a safe manner. Rush into jumping that canopy that is pushing your limits, and you are decreasing your odds of making that next load, and quite possibly, that next day. By learning how to fly your current size more efficiently, you will be ensuring that you will be able to maximize your canopy's performance once on that smaller size.
    The recap:
    Pick a canopy, fill out the form on the website, be nice to Anabel (bribery never hurts), cough up the 30 bucks, jump until your little heart is content (as long as it fits into the 2 weeks), send the demo back, lather, rinse, and repeat if necessary.
    **Unfortunately, the demo program is currently available only in the United States at this time. If outside of the U.S., please feel free to contact us so that we can direct you to one of our remote demo centers, or check our events calendar to see when and if Performance Designs will be in your area.
    Photos by: Joao Tambor

    By admin, in Gear,

    The Return of BIRDMAN

    The Birdman is flying again! This past week, BIRDMAN® International ltd jumped back to life with the addition of some new content, along with a new website design. The company, which halted sales on gear in 2010 due to a change in ownership structure - now has blood pumping through its veins again. The press release that was posted to the website highlights a number of details regarding the company; it's structure, ambitions and new direction are all addressed. This news has caught the attention of wingsuiters everywhere, many eagerly anticipating the new products that are set to emerge from the restructured Birdman company.
    Birdman's Return
    The question on many lips surrounds what exactly went on during the past 30 months with regards to Birdman as a company. What structual changes were made, and where Birdman are headed from here. These are all questions that have addressed in the BIRDMAN® International ltd press release that they have posted on their site. One question that only time will be able to answer, is whether or not Birdman have what it takes to return to the market with the dominance they once held.
    Firstly, Risk Control Corp. will be the manufacturer and seller of BIRDMAN® International ltd suits under license worldwide from Japan. Risk Control Corp is run by Shin Ito, who is now seen as the strategic partner to BIRDMAN® International ltd. Shin Ito is a world renowned and record holding skydiver and specifically wingsuit flyer. Jari Kuosma, from BIRDMAN® International ltd states that Shin Ito has been the driving force behind the new birdman line as co-creator. Jari goes on further to say that while in the past BIRDMAN® International ltd had trouble in regards to the sewing of the suits, he now feels more comfortable in the manufacturing process - having professionals to work with, ensuring the best possible quality for the new Birdman suits.
    There is clearly a new focus on the Birdman products, and that focus seems to be quality. The company seems to have shifted away from the more economic suits and instead are focusing on supreme quality as opposed to an economic wingsuit option. The claims are that no corners were cut with the new line and that the aim was to create cutting edge suits that provide top quality. The paragraph closes with the wording "However, I dare to claim that the value of the new suits will be higher than the price tag. You'll see."
    The website indicates that the new line will come out with 3 new wingsuits. The Birdman Blade III has already been put live on the site, with detailed information publicly available, while the other two suits, the Samurai and the Ninja - are both yet 'to be announced soon'

    The Blade III
    A new wingsuit has also been made available by BIRDMAN® International ltd. The Blade III is said to be targeted towards experienced skydivers and will be the first product to be released having been created with the help of Shin Ito.
    An extract from the Birdman website says the following about the suit:
    "BLADE III is very powerful all-around wingsuit made for experienced wingsuit pilots who want to enjoy their flight from exit to landing. It is balanced perfectly giving pilot 100% control of pitch and speed. It’s drag-reducing quattro–wing platform has large, carved and specially shaped wings for best lift, agility and speed. This gentleman’s race craft comes all included; four wings, semi-rigid ribs & mini-ribs, pockets, inner lining, extra sturdy booties & 10 mm YKK zipper and over the shoulder zip for easy dossing. It will be offered in 5 color scenes."

    Birdman Watches
    It seems that wingsuits aren't the only products that BIRDMAN® International ltd are returning to the industry with. The company has also released information on a line of skydiving watches that they will be selling. The watches are supposedly designed with skydivers in mind and consists of a carbon fibre face, a case of aerospace grade 316-L stainless steel and 'virtually scratch-proof' sapphire crystal. The watches are said to be water resistant to 100 meters and the straps made from parachute nylon, so that you can be sure that they aren't going to snap under pull.
    The History of Birdman
    Birdman started out making wingsuits in 1999, at a time when the wingsuit manufacturer market was extremely small - in fact, Birdman is generally recognized as one of the first wingsuit manufacturing companies. They released the BirdMan s.u.i.t in '99, as their first commercial wingsuit. The year after that they released both the BirdMan GTi and the Classic. In 2001 they continued the new lines with the BM SkyFlyer and the Classic II being released. A year later they expanded into tracking pants, releasing the Birdman Tracking Pantz. In 2003 the SkyFlyer and S.3 were released, followed up in 2004 by the Phi. 2005 saw the release of the quite popular Firebird and Firebird-R wingsuits. Between 2006 and 2009, Birdman released several more suits including both the Blade and the Blade II in 2007 and 2009 respectively.

    By admin, in Gear,

0