0

Disciplines

    Indoors Outdoors - Translating Between The Tunnel & The Sky (Part 2)

    Of all the basic orientations and body positions available, good old sitfly is the one that changes the most between indoor and outdoor flying. If you have done any head up training in a tunnel, your coach will very likely have been hitting you over the head from the very beginning about how you need to use your back more and your arms less. Learning to freefly is about understanding how each and every surface of your body can be presented to the wind in different ways that work together to create lift and drive. Your back is the biggest single surface that you have - and as such knowing how to use it properly and from early on not only makes flying head up easier on every other surface you use, it feeds into many, many other skills.
    Head Up Is Cool
    Just a mere handful of years ago it was much more common that sitfly abilities were seen as another frustrating speed bump on the way to ‘getting head down’ - and as with belly and backfly only the minimum possible understanding and skill development was needed (or tolerated) before you do the ‘proper flying’ that was cool and not lame. In no small part thanks to the macroscopic nature of modern tunnel training people now seem to mostly accept and understand that the path to improving as a flyer is one that embraces good foundational skills that cover all the orientations properly. The ways that programming your body via repetition to understand movement and build both confidence and awareness have such a strong symbiotic relationship that the better you are at one thing, the easier it is to learn another.

     
    Even a well fitting harness might develop space that can hinder your movement  
    Being diligent and thorough with something that is comparatively easy will make the harder thing easier and you will get it much quicker.
    Also, some imaginative people did awesome, progressive things with their feet pointing at the ground and as a result we have learned that doing head up flying is as challenging, rewarding and fun as anything else. With bigway records and complex feetsdown angle flying becoming more and more regular - head up has never been more exciting.
    What About My Parachute?
    Herein lies the difference. Your container assembly is made from a really grippy material and from the ass-end is not so aerodynamic. Also, as often as not, when flying head up your body position will generate a little (or a big) space between your back and your rig, exposing more surfaces to the wind that you need to consider. The sum total of these factors is that your rig hampers your ability to use your back to get about the place, and the balance of how you move shifts over to the other surfaces you have available - your arms and legs. When learning to sitfly a good coach will explain and demonstrate exactly how all the surfaces of your body work together and how to safely manage the difference between indoor and outdoor movement. Once you have learned how to do it, using your back for movement in the tunnel is easy peasy. When you put on a parachute and try the same thing while skydiving you will feel like your rig is trying to anchor you on the spot and you must adapt how you fly accordingly.
    Technical Difficulties
    While the following is true of other positions, a good early example of how developing good technique between the tunnel and sky is with sit. The tunnel is an enclosed space in which you need to generate the correct amount of lift with your body to fly and remain in the right place - whereas In the sky there is no net to worry about so strength and diligence with your body position becomes less important to maintain a position.
    There is stability in speed and it is easier on your body to fly fast.

     
    Understanding how to use your limbs important  
    So, in the sky things feel a little looser and jumps tend to fly a little faster. This is great when applying things you have learned in the tube, as once you remember to be subtle you will have it nailed to the wall - but it is important to be aware that the same adaptation in reverse means it is easy to develop sloppiness and wind up battling with inefficient and tiring technique when you go back inside. The way to avoid this is always consider your body position as part of your pre and post jump process. When running through the plan in your brain, picture yourself flying in a proud, efficient position and break down the movements you are aiming for into each surface you will bring to bear on the wind. Afterwards, include analysis of not only what you did, but of how you did it as part of your personal de-brief. if there is video of the jump go through it frame by frame and deconstruct exactly what is happening with your body and how the changes you make effect your movement.

    By joelstrickland, in Disciplines,

    Indoors Outdoors - Translating Between The Tunnel & The Sky

    Part One: Where Are We Now?

    Bodyflight has undergone significant evolution over the past few years. There are many tunnels now, with many more on the way - and the very best flying from formalised competitions attracts a great deal of attention from the outside world across the various media that we absorb into our brains every day.
    The techniques used to teach flying skills both indoors and outdoors are myriad and complex.
    Whether you are brand new to flying or a bit further down the road, the amount of information you are required to process during a short time in a stressful environment can be a heavy burden.
    Once you fall down the freefly rabbit hole, flying quickly gets very technical, and although many of the concepts are fairly simple to understand during the briefing - remembering and applying them while you are doing it is a different game.
    Indoor flight has taught us how to squeeze every efficiency from our bodies, gradually trimming the fat from the training process to where a lot can be achieved in a relatively short space of time. However, when new to the mysteries of the tube it can be confounding to watch exactly what coaches are asking their students to perform and be left wondering exactly how the various drills and techniques on display are relevant and applicable to one’s skydiving skills.
    The articles that follow are designed to clarify somewhat how tunnel flying and skydiving crossover with each other and address some of the questions people generally have at the beginning of the training process.

     
    Generic Coaching Disclaimer
     
    While it is certainly possible to learn some useful things from articles such as this, there is no substitute for good quality tuition. A coaching fee on top of what you are already paying for tunnel time or jump tickets will likely make things feel extra spendy, but for the amount it costs to employ someone with both the right knowledge and the means to convey it into your head will get you much further than the equivalent cash thrown at just trying to figure things out for yourself.
    Bodyflight is evolving quickly and expanding into every corner of the world. There are lots of coaches and many different opinions out there as to what exactly is the correct way to teach things. After reading this someone may well trot up to you and pontificate about how much of an unbearable ass I am and that what I say doesn’t count for shit all. Different approaches work for different people - and the more sources of information there are available to you the better equipped you can be to winnow the wheat from the chaff. I am writing from the position of eight years as a tunnel professional and have attempted to structure these words in a way that represents that which people most want to pick my brains about.
    Low Speed, High Speed, and the Follow Me Game
    The driving force behind how things have changed is the space available in which to fly. Some years ago tunnels were mostly smaller in diameter. Learning to fly used to be about getting the wind speed up as soon as could be, and that learning moves on lower speeds was a tedium to be rattled through as quickly as possible until you battled your way to head-down flying.
    As a general rule, tunnels then started getting bigger and as a result people began to discover a couple of very important things. The extra space meant that not only was it possible to present bigger, flatter, more efficient body positions to the wind - you could do so with more than one person (crucially - a coach and a student) at the same time.
    At this point, coaching via leading and following around the tunnel was already a thing, but bringing the format forward to the very beginning of the training process meant that a student could learn more things faster. A coach now had the room to quickly demonstrate something next to the student without more than the very minimum of time consumption and fuss, which is of tangible value in a place where very seconds mean monies, but also when leading and following is added into the process the student would then be approaching all the main concepts of getting shit done in the tunnel from day one.
    Following a coach from one position in the tunnel to another and performing structured moves in the same spot that they do engages the key elements of understanding how dynamic flying works. Not only are you practicing the moves themselves, you are learning lines and programming the management of space into your body, coaxing your awareness outwards to the environment you occupy. Good awareness is just as important for safe flying and a healthy learning curve in the tunnel as it is up in the sky.

     
    Low Speed and High Speed Training
     
    An unsophisticated way to think of the difference between low speed flying and high speed flying is as an indoor and outdoor skill set. In the simplest imaginable terms, low speed training teaches you how to fly all pretty in the tube and high speed training is where you learn skills to be better at skydiving. This is pretty reductive as while these things are not untrue, there is so much more value in understanding exactly where, why and how things cross over. The beautiful part is that the symbiosis between the two ways of doing things is so total that end result is greater than the sum of its parts. If bodyflight has put the hooks in you then chances are you desire to be a good flyer in both the sky and the tube - which is where the benefits really start to show. There are differences between the two environments which reveal themselves the more you learn. Adapting you skills from one place to the other takes a minute and does not happen automatically, but lots of what you learn translates from one environment to the other in valuable ways.
    The chapters that follow each represent one of the main orientations in which we fly - broken down into elements where attention is paid to the similarities and differences between indoor and outdoor zooming, and how to approach transitioning concepts and body positions successfully between the two environments.

    By joelstrickland, in Disciplines,

    Indoors Outdoors - Translating Between The Tunnel & The Sky (Part 3)

    Part Three: Back Flying
    Backflying, in the manner that you learn as the entry point into freefly training in the tunnel, is not something much done up in the sky. Back tracking yes, and transitioning through your back from one place or position to another also yes, but static backfly not so much. Nonetheless, it is a crucial skill for many reasons - not only as a safety position that you can control at any speed, but also to build your awareness and ability with more advanced techniques.
    These days, people understand much better the importance of being able to backfly with confidence. From the perspective of coaches and instructors the resistance to students spending time learning this skill is more manageable than it was not such a long time ago. If you are feeling morbid and have substantial gap in you day, go dig up an old tunnel monkey and set them off about teaching backfly - then watch as their eyes bulge and the veins on their neck stick out.
    Investing in you backfly skills now will save you a lot of time and money later.
    The ways in which this orientation sets you up for strong progression are important and various. Not only is it your rescue position when practicing high speed drills in the tunnel, it is the jumping off point for understanding carving, how to build your back tracking and angle flying skills, and develop your awareness when switching between head up and head down.
    How Does Back Carving Work?
    Carving all works in the same way regardless of which way, which way up, or on which side you are approaching it:
    The combination of a drive and a turn creates a carve.
    If you just drive in a straight line with no turn then you fly straight into the wall. If you just turn and don’t drive at all then you spin on the spot. The balance between these two inputs dictates the size of the carve. Ok, so now jump back to just driving and not turning - when learning to carve hitting the wall is not your goal, but what if there is no wall to hit? The surfaces you use to control your speed and pitch are the same wether you are going around in a circle or in a straight line, so the muscle memory and technique you develop while learning to carve in the tunnel is immediately applicable to your angle jumps. Hooray!


    Orientation and Awareness
    So much of learning how to fly is teaching your brain and your body to do the opposite of what it is naturally programmed to do. Slow is fast, left is right, up is down. When practicing moves that are initially complicated and difficult, it can be very challenging to consider any other factors than simply getting to body position right. As your skills grow so does your ability to process more information - such as where you are, where anyone else is, where you have just come from and where you are going.
    Awareness drills that you can practice early on help greatly toward overwriting your brain with the correct information about which inputs move you in which direction.
    For example, transitioning from head up to head down while facing the same way switches the direction of you whole body - shoulders, head, eyes, brain - everything that was on your left side is now on your right side and vice versa. Without training your body to understand how this effects movement and swap things around accordingly, you will find yourself going the wrong way because it feels correct to go the wrong way.

    Building your understanding of how, why and when to switch direction is a vital part of moving around safely and with purpose while freeflying.
    So start now. When you are flying on your back looking down across your chest towards your feet you are in a head up position. When you are flying on your back with your chin up as far as it will go, your eyes pointing backwards and the top of you head down towards the net you are in a head down position. It does not matter that your body remains horizontal - for all intents and purposes you brain is learning the differences between the two. When you move on to higher wind speeds and and positions that are tougher on both your body and attention, having been aware of how this works from the start and including it in your training will help a lot with how fast you move on.
    So, right from the start there are things you can do in the tunnel that will improve your skydiving. Learning to freefly properly is something that requires attention to detail and practicing backfly skills on low wind speeds in no way diminishes the rate at which you learn.


    By joelstrickland, in Disciplines,

    Indoors Outdoors - Translating Between The Tunnel & The Sky (Part 6)

    Part Six: Wrapping Things Up
    Before you have invested the considerable time and effort to persuade your brain how to understand freefly properly it can all feel rather difficult. Witnessing highly accomplished flying in both the sky and the tunnel appears akin to magic, and the road to being able to do all that stuff yourself can seem very long indeed. However - the key to mastering the necessary skills is about breaking down complicated positions and challenging movements into manageable, digestible elements. As you learn you will start to recognise moves that you can do as being pieces of the overall puzzle - building blocks that you can assemble in a variety of ways to achieve different results.
    Without proper guidance it can be difficult to take on board the amount of themes and concepts you are required to grasp, so hopefully this series of articles has offered up some insight into the methodology behind the ways we train. To get the most from your sessions with a coach it is important to not only understand what to do and how do it, but furthermore why you are doing it.
    Now that we have looked at the individual body positions, here are some general tips to help with progression:
    Slow Is Fast - The importance of being able to control your speed cannot be overstated. Mastery of a move is not the ability to do it fast but the ability to do the opposite - the slower you can do something the more your body is registering exactly what is happening with the surfaces you are using for control and the easier it is to inter the correct technique in your muscle memory. Low speed training is a very useful way to develop good technique as you must apply more of your body to the wind in order to make the positions work. Once you have practiced something enough the good technique should transfer though to higher speeds in the tube and on your skydives. Zoom!
    Range - This begins with being able to do things as slowly as possible. Zooming flat out is no good if you cannot get there and back safely, and merely being able to go fast does not count as having mastered something. Being able to apply and remove speed with precision means you truly understand how the mechanics of how something really works.
    Less Is More - The most efficient way to fly you body is to use all of it a little bit, rather than one part of it a lot. At the start of training a particular move or position the inputs might be exaggerated to emphasise the effect they have, but as you improve and work through the drills the goal is to use your body as effectively as possible. Pay attention to the very best flyers to see how conservative they are with the energy they expend in the tunnel. Aim to be as economical with your movements as you can.
    Personal Goals - The only person you are trying to be better than is you. Learning to freefly properly takes a lot of time and effort and money. Everybody went through the same steps and recognises the same frustrations - some things you will get relatively quickly, whereas other will take more time. It can be inspiring to watch people that have been flying for years but also very frustrating. Try not to focus your too much on the huge goals - it is important to remember that every small step forwards is of equal value as they are what adds up the the whole.
    Fill the Gaps - Being a truly good flyer is about breadth and depth. Try to resist letting your skillset lead you off by the nose in a single direction - instead use the training time and resources you have available to build your skills evenly. You may well be able to zoom like a motherfucker in a single position and a single direction, but once it gets like that it is all you are ever going to want to do at the expense of everything else. If this is already you then don’t think that revisiting weak areas is ‘going backwards’ - filling in any gaps in your abilities to bring them level is very much moving forwards. All the pieces matter.
    “Keep it loose. But keep it tight.” - James Brown

    By admin, in Disciplines,

    Useful Training for BASE, Right There on the Dropzone

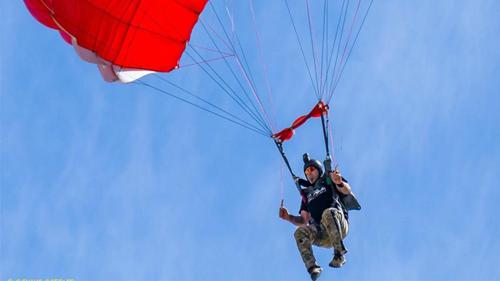
    Courtesy Apex BASE: Pascal Constantineau flying his FLiK at Skydive Perris during his BASE canopy course with Dimitrije Dadic. (Of note: Square1 offers discounted rental rigs to people taking Dimitrije’s BASE canopy courses.)
    If you’re like most people, your idea of dropzone training for the stresses of the BASE environment involves trying to look nonchalant when you climb into a hot-air balloon basket. If you have no access to such a thing (and/or if you’re significantly smarter than the average bear) you’re probably looking for more. You know you need a way to get as many jumps under your belt as possible with your BASE parachute proudly overhead--preferably, with a reserve on standby. But how?
    “Skydiving your BASE canopy is by far the best way to learn canopy skills for BASE jumping before making a BASE jump,” says Steve Doherty, who served as Director of Operations of Apex BASE for five years. “In a perfect world, everyone would be able to jump their BASE canopy skydiving--a lot--before they ever took it out on a BASE jump.”
    Ideally, if you’re serious about this, you’re not just swapping gear willy-nilly on every dropzone day. You have a dedicated skydiving system, configured for the purpose. Here’s how to build it.
    The Canopy
    “It's only with the introduction of ultralight canopies that jumping BASE canopies at the dropzone has become a possible and useful activity,” he continues. “Anything you can use in the BASE environment, you can use in the skydiving environment--of course, in the skydiving environment, you have to manage your opening speed.”
    “If you take your whole BASE setup: mesh slider, BASE bridle and BASE pilot chute, you're going to have a very brisk skydiving opening,” he adds. “In our collective experience at Apex, we found that you can make two or three slider-up skydives on this kind of setup in a day and it's okay. If you were going to make five to ten, you need to start making modifications.”
    As any seasoned BASE jumper will tell you, nothing flies quite like an actual BASE canopy--so the goal is to get as close to it as possible. Athletes who want to train BASE canopy skills should choose an ultralight canopy and seek a skydiving container that fits it.
    That said: Athletes who want to get into flying a wingsuit with the intention of BASE jumping but don’t want to jump a BASE-sized canopy for all their wingsuit skydiving training now have some options.“On today’s market, you can find seven-cell, BASE-type canopies created for the skydiving environment. The benefit is that--while these canopies do have some of the distinctive BASE properties--you can jump all day and not feel it when you wake up the next morning.
    The Risers
    Forward-facing risers are more appropriate in the skydiving environment for a simple reason: the possibility of a horseshoe malfunction. During a horseshoe malfunction, forward-facing risers are the only type that you can reliably cut away.
    “During a horseshoe malfunction with rear-facing risers,” Doherty notes, “Your body will be in the way of the twisting movement that the three-rings need to do in order to release. So, when you’re jumping a two-parachute system, we always recommend jumping forward-facing risers.”
    The Container
    As you’ve certainly noticed by now: Apart from student gear, most of the containers available for sport use won't fit BASE canopies. According to Apex, the best way around that is to jump an ultra-light parachute. (Take, for instance, the Lobo: a 250 can pack up to the size of a skydiving 180.)
    “More and more drop zones are coming around to the idea of BASE jumping,” Doherty continues, “That is to say: Not assuming that it’s attracting bad publicity to the sport of skydiving. Nowadays, they're more willing to let their student gear be used. Here in Southern California, we suggest going to Square One. They have a huge selection of demo equipment, so it’s relatively easy to get the largest demo container they have and pack into it the largest BASE canopy that fits.”
    Most drop zones have a container that's sized for a 180/200. The Apex team have, however, not been able to find a non-tandem or -military container able to fit anything bigger than a 300+ made from F-111 fabric. (UltraLite PN-9 is a different story, and large canopies are more easily accommodated.)
    The D-Bag
    Talk to your local CReW dogs: You don't have to use a deployment bag when you skydive.
    “You can free-pack your BASE canopy into a properly-sized skydiving container, just like you do in your BASE container,” he says, “except the rectangle is a lot smaller, so you’ll have to stack it up.”
    If that sounds a little unnerving, ask for help. Doherty notes that a lot of the older generations of CReW skydivers are quite familiar with that deployment method, so ask them for advice.
    If you do use a D-bag, he insists that you’re using it correctly. Take note of what BASE canopy you're using. Not all BASE manufacturers use a metal ring at the top of the parachute. Some do use a metal ring, just like you'd find on a skydiving canopy. The Blackjack and Ace canopies built by Asylum also use a metal ring. Atair doesn't. And Apex doesn’t, either. To get this right, use a metal connect link to prevent the canopy from getting sucked up into the grommet of the bag. (Very importantly, the link needs to be inside the bag.)
    The Pilot Chute
    You are going to want to use a slightly larger pilot chute for a BASE canopy than you would if you were jumping a skydiving canopy, because the BASE canopy itself is much larger.
    “You don't need to use the same-sized pilot chute that you use in the BASE environment,” Doherty notes, “We recommend a 32" non-collapsible pilot chute for skydiving. It's much larger than a sky pilot chute, which is typically 28 inches.”
    The Bridle“We typically use a longer bridle in BASE jumping,” Doherty says. “You don't need to take the BASE bridle over to make the BASE canopy work. You'd want to use the bridle that was appropriate for whatever discipline you were doing in skydiving. We recommend using a normal skydiving bridle for normal skydiving freefalls. If you’re wingsuiting, we recommend using whatever bridle length you'd normally use for wingsuiting in the BASE environment.”
    The Slider
    You can use a mesh slider, but it’s not ideal.
    “In BASE, we’re so close to the ground that we tolerate--even welcome--brisk openings,” Doherty says. “But if you make five jumps on a mesh slider at terminal, you’re going to feel it. You won’t regret using a sail slider in the skydiving environment. That said: If you’re making hop-and-pops, a mesh slider is not a problem.”
    The Jumps
    Once you’re all geared up, there’s only one place to go: Up. And when you get there, you’ll have a few more things to think about.
    “When you're jumping a BASE canopy on the dropzone, you have to think about where you're going to be in the pattern,” Doherty advises. “You're jumping a parachute that's much larger than the other parachutes around you and you're going to descend a lot slower. Especially at large dropzones where they’re flying multiple aircraft and doing multiple load drops over the same area, this can get problematic. Stay out of the way.”
    The Mentality
    If you have access to a candy-colored, fire-powered dead-air machine, then by all means use it--but don’t rely on them as the sole training platform for your BASE-jumping skills. Commit to fine-tuning your BASE canopy skills (and that impossible-to-exaggerate-the-importance-of accuracy) before and between jumps from objects. Your bones, your friends and your family will thank you. And--as always--talk to your mentor and/or gear manufacturer to clarify any points that leave you unclear.

    By admin, in Disciplines,

    The Future of Wingsuiting:

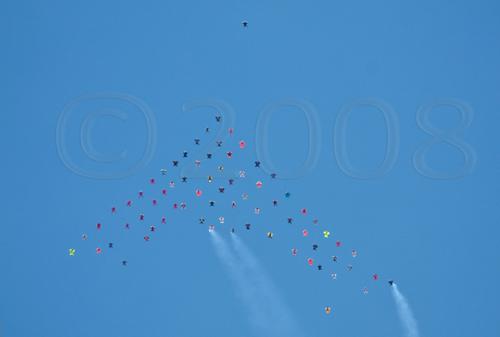
    In November 2008, 71 wingsuit pilots flew in a stealth-bomber-shaped formation over Skydive Elsinore.
    It was the largest slot-specific formation in the short history of this emerging
    discipline. But how did the event, which was billed as a “Wingsuit World
    Record,” change the future of wingsuit flying (if at all)? In a discipline still
    unrecognized by the FAI and the Guinness Book of World Records, what does it
    mean to try setting new standards?
    71: Achievement and Frustration
    The idea of a big-way wingsuit record was not new. The most notable previous
    event was in Cochstedt, Germany in July 2006. Organizers there sought Guinness
    recognition for the largest number of wingsuits exiting on a single jump run,
    out of an Antonov 72.
    In contrast, the 2008 71-way at Skydive Elsinore was a purely invitational event
    focused on slot-specific flying in a four-plane formation. A diverse
    international team reflected a worldwide growth in the discipline and a global
    desire to achieve something recognizable within our sport. Hailing from as far
    as South Africa and Russia, participants from 14 countries qualified for a
    chance to fly in the big-way by demonstrating their skills at official camps and
    through a referral system. Five were women (the few, the proud, the only gender
    not to have a single member axed from her slot!).
    The skydiving press (the French

    ParaMag, British

    Skydive The Mag and American

    Parachutist, among others) extensively documented the event.
    The 71-way marked significant achievements as well as frustration. In the
    achievements column, the team flew a new, wider spacing that reduced oscillation
    and movement within the unlinked formation. This led to multiple smooth and
    on-level jumps that looked beautiful from the ground.
    The previous slot-specific record recognized within the wingsuit community was a
    16-way diamond. Like that formation, most small groups had employed a
    “head-to-foot” spacing technique that encouraged proximity but usually resulted
    in trailing flyers at the back and reactive vertical motion within the flock.
    The scope and level of organizing, while it left much room for improvement, was
    also a check in the achievements column. While there was some initial grumbling
    about the level of seriousness and the pushing of safety standards in
    communications to team members prior to the event, most participants expressed
    relief that the 71-way jumps would be a focused record attempt and not “just
    another boogie”.
    Frustration arose when it came time to judge whether the group had succeeded in
    setting a “world record”. The initial goal was to have each wingsuit pilot
    flying within three-square-meter boxes arranged in a grid that would be
    superimposed over still photographs of the formation. The organizers’
    proclamation of success was based on a photograph where all flyers were either
    fully within or touching at least one edge of their three-square-meter grid
    square. However, without an outside judging structure, heated discussions
    escalated the meaning of “success” and the best way of judging unlinked
    formations into a full-throttle debate.
    Beyond R&D;: 100 over Elsinore
    The debate about how to judge large wingsuit formations will continue unabated
    until an outside governing body agrees to recognize one set of objective
    criteria. The 71-way was destined to be a “work in progress” since it had never
    been done before. With the lessons learned from the experience, an expanded
    organizing team is preparing for a 100-way wingsuit event at Skydive Elsinore
    from November 7th to November 13th, 2009.
    While some ask whether trying to set records before there are established
    categories is futile, skydiving is not a sport that waits for mainstream
    approval in order to change and grow. Wingsuiting is an especially
    entrepreneurial and fast-growing subculture. The hope is to continue safely
    demonstrating what is possible. In doing so, organizers strive to create events
    that excite new skydivers and unite those already committed to wingsuit flight.
    Armed with evidence from last year’s judging attempts, big-way organizers are
    prepared to continue lobbying both the FAI and Guinness.
    The 100-way five aircraft formation is invitational. Skills camps are planned
    between now and July, when official qualifying events begin. A specific Skills
    Checklist sets out minimum jump requirements and what exit, flying, and canopy
    skills potential participants need to practice and perfect in order to gain a
    spot on the team. For more specific information about the 2009 Wingsuit 100-way,
    go to www.wingsuitworldrecord.com.
    Numbers and Recognition
    Official recognition of wingsuit flight as a skydiving discipline will bring a
    clear judging regime – and therefore, is ultimately necessary for long-term
    growth. Competition drives our sport, and desire to achieve recognizable goals
    is at the heart of every team. Whether with the versatility and creativity of
    vertical relative work or the sheer size of the formation World Team, standards
    and rules (some made to be broken) compel excellence and progress.
    In the current vacuum, setting new standards and claiming achievements without
    official rules is difficult but necessary. The 71-way, for all its
    imperfections, spurred the wingsuiting community to more seriously consider how
    it wants to be judged. It also demonstrated that such events have the potential
    to recruit serious sponsorship and interest from both new skydivers and
    experienced jumpers in other disciplines. That’s the future.

    By Deleted, in Disciplines,

    Wingsuit Gear Check

    Whether you jump at a large dropzone or a small one, you’ve
    probably shared a ride to altitude with a wingsuiter. Like all skydivers,
    wingsuiters should receive a thorough gear check, but a wingsuit also creates
    unique concerns that a watchful eye can catch.  Regardless of experience level,
    it’s possible to make a mistake while gearing up with a wingsuit – in the same
    way that its possible for any of us to make a mistake while gearing up for a
    traditional skydive. This is a situation where your vigilance can save a fellow
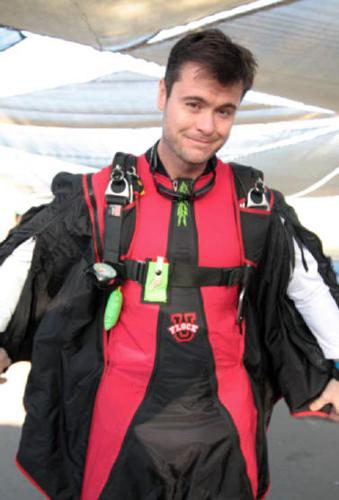
    skydiver’s life. Here are a few recommendations that Flock U has for gear
    checks:
    A wingsuit skydiver is a skydiver first and a wingsuiter
    second – you will need to check his or her rig, chest strap, altimeter,
    goggles, etc. in the same way that you would with any other skydiver.
    Make sure that the jumper’s AAD is on (if he or she is jumping with one). Pay
    particular attention to the jumper’s cutaway and reserve handles. While a
    wingsuiter’s emergency procedures aren’t any different than a traditional
    skydiver’s, in some suits, handles can become pulled into or obstructed by the
    fabric of the suit. That can result in a dangerous surprise if a cutaway or
    reserve pull becomes necessary.
    After inspecting the rig, examine the wingsuiter’s arm
    wings – and in particular, examine the connection between the wing and the
    jumper’s torso. There’s unfortunately no “one size fits all” rule for arm wing
    inspection, as different wingsuit designs have different wing configurations. 
    That being the case, there are several general categories of wing/torso
    connections that each raise their own concerns:
    Cable Thread Systems. Cable Thread Systems consist of a cutaway-style
    cable that runs through alternating torso and wing tabs, which keep the wing
    attached to the torso.  By pulling on the cutaway cables, the wingsuiter can
    release the arms of the suit in an emergency. This design can generally be found
    in BirdMan brand suits, among others. For a Cable Thread Systesm, look to see if
    the cables are threaded correctly through the tabs, all the way up. In some
    cases, they will alternate evenly between wing and torso, but often the cable
    will intentionally be threaded to skip one or more tabs. Don’t hesitate to ask
    the wingsuiter if you’re not sure – even experienced wingsuiters may not know
    the proper configuration for suits that they haven’t flown before, and some
    wingsuiters have preferences for arranging these tabs that differ from the
    standard. Make sure the wing cutaway handles are properly secured in a Velcro
    or tuck-tab housing. Note that there’s often both a front and a rear cable on
    these systems - so check both, on both wings.
    Zipper Attachment Systems. Zipper Attachment Systems are found
    primarily on Tonysuit, Phoenix Fly and S-fly brand suits, though there are many
    different suit designs on the market that use one form or another of the Zipper
    Attachment System. These systems generally come in two types: “over the
    shoulder zippers” and “bottom of wing” zipper attachments.
    “Over the shoulder zippers” are what their name implies – a zipper that runs
    over the wingsuiter’s shoulder, which connects the wing to the torso.
    Generally, in this design, the wing isn’t detached from the torso even in an
    emergency, and the “over the shoulder” zipper is usually only unzipped if the
    wingsuiter is removing the suit from his or her rig while on the ground. In
    these models, there’s generally a Velcro breakaway or other cutaway system or a
    safety sleeve (described below). Look to see if the zipper is attached properly
    and zipped all the way down. Some wingsuiters will intentionally leave several
    inches of the zipper unzipped in the back, so ask before correcting a slightly
    unzipped wing! If the over the shoulder zipper design includes a Velcro
    breakaway system, check to make sure the Velcro “sandwich” is holding the top
    and bottom of the wing together and that the Velcro isn’t bunched or pinched –
    these gaps can widen when the wing encounters the relative wind.
    Newer Tonysuits brand model have a “safety sleeve” – a ZP liner – that allows
    the armwing to silde up the jumper’s arm, permitting the wingsuiter to reach
    canopy controls in an emergency. As a result, there’s no arm wing cutaway
    system to inspect. When looking at these suits, make sure that the arm zipper –
    the zipper that runs from the jumper’s shoulder to his or her wrist – is fully
    zipped. There will generally be a snap or tuck tab on the bottom of the wing;
    check to see if they are properly stowed.
    While inspecting the arm wing, check the wingsuiter’s
    wrist-mount altimeter (if he or she is jumping with one). Make sure that the
    jumper can release his or her wings without undoing the wrist-mount (which
    can happen, for example, if the wrist-mount is put on after the arm wing is
    zipped up in wingsuit designs with a thumb loop). This is a dangerous and
    easily avoidable method of losing a wrist-mount altimeter!
    Check to make sure the wingsuiter’s legstraps are on. Leg
    straps can be missed by wingsuiters while gearing up, as the suits tends to
    restrict motion and prevent the jumper from seeing his or her legstraps. Even
    highly experienced wingsuiters have admitted to momentarily forgetting leg
    straps while gearing up. When using a wingsuit, visual inspection is
    insufficient to make sure that the leg straps are on – the wingsuit can
    deceptively pull the strap against the leg, making it appear that the strap is
    on. Ask the wingsuiter to shrug – the jumper should feel the resistance in the
    harness created by tightly worn leg straps. Alternately, you can lift the
    bottom of the wingsuiter’s rig (in other words, under the pilot chute). If the
    rig moves more than a couple of inches, it’s not secure enough.
    Each leg of a Tonysuits brand wingsuits also has a leg
    zipper pull up system, which is basically a bridle that connects to the leg wing
    zipper. The bridle is stowed against the leg by Velcro or tuck tabs. Also
    incorporated in this design is a pair of magnets that keep the bottom of the
    wing together. These magnets must go over the zip pull ups. If they are under
    the zip pull up, they may jam under canopy.
    Are the wingsuiter’s booties on? Particularly when the wingsuiter is using a
    borrowed or rental suit, booties may be ill-fitting. Badly fitted and poorly
    positioned booties can result in a lost bootie, which can make for an incredibly
    difficult flight and dangerous canopy deployment. Check to make sure the bootie
    is on, and straight.
    Help to make this year a safer year for skydiving by
    looking out for your fellow jumpers. Making it a habit to look at others’ gear
    can only result in positive results. Save someone’s life this year - it could
    be yours!
    A free, downloadable
    wingsuit pincheck file can be found on our site at
    www.flockuniversity.org. This
    pincheck guide is perfect for printing for Safety Day or for putting on the wall
    near manifest.
    Thanks to Jeff Donahue and Andreea Olea for their help in this article. All photos courtesy DSE.

    By Deleted, in Disciplines,

    Headdown - Everybody wants to learn!

    The winter is coming and you’re thinking about where you're going to jump to clear your winter doldrums. When you get to where you want to jump, everybody needs to freshen up their skills, maybe learn some new ones. One of the most popular skills to learn is Headdown. As a coach I have seen a lot of ways to learn the position. Some people, if you manually stick them in the position and hold them there, will learn it in a few jumps. Other fliers don't have it so easy. Well this article is for you!
    We will learn what to concentrate on in the Headdown position, but more importantly how to work around the problem with other skills, which I think contribute and can sculpt the Headdown position. These skills being back flying, flat back tracking and flat belly tracking.


    Headdown
    Headdown is probably the most technical of the freefly positions. It requires balance, skill, strength, and a refined technique. I teach the straddle position first, because it is easier to balance and conceptualize early on. You should have your head, shoulders, hips, and ankles completely in line. Your head should be pointing straight towards the Earth with your field of view consisting of the horizon with a half sky/half ground ratio.
    People who fly on their bellies a lot usually have a huge arch in their torso, which causes them to go to a back track, or belly track (we will get to how that is important later). Others usually have a kink in their hip so their shoulders and head are in one plane and their hips and ankles in another plane. This causes a steep track on their belly.
    Most of the concentration, once you have acquired the skill of keeping your body all in one plane, should be concentrated on the hips, legs and feet. First, You should have tension in your butt so you are straight, this can fix the hinged at the hip problem addressed above. Second, you should squeeze your quads taught so they push outwards, but remain in the same plane as everything else and keep the full extent of your leg straight. Third, you should have your toes flexed up towards your head. Picture yourself hanging from a bar upside down by your feet. You should feel air on your toes when you get it right. Pressure should be felt on your toes much like someone standing on your feet.
    Once you have the straddle position, the progression calls for 360 turns both ways, forward and backward motion, and then docks.
    We won't get into the technique of daffy Headdown, but it is extremely useful to slow down, fly in the tunnel with the lower speeds, and for heavier people to fly with others.

    Back Fly
    People often ask why they need to learn to fly on their back. The answer is simple. Headdown is a balance between flying on your back and on your belly. When the Headdown position is correct, no wind should be felt on your back or belly. This position requires the awareness of air being on your back or belly, so you can achieve no air on the torso. Since most people can fly on there belly relatively well, then it is imperative for you to learn how to fly on your back to acquire the Headdown position.
    The back fly position can be attained in the tunnel first, because it is much safer. Start on the grate. Relax your torso so it is convex. Put your hands above your head, and relax them. Do not push down towards the grate unless you want to slow down, or go up! Let your head relax and sit in line with your torso, while looking straight above. Keep your hips 90 degrees just like sitting in a chair. Keep your legs wide for stability.
    Back fly also has many everyday uses. Flying with tandems on your back is not only fun, but honestly the best video angle. When you are flying with an inexperienced sit flier and they cork you can match their speed on your back, until they can get vertical again. Lastly, you can use back fly to fly with relative workers, or once again get an interesting camera angle from below.
    Two words of caution! First, tighten up your rig when you fly on your back because the rig tends to shift from the wind below and can turn you. Second, I do not recommend flying on your back with other people unless you can competently fly in the wind tunnel on your back with a coach, as not to cause a huge difference in speed and thus a high speed collision.

    Tracking
    When first learning the Headdown position people either track towards the coach or away. I think it is very useful to learn to flat track on your belly and back. If you learn to fly both positions well with a coach, then control of the Headdown position is easier.
    Belly flat tracking is a little different than the steep track taught in the majority of AFF programs. A flat track has the ankles, hips and shoulders all in one plane.
    The progression suggests to learn to turn left and right, adjust your fall rate with your torso, and finally increase your speed with your legs. Turn left and right with your arms first as to make the adjustment slow. Then start to adjust the trim of your body for more powerful turns. Adjust your fall rate in tracking by arching to go down, and cupping with your torso to go up. Lastly, squeeze your quads tight for speed.
    Back tracking is fun and challenging. It can be used in Headdown, to track up to formations and to close huge distances. Make sure to slow down well before you reach your target.
    The first problem most people have when they back track is they have a kink at the hip. This creates more of a back fly rather than a track. Squeeze your butt, or push your hips forward to get flat. To gain more speed, put your legs together and press your ankles down slightly.
    With all these positions and abilities under your belt, Headdown will be easier to learn. The awareness and skills you learn from these alternate positions can in the end help you conquer Headdown.
    Remember, try to freshen up with a coach and in the tunnel before you start flying with other people. Headdown, along with these other positions is never easy, but persistence mixed with awareness and the right guidance always pays off.
    Swoop high, don't lag on jump run, and pack your instructor's parachute. Later!
    The New School Fligh University Web Site
    Steven Blincoe is the founder of The New School Flight University in Lake Wales, Florida. He has 4,000 jumps total and 300 hours of Skyventure Orlando wind tunnel time. If you would like to contact him you can at blincoe.org, or 530-412-2078.

    By admin, in Disciplines,

    The Challenge of 10-Way

    Remember when you were a student? Most of us couldn't exit a plane to save our lives (or pass a level), the skydive seemed so short yet so full of things to do, and when it was over we had this nagging feeling of, "If only there was more time!" Welcome to 10-way.
    If you're an accomplished competition formation skydiver, then 10-way isn't so tough, just another engineering challenge to meet with a little thought and practice. But for most weekend warriors who usually just jump with their buddies to have fun, funneling exits with varying frequency but not quite sure why, 10-way is an event that makes you feel like a student again. But when you start training for 10-way, like when you were a student, a new world of skydiving challenges opens up to you.
    Not only is it challenging--10-way is also a blast! It's some of the most intense skydiving you'll do, because whatever you do, it's got to be very fast if you're going to be competitive. And you don't have to be a full time skydiver to get good at it. As Roger Nelson, program manager at Skydive Chicago and eight-time 10-way medalist, often said, "10-way is the only discipline at Nationals where you can be a weekend warrior and really compete against the best in the world." For example, Skydive Chicago's STL10 team practiced in the mornings from 7 a.m. to 10 or 11 a.m., stopping to allow jumpmasters and videographers to work for the rest of the day, and still won two gold and two silver medals in four competition years.
    And who knows how low the time can go? "We're building 9.2-second jumps, thinking we're pretty hot, but Roger's saying, 'I think we can do eights…' and we did," remembers Frank Shisler, member of Skydive Chicago STL10 in 2000 and 2002. "It's all about focus and intensity; once you step in your slot behind that line, it's a totally different world." When you're really training for 10-way, you give that exit and skydive every last bit of effort you've got. To excel in 10-way, that's what it takes.
    If you just want to play with this new discipline for fun, well, it lends itself to that too. Not being a World Meet event, it tends to be more casual and the experienced teams more supportive than in some other events.
    This article presents the lessons learned from several years of 10-way experience with a recognized top 10-way team, Skydive Chicago STL10. The concepts explained here are valuable to anyone working on 10-way, and will be most useful for those trying to get past good on their way to great.
    Your Mission Is…
    Your goal for every 10-way formation skydive is to build one correct predetermined formation as fast as possible. There's only one point to remember. In theory, it's the simplest competitive skydiving event out there, with the exception of accuracy--get to the right place as fast as you possibly can (or at least faster than the next team). It's almost a drag race between teams, especially in the later rounds.
    Easy, you say? Not necessarily. To be sure, the "new" rules (which went into effect for the 2002 Nationals and were a screaming success) make things a bit easier than they have been in previous years because they now allow grips out the door. This means that you can launch part or all of the 10-way as a chunk, thus making the exit frame (the position of everyone when the last person exits the door) tighter. Then the early floaters and late divers don't have as far to go to the two unlinked jumpers who form the base, making the completion time shorter.


    The rules require the first two jumpers in the base to be unlinked, which can happen with a grip flash after launching a chunk. So technically, you could launch all 10 together, let go of the base two, then dock the two four-ways on the base if you could manage it.
    By the way, all participants except the camera flyer must be lined up behind a line on the floor for exit--no floaters allowed. This line goes from the forward edge of an Otter door to the rear bulkhead on the right side of the plane. Going over this line starts the clock, even if you are obviously just setting up and not ready to exit, so be careful of it until you are ready to exit.
    You have 35 seconds to build the formation in competition, because a five-second hold time is required within the total working time of 40 seconds. If you take longer than 35 seconds to build the formation, it's a bust and you are awarded the full time of 40 seconds.
    Why 10-Way?
    So what exactly will 10-way do for you? It's not a World Meet event. It won't teach you transitions and vertical hops. You can't practice it in the wind tunnel. But it will teach you all about exit dynamics, subterminal relative work, approaching a formation from above or below, and a respect for team cooperation at least equal to that you get from other disciplines.
    Body position on exit is just the beginning. Since there are no outside floaters in 10-way, the way your body is positioned upon breaking the plane of the door (while driving out the door hard) determines how far you (and anyone behind you) will be from the teammates ahead of you. What you do in that split second determines the outcome of your skydive. Contrary to popular belief, 10-way is not all about diving. The first few people out are dive floaters--they bomb the door, but do so either sideways (with their left sides exiting first) or turning to the right (exiting a Twin Otter) in order to float back up to the base. Between dive floating, setting a base, and diving down to the base, there is a wide range of ideal exit body positions based on the slot in question, and every member of a good team has an understanding of all of them.
    On to subterminal work. When 4-, 8-, and 16-way competitors say the exit is everything, they generally mean that the exit separates the best from the really good. In 10-way, the exit is almost literally everything. From the instant you cross that line inside the plane to the instant the last grip closes is your build time. Just to give you a little perspective, SDC STL 10 averaged a build time of 9.79 seconds for the required six rounds in the 2002 USPA Nationals (which they won). If we assume that we spend 8 seconds "on the hill" before reaching terminal velocity, and that a fast exit might hit 2 seconds on a really good day, that means that a top 10-way dive is completed before hitting terminal velocity. That's what we mean when we say the exit is everything--building a formation that fast requires an ideal exit and a lot of flying skill on the hill.
    Once you're out, if you're not the base, you have to dock on it. Since we're talking about sub-terminal hill work, we have to remember that the plane of the formation is still tilted to some degree relative to the ground. Thus, the floaters approach from below and the divers approach from above--which is quite different from the typical larger-formation picture of approaching on level. Here, level is relative to the plane of the formation, not the horizon. And if you want fast times, you don't have time to hit level a distance out from the formation and approach flat. You need the fastest approach, which is a straight line. Besides, if you're building in sub-terminal air, the base is accelerating--so if you pause a ways out, you're usually hosed.
    Cooperation and consistency among all team members is essential to each member's successful performance and thus that of the team as a whole, perhaps even more so in 10-way than in other competitive disciplines. All it takes is one sidestep by one person early in the lineup to hose the whole skydive by giving everyone else an exit they didn't expect (perhaps even involving the infamous door strikes). In a 35- or 50-second skydive, a bump on exit is much smaller in the grand scheme of things. But if your build time goal is less than one-third the working time of a 4-way jump, every fraction of a second counts. That's why every member of a 10-way team has to be on the same word, not just the same page, in order to succeed.
    "You change one person, you change the whole thing," says Shisler. "If you want to be competitive, you have to put in the practice with the same people in the same slots."
    Also, the cohesiveness and discipline you learn with 10-way will benefit you in any other competitive disciplines you choose.
    You get all of these benefits from doing competitive 10-way, and you get to have fun too! The fun and bonding between team members are the biggest reasons why several teams, like SDC STL, compete together with minimal lineup changes year after year.

    Exit Challenges
    Diving out of a plane solo isn't so tough, but if you want to be in the same time zone as your teammates when you exit for 10-way, some grips are quite helpful. So now you're diving out some number of people as a chunk. That doesn't mean that you have to hold onto them forever--the people just behind the base and the divers behind them generally find that holding on just long enough to ensure proximity through the "snap" on exit is all they need (floaters tend to do best without grips, as dive floating individually is enough work).
    Thus, if you are one of the jumpers with a grip on exit, your hold time and release timing will be engineered through trial and error, and consistency is an absolute requirement. Letting go of only one hand earlier than usual will spin the person you're holding. Letting go of both hands early will leave you and everyone behind you too far away (or the floaters too far away, if you are early in the lineup). Letting go too late might screw up the person you're holding.
    Setting up behind the line is a lot like The Price is Right--you want to be as close as possible without going over. As stated earlier, this starts the clock whether the offending body part is a foot over the line or a head leaning over it. Think of the line as a plane, not just a line on the floor.
    Your exit setup will go through a lot of changes before it settles into one that is good for everyone. Practicing on the ground with rigs is a helpful start, but the actual skydives are the real test. Once you've settled on an effective lineup (Jane's foot here, Bill's knee tucked in just so), stick to it unless you're trying to improve something and you let your teammates know. As previously stated, your exit affects everyone else's--so if you're going to change something, talk about it.


    Movement on exit is another challenge--not everyone can move at the same time. If you're first out and start the clock, be sure that you go at the same point in the count, not leading the GO! one time and going right on it the next. This helps set the timing for the later divers, who have to be leaning in the right direction at the right time to exit with the team without either running people over or getting caught napping and being dragged out the door.
    "You're skydiving from the word 'HOT!' " says Shisler. "A lot of casual teams get out (of the plane), get stable, then get together. You can't do competitive 10-way that way. You have to be flying together from the word HOT! A lot of people don't understand that."
    Also, using the door side of the plane for balance is not allowed under the rules, whether during setup or on exit, though you can use the opposite side. (Note: if you lean on that side of the plane, be sure that no part of your rig is caught on a bench or seat belt bolt. I can tell you from experience that this definitely hampers your exit…) Your balance, which is essential to a good exit, depends on your agility, your teammates' balance, and a smooth jump run.
    Speaking of jump runs, consistent airspeed as well as a smooth flight is essential. When traveling to different drop zones, or even with different pilots at home, we found that changes in airspeed produced noticeable changes in the exit frame. With higher airspeeds, everyone is more separated and the times are longer. With a slower airspeed, everyone notices a steeper exit frame and often a longer build time because of the different angle, despite being closer together. So, basing practice flights on the airspeeds specified in the competition manual (85-95 knots) is a big help to a seriously training team.
    If jumprun is bumpy, your exit will stink. It's guaranteed. Don't be afraid to call a breakdown of the lineup and a go-around if the floor is rocking and rolling, especially in competition.

    Formation Build Challenges
    So now that you're out the door, for most of you it's time to chase the base. You might be tracking uphill with everything you've got, or diving and hoping you can stop without sacrificing a teammate. Either way, aiming for a target when both you and it are on the hill can be tough.
    If you are building a 10-way quickly, in subterminal air, it's a big game of acceleration control--not position control. If you're the base, you try to keep acceleration constant. If you're a floater, you are trying to slow your acceleration and then match the acceleration of the base. If you're a diver, you're accelerating more and then trying to slow--not stop--your acceleration to match that of the base. Matching position with a stationary target isn't so bad, but the acceleration game is a challenge.
    Add to that the fact that you are working in "mushy" subterminal air, and the degree of difficulty rises again. It's a lot harder to make these acceleration changes at this time than it would be in terminal freefall, especially right out the door. Respect the fact that things just don't work quite as well as you want if you're not used to a lot of subterminal maneuvering, and take it easy the first several times. Hitting the base hard can take it out, or it might just change its angle enough to make it cut into or surf on the relative wind more than it was doing before you hit it. This will change the base's position from its normal exit frame, hosing the floaters and divers who haven't docked yet. With a highly practiced team, everyone gets accustomed to a certain exit frame after a certain amount of practice and is already going to that familiar spot on exit rather than waiting to see what the base does. When that spot changes, it messes up things for everyone.
    Of course, at some point everyone has to cross the line in order to figure out just where it is…the takeouts can be spectacular.
    Your vertical approach isn't the only thing that requires a lot of care--you don't want to hit the formation hard on the horizontal plane either. It's essential that the angle of the formation remain the same, ideally where it was planned to be. Large changes in the angle during the build screw up the approaches of everyone who isn't yet docked. When you're approaching the formation on the ragged edge of too fast to stop, it's pretty tough to adjust to an angle change.
    Then, although it's best not to throw off the angle in the first place, it's not necessarily good to quickly fix it either. When time is short and the angle is off, those still approaching are already adjusting their approaches to compensate for the problem. If the base puts the angle back where it was, then those still approaching could be going the wrong way--to the temporary "bad" angle they saw just a second ago. Figuring out how much angle change your team can handle takes a lot of practice and awareness in the base and late floaters/early divers.
    Last, but certainly not least, of the formation build challenges is that of grips. It's easy to snag the first bit of the right arm or leg that comes near you, but it's absolutely vital that you get a solid grip the first time, not just grabbing a fold of a jumpsuit and hoping it will hold. There can be a lot of tension in a fast 10-way build, and you'll surely get a lot of grief if you're the one who lets go.
    Another thing about grips--if you are on the front of the triple diamond, you have no grips. However, if you keep your hands out wide and overlap the hands of the person next to you, it can look like you do--this will look like an incorrect formation. As in the smaller-way RW disciplines, you have to present the formation to the judges correctly in order to get scored. Each slot carries the responsibility for this.
    Slot Specifics
    First of all, the exit is roughly a single file line. Many teams will stack the first couple of people out the door or curve the lineup to shorten its overall length from the door, but the later divers tend to do best when exiting single file so they don't interfere with each other during side-by-side exits. The early slots (usually 1-3 or 4) are the floaters, the middle slots (usually 4 or 5-6) are the base, and the last to exit (usually 7-10) are the divers.
    Floaters--For decades, late divers have had the "glory slots" on larger formations because all eyes were on them as the formation completed. In 10-way, the ideal situation is for the last floater and the last diver to dock at the same time, so there's a lot of healthy competition between the two groups.
    "If you don't get out of the plane in a mode that propels you up, then you're behind the curve and the divers beat you every time," says Ron Olson, four-time 10-way medalist in slots 1 and 2. "You've got to know where your target is--the sooner you spot it and the angle it's coming at you, the quicker you can adjust to where you need to go. You need to be able to cup air and look where you're going at the same time, and go where you look. You're pointing your toes and driving at it hard, then all of a sudden you're level with it, it's coming at you, and you're trying like crazy to stop.
    "The rest of it is looking at the divers and knowing that if you slack off, they'll beat you there," he laughs.
    With a quick build, floaters certainly have to work hard. First they're anchoring in the airplane to stay behind the line even though others might be leaning on them, then they're going up as hard as they can go, then they're stopping as hard as they can and punching out a hard arch to stay with the base as it continues to accelerate. No 10-way slot is for tentative flyers, but the floater slots in particular are best filled by skydivers who know how to get maximum performance out of their bodies--whether it's tracking up hard, slamming on the brakes with your knees almost in your chest, or backsliding in your slot to keep up with the formation sliding down the hill.
    And like divers who need to go fast and stop quickly, floaters benefit from a lighter body type. "Lighter people have a better chance of recovering when they're behind the curve," Olson notes. However, you have to be able to match the base's fall rate when you dock, so if you are so light that you can get to the formation quickly but not stay down with it, you might need weights even if you are a floater.
    Another key to a good floater performance is a consistent base, says Paul Wold, four-time 10-way medalist in slots 2 and 3. "You've got to leave the plane going to your slot on the base, or you're too slow. But you can't leave the plane going to a spot like that unless the base is in the same place every time."
    Base--Just in case you haven't heard the word "consistent" enough yet, "consistent" is the hallmark of jumpers suited for these two slots. The 10-way is "initiated by two unlinked jumpers"--that's you. Your job is to get out of the plane the same way and speed every time, and to set a stable fall rate every time and a stable heading for each formation.
    It sounds like a job for a drop-test dummy, but it isn't. On exit, you might have two or three people hanging on you, so not only are you towing them out as you start the "train," you also get to deal with any of their issues as well as your own. It's your job to fix any problems that arise so that you exit where and as fast as you are supposed to be. Regarding the formation build, as anyone who's done larger formations will tell you, sometimes you have to fight like hell just to stay still when other people are docking on you. And of course, all the effort you put into staying still includes vertical and horizontal force, and it's tougher to fly hard in mushy sub terminal air.
    Base flyers should ideally be skydivers with lots of subterminal maneuvering under their belts, not career-long late divers or super floaters. People who are used to a lot of contact and working towards multiple points (particularly with competition RW teams) tend to have the subterminal flying skill and solidity (sometimes described as "roots in the sky") that these slots really need.
    Solidity means that when someone docks too hard, you can almost instantly adjust to minimize their effects on the rest of the formation. This requires split-second reactions and strong flying skill, the kind an instructor needs when manhandling a creative student. This slot isn't for "delicate" flyers who are easily bumped out of position. Also, the base can't be maxed out in terms of fall rate (slow or fast), because the adjustments could go either way (more on weights later).
    Position isn't just related to fall rate and your spot in the sky, it also involves the right angle for everyone. You'll find that once you get your exit to be fairly consistent, everyone ends up in about the same place relative to each other in the exit frame. So you plan each formation's angle to give everyone the shortest approach to their slots. If the base doesn't set that ideal angle, then everyone has further to go and thus the time is slower. And as previously discussed, maintaining the angles throughout the build is also the job of the base and anyone who has already docked.
    With practice, you develop an image of the exit frame you expect to see, and any significant changes then offer the option of accommodating them. If, for example, a floater flipped on exit and dropped down, you might punch it out a bit to help them out. But you don't want to go all the way to where they ended up, because then you make nine people work to save one. Ideally, you go to a point in between where everyone else goes a little further, and that floater goes a little further, and your time is better than if you went all the way to the floater and made the divers make up the entire distance.
    Divers--Even experienced large-formation divers often get humbled when they switch to a good 10-way team, because much is the same, yet much is different. If you're building a fast 10-way, the divers can't go into a max no-lift dive at all because they'll blow right past the formation (this is the most common mistake). As stated earlier, this is a game of acceleration control, with emphasis on the control.
    It starts with "not listening to the count, but feeling movement and being prepared," says TJ Hine, two-time silver and two-time gold medalist in 10-way with Skydive Chicago STL (TJ has been #9 for the last two years). "You've got to be skydiving from the word 'HOT!' " The right exit for a diver is one where he isn't getting pushed or pulled, instead flowing out the door smoothly behind his teammates with grips on the laterals to maintain proximity out the door.
    Hitting the door is a concern for the later divers, but tends to start earlier in the lineup (such as when someone in the middle or an early diver cuts the corner to the right when exiting). Thus, the divers mainly rely on their teammates to put the train in the middle of the door so that everyone makes it out clean. Shin guards on the front of the shin or the outside of the calf can be quite helpful when working out lineups and exits early in the season.
    Once you're out the door, "The big thing is how you release--you can push people around with the release, but don't hose your teammate," says TJ. "Figure out where the air throws you with your release and don't fight it. Design the formation from there, not from the lineup." For example, Skydive Chicago STL designed formations so that #9 was the last one in, not #10, because #10 (Tommy Shannon) always got thrown past TJ and to his right on the release, in a leapfrog type of move.
    Next is the approach to the base. "The big thing is being aware of the base as fast as possible, not so much the person you're docking on," TJ explains. "Go for your airspace relative to the base." If you chase the person you dock on, then if they are out of place, so are you.
    When slowing down to dock, you might find that swoop cords or baggier suits are quite helpful to a diver. As with floaters, leaner-bodied jumpers have a better time with diver slots; the floaters need to conserve altitude early, while the divers need to do so at the end of the approach to keep from passing the base.
    Also, as with all slots, you have to hang on tight when you get there. "You need death grips on first grip," TJ adds. "The later guys can really put tension on the formation.
    "The faster times are when people don't think, just react," he summarizes.
    Weights and Swoops
    It's well recognized in smaller-way RW disciplines that weights are necessary to equalize fall rates for various team members, and 10-way is no different. Whatever it takes to get all members to a matched mid-range fall rate, whether it's weights for one or a looser suit for another, then that's what should be done.
    For example, as stated earlier, if you're a floater with a small build relative to your teammates, you might still need to wear weights in order to keep up when docking on and flying with the formation. The base might experiment with weights for a time, especially if all floaters or the divers are consistently faster to the base than the opposite group. Weights seem to have a significant effect on the base's initial acceleration out the door, which is what the floaters and divers evaluate for their target position. As previously stated, the fastest times are when the last floaters and divers dock at about the same time, so if one side has an advantage, you have to "handicap" them to get a better overall time.
    As a diver, however, you probably don't want to wear weights unless absolutely necessary to match the formation's fall rate, as they decrease your ability to slow down your dive.
    Regarding slowing the fall rate, remember that major changes in fall rate are the norm for non-base flyers in 10-way. Swoop cords are often used by divers to make the change from fast to slow easier, smoothing their docks. Swoops can be very handy for a diver who needs to stop hard, but make sure that they're not so tight that they restrict your movement. It's not good if they float you up in the formation or keep you from reaching your toggles comfortably.
    Video
    Last but certainly not least of the slots is your (hopefully) dedicated videographer. As SDC STL's 2000-2002 videographer and proprietor of Skycam Productions, Mike Wood, says, "If it's not on video, it never happened."
    What's the most important thing about capturing a fast 10-way on film? "Don't screw up," Mike laughs. "I carried two cameras in competition just in case. There's absolutely no room for error. If a floater or diver goes low, they can fly back up and maybe get a worse score, but not having video gives you a 40 (the maximum score). You have to be there absolutely as quick as possible. If I'm one second behind, it costs the team. You have to be there before the last floaters and divers so you can see the last grip close on video to stop the clock.
    "A lot of people don't take filming 10-way as serious as other disciplines because it's fun," he adds. "But it can be a very competitive thing just like 4-, 8-, and 16-way. It has its own challenges that make that one point very difficult to do fast, as well as filming that one point. With unpracticed teams, it might be 10 seconds before the first two people hook up. With us, it's over by then. There's no time to screw up and fix it. We're shaving tenths of seconds, not 5-10 seconds per jump. Even a 12-second jump is over very fast.
    "To me, the biggest challenge is getting in your own little spot in the sky without hitting the floaters or the divers," Mike continues. "The exit is coming out so fast (with a medal-class 10-way) that you have to jump many times with the same people in order to learn to react to the base's colors. You have to let half the lineup go past you to (be in position to) film the break in the base grips. Then you have to beat the floaters and get up over the top without running into the divers, because now you're close enough to get in their way if you're not careful."
    So what's the procedure for getting the perfect 10-way video? Mike is happy to explain. First, you have to be solid and ready to hang on for awhile on climbout, he says, to allow the team to set up inside. "I usually hook my left foot inside to help hold on, then pull it back when the last guy steps into the lineup," he says. "It helps signal the front guys that the count is coming, too. And you have to know how to angle your head to see the whole line before exit. You want it clearly shown, not on the edge of the frame. But don't put your head in too far--one fill-in videographer learned that lesson when he got his lens peeled off by the first guy out the door.
    "Then on the count, you watch the blur of bodies stream past until the base colors come out," he goes on. "A lot of times, you drop off a little too soon until you get used to your team. I'd slide down the fuselage, not out to the side, since as the floaters hit the door they are immediately spinning around to come back up and it's easy to get in their way. Then you pop up to stay out of the divers' way. You have to get right over the top; if you're too flat, you can't see all the grips.
    "It's not hard so much as practicing with your team a lot to learn where to be and where not to be," he sums up.
    Training Logistical Challenges
    With all the jump mechanics out of the way, you might wonder what could be next? The answer is: Lots! For example, if your team can build a 10-way in under 15 seconds, why go to 13,000 feet? You can do training jumps from a lower altitude, saving time and money, and allowing easy back-to-back loads if the rest of the load is climbing to full altitude. For the last three years, Skydive Chicago STL ended up doing training jumps from 6,000 feet--sometimes as low as 5,200 feet--and still built the planned formation nearly every time.
    However, keep in mind that if you only allow enough altitude for a fast build time, you can't rebuild a funnel--so don't try. A good bet is to plan enough altitude to accommodate your fastest build time plus at least ten seconds to allow a build in spite of a bobble. Besides, you're supposed to hold it for 5 seconds anyway--it's good to get in that habit early.
    Another key is to document your progress--write down your build times on the various formations every time. That way you can see which ones you need to work on, and which ones you can't wait to draw at Nationals.
    Thirdly, we've all heard the old saw about how you play like you practice. Well, that means you have to practice like you'll play, which means practicing all or most of your jumps out of a Twin Otter, as that is the only aircraft used for 10-way at Nationals. Not only do you require a Twin Otter, you also require a Twin Otter flying at the same airspeed (85-95 knots) as are specified in the USPA Skydiver's Competition Manual. It's a good idea to check with drop zones where Nationals have been hosted to see what exact airspeed and power settings have been used in previous meets to ensure consistency between practice and competition.
    The last significant training hurdle is that of over-analyzing the skydives. We all know that each skydive is a little different (or a lot!), but that's easy to forget when you're looking at only 10-second skydives and working towards cookie-cutter consistency. Don't get too bogged down in the particulars of every single skydive--look at your team's performance over a period of time and jumps before you make conclusions about your improvement or backsliding.
    There is certainly a lot of effort, thought, and engineering behind a successful 10-way team. But there is also a lot of camaraderie, friendship, and learning--there has to be for 11 people to keep working towards the common goal of a highly competitive 10-way. Not to mention the pure thrill of achieving a fast time with the simultaneous cooperation and skill of 10 of your closest friends.
    The challenges of navigating the road to top-level competition status, both technical and cooperative, make 10-way competitors better all-around skydivers--who had a blast while they were getting better!

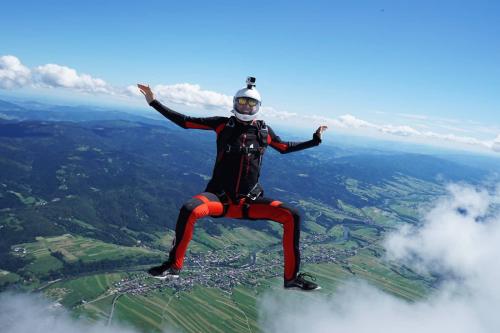
    By admin, in Disciplines,

    An Introduction to Piece Flying on Formation Skydives

    (This article was first published in the August 2004 issue of Parachutist as “One Good Turn Deserves Another”. Since then, the article has been updated and improved.)
    Turning a piece on a formation skydive is not as simple as yanking it around and hoping it will stop where it is supposed to. Jumpers in the piece must help it stay close and level throughout the turn, and they must help their piece partners start and stop the turn without rotating it too far or slamming it into the other piece.
    A piece that is yanked around too fast can rotate too far or even injure somebody. A piece that is not completely turned or turned incorrectly can drift away and actually become harder to control. This article shows the correct (and safe) techniques for turning pieces on recreational RW loads.
    Meet the minimum skill level
    Before jumpers participate in a skydive that involves piece turning, they should meet the requirements for a USPA A license, which means that they can do individual 360-degree turns, dock on another skydiver, maintain eye contact, track, wave off, and pull. In addition, jumpers should be able to dock on small formations such as a 4-way Star.
    Start with partial turns
    Newer jumpers should start with partial turns (180 degrees or less) on small formations. Here is a fun drill. Build a 4-way Open Accordion, break it in the middle, turn the two pieces 180 degrees and re-dock. This puts the jumpers who were on the inside on the outside, and vice versa.
    In this drill, think more about “trading places” with your piece partner than about turning the piece. The piece will automatically rotate if you move to the slot vacated by your piece partner. As you move, try to help place your piece partner in the spot you just vacated, keeping your piece level with the other piece as you do. Repeat the process to place yourselves back in your original slots then repeat the drill until breakoff.

    Move on to 360-degree turns
    Once you can do drills like the one described above, you are ready to move on to 360-degree turns on small formations. A good drill for this is the Zig Zag – Marquis 4-way block.
    A “block” is a two-formation set in which jumpers build the first formation, split into pieces, rotate the pieces then reconnect them to form the second formation. In competition, experienced teams speed up their turns by rotating the end of one piece over the end of the other piece – in essence, reducing a 360-degree turn to 270 degrees or even less. But in this article, we only discuss flat turns because they normally work best on recreational loads where the objective is not speed but smooth level turns.

    In the Zig Zag – Marquis block shown above:
    To start the turn, Jumpers A and B break grips and turn approximately 90 degrees to the right and stop, keeping each other in view over their left shoulder (helps them stay close and level). While this is happening, Jumpers C and D stay put except to extend their arms to let Jumpers A and B move.
    Once Jumpers A and B have moved, Jumpers C and D “trade places”, keeping each other in sight over their left shoulder as they move. When their legs almost touch, they stop, look over the other shoulder (called a “head switch”) and place Jumpers A and B together in the Marquis.
    While Jumpers C and D are finishing their turns, A and B also do a “head switch” and keep each other in view and on level while they are placed together.
    All jumpers should help keep the pieces level throughout the turn.
    Notes:
    To be safe while they trade places, Jumpers C and D do not move directly at each other, but slightly offset so that their legs do not collide.
    Also if they focus on “trading places” rather than spinning their partners around, the pieces are more likely to stay close. The same concepts used for the Zig Zag – Marquis example above can be applied to turning pieces in larger formations. Consider the following example.

    In the 9-way example above:
    Jumper A turns approximately 90 degrees to the right and stops, keeping the other pieces in view over his left shoulder (helps him stay level and close).
    Jumper B moves into the space cleared by Jumper A. At the same time, Jumper C moves into the space vacated by Jumper B.
    As soon as Jumper A feels the piece rotating, he looks over his right shoulder for the other pieces and stays level with them as the turn finishes.
    As the turn finishes, Jumpers B and C place Jumper A back into his original slot.
    All jumpers should help keep the pieces level throughout the turn. Note: Everybody’s initial moves should create enough momentum to keep the piece rotating. If it starts rotating too fast, Jumpers B and C can lower their right knee temporarily to put on the brakes. Similarly, if the piece stops rotating too soon, they can lower their left knee until it starts moving again.
    Rotate pieces on their center points
    To keep the pieces close throughout the turn, each jumper must help the piece rotate on its center point. Jumpers in each piece should watch the other piece over one shoulder as the turn starts, then “head switch” and watch it come back into view over the other shoulder as the turn completes. This helps keep the pieces close and on level and emphasizes the following point: If you keep your target in sight, you will be more likely to fly to it.
    Get the right grips
    In the dirt dive, jumpers should practice the grips they will be taking in the air. This way they won’t be fumbling around for grips when the piece starts turning.
    Also a grip should not hinder a piece partner’s ability to fly. This is especially true of leg grips. Do not grip at or below the knee because this hinders your piece partner’s ability to move his leg. Instead, grip as high as you can on the outside of his thigh so that when he moves his leg your grip doesn’t move much at all.
    Tip! High, outside leg grips also help people with short arm spans to fly when they have Sidebody grips. Sidebody grips consist of an arm and a leg grip on the side of your piece partner. It is much easier to fly if your arms aren’t all stretched out.
    Slow is Fast
    If the pieces drift apart and get on different levels during a turn, jumpers should not try to make up the distance too quickly. They should get the pieces level first then slowly make up the horizontal distance. Slamming the pieces together in a rush can possibly injure somebody or even cause a funnel. At the very least, it creates a wave throughout the formation that must be dealt with before jumpers break for the next point. If jumpers break before the formation settles down, they will more than likely end up on different levels again. It actually takes less time to get the pieces level and fly them smoothly back together than it does to slam them together then have to deal with an unstable formation. As often is the case, slow is fast.
    Give it time
    Like any skydiving technique, learning to turn pieces effectively takes time. Don’t expect to run straight from your A license exam to jumping on the hot RW loads. Practice on small formations first. Do some 4-way; there is no better training tool for learning how to turn pieces.
    With practice, you’ll learn to anticipate your moves and to work with other jumpers in the piece. Piece turning is definitely a group effort and when everybody is working together, it feels like the piece has eyes and a mind of its own as it does a smooth, quick and controlled 360-degree rotation then stops on a dime and makes a perfect re-dock on the other pieces!

    By elightle, in Disciplines,

0