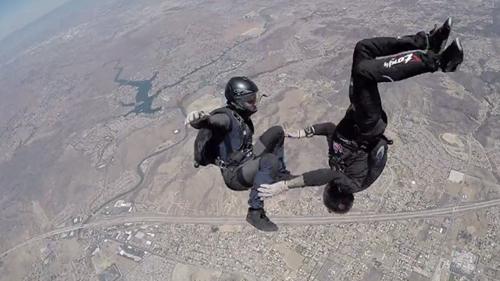
Skysurfing
Skysurfing is a team parachuting discipline, with each team consisting of two athletes: a Skysurfer and a Cameraflyer. The Skysurfer rides a specially designed skyboard during freefall, sliding, spinning, twisting and yes, surfing through the sky. The Cameraflyer records the performance with a helmet-mounted camcorder but also contributes to the performance interactively --and the team's overall score--through his or her own creative and athletic skills.
All Skysurfing performances take place in the four dimensional stadium in the sky called freefall. This is the only place where you can fly your body in all three regular dimensions, up/down, left/right, forward/backward, plus the fourth dimension of relative speed. Not even NASA astronauts get to play in four dimensions. In free fall, you can cheat the boundaries of time and space, but only a minute at a time.
Comparing Skysurfing to other board sports such as snow boarding and skate boarding is a common mistake. About the only shared trait is that all involve some kind of board. The Skysurfer's skills are much more closely related to freestyle skydiving, whose devotees perform gymnastic- and/or ballet-style maneuvers utilizing the aerodynamics created by the "relative wind" the athlete moves through during freefall. Adding a board to the equation, though, is not just a whole other ball game--it's a whole other sport.
By admin, in Disciplines,
Style and Accuracy
More commonly called Style and Accuracy, these disciplines are also referred to as the "Classics." The first skydiving competitions in the first half of the 20th Century involved landing on a target using a parachute, then the Style series was created:
Freefall style is a sequence of six maneuvers performed in the following order: 360-degree turn, 360-degree turn, backloop, 360-degree turn, 360-degree turn, backloop. All four turns and two backloops performed in proper sequence and in the correct direction is called a "series." Each of the four series prescribes different directions for the 360 degree turns.
For Accuracy Landing, a jumper guides his/her canopy to a precision landing on a disc, or electronic pad, with a three-centimeter diameter dead-center target. The object is to get as close to the center as possible. Accuracy landing is also part of the USPA-sanctioned championship event Para-Ski. Para-Ski combines accuracy landing with a giant slalom skiing race.
By admin, in Disciplines,

Getting Into BASE
For BASE jumping information, BASE jumping articles, photos, videos and discussions visit BASEjumper.com
This article was written entirely by Tom Aiello, BASE 579. Tom has made over 500 BASE jumps in the past 30 months, from more than 100 objects. He is not an authority or expert of any kind on BASE jumping or any other type of parachuting, so all his advice should be taken with a grain of salt. Copyright 2002. Permission to reproduce and distribute in this exact form only is hereby granted.
Virtually every time I tell someone that I'm a BASE jumper, their first question is "how could I get into that?" After answering that question dozens of times, I decided to write it all down, so that I can avoid repetition induced laryngitis.
There are as many different ways of getting started BASE jumping as there are jumpers. But, after some soul-searching, some discussion with friends, and some internet research, I've decided that the course I wish I had followed, and the one I've tried to set people on, goes something like this.
Check the Fit
BASE jumping is not for everyone. Give yourself a long hard, look, and decide if BASE really fits you. It's virtually impossible to objectively evaluate yourself, so it might be helpful to have a (close and tactful) friend help you with this step.
Does BASE jumping fit your physical abilities? BASE is not really about personal fitness (although it helps) or athleticism (which only comes into play in advanced sub-disciplines). In BASE, the important physical abilities are reaction time, coordination and balance. Evaluate yours. It may be helpful to ask some of the following questions: If you are sitting at a desk, and knock a pencil off, do you pick it up off the ground, or did you catch it in mid-air? When you spill a bottle of beer, do you have to get up and get a new one, or do you right it before you've lost most of it? How often do you trip or stumble?
Does BASE jumping fit your mindset? The best BASE jumpers are organized to the point of anal retentive. They also have an intellectual curiosity about almost everything. Have you ever wondered how the reserve system on a skydiving rig works? How many times did you trust your life to it before you starting wondering? Are you always trying to find a pull-up cord to close, or do other people ask you for them?
Do you make correct decisions in pressure situations? BASE jumpers need to react quickly, and correctly, in life threatening situations. Have you ever been confronted with an oncoming car in your lane? How did you react? Did you have to think about it, or did it just happen for you?
BASE will best fit a person who is intellectually curious, has good reactions, responds quickly and correctly (without having to think during the emergency), has excellent coordination and is highly organized and detail oriented. You can definitely still be a BASE jumper who has trouble with one or two of these things, but if you are weak in most of these areas, BASE is not a good sport to take up.
Make the Decision
Make absolutely certain BASE is really what you want. This sport is dangerous, sometimes illegal and very addictive. It will take over your life. I would never advise someone to get into it (and I have found it to be the most rewarding experience of my life). In my short time in this sport I've seen two life flight helicopters from the outside, two more from the inside, the back of a police car, several broken bones and a funeral. I've also spent three weeks in Intensive Care and 18 hours in neurosurgery. Are you sure you really want to do this?
There are lots of different reasons to get into BASE, and I have given up trying to decide which are the "right" ones. The important thing is that your reasons are important enough to you to outweigh the potentially enormous costs of BASE jumping. Unless you are a NASCAR driver, BASE is by far the most dangerous thing you will ever do. Statistically, you have something like a 5% chance of dying by the end of your BASE career. Worse, your chance of serious injury (think hospital time) is more like 95%. I know three BASE jumpers with more than 500 jumps who have not spent serious time (more than a day or two) in the hospital due to BASE accidents. Even they agree that it is just a matter of time until they are seriously injured. If you are not ready to die BASE jumping, you are not ready to BASE jump.
Go to this web site: http://juliabell.home.att.net . Read the entire thing. Seriously.
Still want to be a BASE jumper? Then read on...
Do Your Homework
Next you need to find out everything that you can about BASE jumping. Talk to every BASE jumper you can. Read every article you can find about BASE, rigging or weather. Get on the internet and find everything you can about BASE (there is a whole lot more than you'd think). I have included several of my favorite references at the end of this article, but there are many, many more.
Get Your Head Straight
Now that you've made the decision to jump, make sure that you have the right mentality. There are two important pieces of that mentality that will keep you alive in this sport.
Never do anything that doesn't feel right to you. If you're not ready for something, don't do it. We all determine our own learning speeds, and there is no way to know in advance what you'll be comfortable with. Don't be pushed into doing things you're not ready for by overeager partners or teachers.
Never be afraid to back down. It takes far more courage to back off the exit point than to jump. There are definitely times when it is right to back off, and knowing when to heed that little voice in your head is critical to your survival. This sport is very, very serious, and taking it lightly will hurt, maim, or kill you in short order.
The rest of your mentality you'll develop as you go, learning from other jumpers, from experience (both positive and negative) and from the rest of your life.
Tell Your Family
It is the responsibility of every BASE jumper to tell their family that they are involved in BASE, that they understand the risks, and that they have chosen to take those risks.
Sit down with your family and talk to them about BASE. This is obviously an extremely difficult proposition. Facing your family with your decision to engage in a life-threatening activity cannot be easy. However this discussion is important both for you and for the sport of BASE jumping.
An honest, open discussion with your loved ones will make them feel more included in your decisions. They will generally be more impressed with the maturity and thought that has gone into your decision to jump. This can help avoid the arguments, tantrums, and guilt trips that might otherwise be thrown at you by family and friends who don't understand your activities.
An explanation, by you, that you understand and accept the risks involved, will help prevent your family from attacking other members of the BASE community in the event of your injury or death. There have been far too many cases of the families of dead jumpers accusing, confronting, suing and even prosecuting other jumpers as a result of fatalities. Don't let this happen to your friends.
Write a letter to your friends and family, to be opened in the event that you die BASE jumping. In the letter, explain why you have chosen to take up BASE, what you hope to get from BASE jumping, and why you are willing to risk death for it. Give sealed copies to (at the very least) your family and your BASE mentor. Do this to defuse any conflicts that might arise from your death.
Make the Skydives
First, make at least 200 skydives. You need to make these skydives in order to practice accuracy, tracking and canopy control skills. You also need to establish a general comfort level with parachutes, free fall, and split second decisions. The skydivers who are best prepared for BASE generally jump large, 7 cell, F-111 canopies, have had a number of malfunctions and responded correctly, and are comfortable with multiple skydiving disciplines. If your only focus is BASE jumping, don't succumb to the temptation to become canopy swooping freeflyer. Instead, focus on CRW and Accuracy as your skydiving disciplines.
To practice tracking make entire skydives in max track. Don't count on the limited tracking on break off, or on the balanced tracking of a tracking jump. Make the whole dive tracking as hard as you can, with camera and coaching if possible, and work on getting the most lift, and the most drive out of your track.
For accuracy practice, it's best to use the canopy that you intend to BASE jump with. Try to set up low (under 500 feet), to simulate the BASE environment. Don't forget to make approaches cross- and down-wind as well, since you will often have to do this while BASE jumping.
For canopy practice, you should make some CRW jumps (on a CRW canopy) and then do some canopy drills on your intended BASE canopy. CRW is a great way to learn canopy flight characteristics in tight spaces before you get into the BASE environment (and CRW with your BASE canopy is an excellent drill-after you've learned some CRW skills).
Be sure you've made several night jumps during your skydiving career. In many places, BASE jumps are made almost exclusively at night (to avoid arrest, incarceration, and gear confiscation), and comfort with flying and landing your canopy at night is essential to survive these jumps.
Make some jumps on your BASE canopy to learn its performance envelope. Pay particular attention to riser input, practicing riser turns and riser flares. Make sure you practice your riser turns before popping your toggles-that's the way you'll have to do it to avoid smacking the side of a cliff one day. Obviously, you'll want to practice them after grabbing the toggles, as well.
Find a Mentor
While you are learning to skydive, you will doubtless meet skydivers at the drop zone. Try to find and meet the local BASE jumpers as well. Your goal should be to find someone with 200 or more BASE jumps, who you think will be a good teacher, and whom you get along with. You also have to trust them with your life (that is what you will be doing, after all).
Get a BASE Rig
Now, with proper canopy skills and an instructor, you need to find a BASE rig. Your best bet is to buy a new, Velcro closed, BASE specific rig from a major manufacturer, and put a real BASE canopy in it. You can also find good used gear (check the classified ads on the BASE board: www.blincmagazine.com). The key is to get actual BASE specific gear. Lots of people will try to sell you converted skydiving gear (Ravens, Cruiselites, Pegasus's, etc). Avoid this and get real BASE gear. Everyone has different preferences in gear, but the key is to find actual, purpose built, BASE gear.
Take a First Jump Course
So, now you have the pre-requisite skydiving skills, an appropriate rig, and you've found an instructor. Time to go jumping, right?
Wrong. Now it's time to get to work. Before you can make your first jump, you still have to learn basic rigging and packing, dead air exits skills, and simple ethics. There are two ways to do this.
The simplest is to cough up US$1000 or so, and take a first jump course from one of the major gear manufacturers. Since most of us don't have an extra grand to throw around, we tend to try to skip this step. I don't recommend this. It really is worth the money to get qualified, professional instruction. You wouldn't try to make your first skydive without paying for instruction, would you? Even if you had a friend who swore he "knew all about it", and could easily "take you for a jump."
First jump courses are also available from various BASE organizations around the world, such as the Australian BASE Association (which maintains a database of qualified instructors in Australia) and the Norwegian BASE Association (which has classes available at Lysefjord in an attempt to minimize accidents at that popular site). If you have the money, though, my preference would be to take your course from an American manufacturer, as their "teaching object" (a 486' bridge over water, with a huge grassy landing area) is generally the safest for a first time jumper. There is a similar object in Southern Europe, and Robert Pecnik offers a First Jump Course there.
Lots of people try to save some money by getting their friends to "teach" them. This is a bad idea for several reasons. First, you don't know that your friend really has the qualifications to teach. Second, you don't know that he's really motivated to do a thorough job teaching. Sure, he can get you off for that first jump, but what did he teach you about dealing with your unstable launch on jump number 12? Third, you will learn more if your First Jump Course is not taught by the same mentor who guides you through your next 20-50 jumps. Finally, these "informal" first jump courses can drag on for weeks, months, even years. If you contract with a real business, you know the exact dates of your course, and you can plan for it.
Watch Some Video
Now that you have an idea of what a BASE jump ought to look like, get your hands on some BASE video. The best video for this is the "Lemmings Exits" series from Bridge Day (http://www.lemmingsvideo.com/). Try to get several years of "Lemmings Exits", and whatever other BASE video you can find. Watch the video, preferably with your BASE mentor. Evaluate each jump. The more errors you can see before jumping, the more likely you are to avoid them yourself.
Get Started
Now you're ready to start jumping. After your First Jump Course, you should have a solid knowledge of gear, rigging and packing, some theoretical knowledge of malfunctions and solutions, and a practical set of launches to work from.
The next step is to get home and make as many jumps (in as short a time) as possible with your BASE mentor. Ask as many questions constantly. Try to learn as much as you can. Once you feel comfortable (and so does your mentor), start branching out and jumping with other people. Ask them the same questions (they may have different answers). Watch different people pack. Watch different people jump. Always ask why things are done a certain way.
Keep Learning
Now that you have 20-30 jumps, and can hang with the local crew, you can consider yourself a solid beginner. There is still a lot more to learn, see and do. Never stop learning. In addition to being a good way to stay alive, it's one of the most rewarding things about the sport.
Some Resources
First Jump Courses:
Consolidated Rigging
4035 Grass Valley Highway
Auburn, California 95602
530 823-7969
530 823-7971 fax
[email protected]
http://www.crmojo.com
Basic Research
236 East 3rd Street, Unit C
Perris, California 92570
909 940-1324
909 940-1326 fax
[email protected]
http://www.basicresearch.com
Morpheus Technologies
5107 Lantana Street
Zephyrhills, Florida 33541
813 780-8961
813 788-7072 fax
[email protected]
http://www.BASErig.com
Robert Pecnik
[email protected]
Australian BASE Association
Tom Begic
Director of Safety and Operations
[email protected]
Must See Web Sites:
http://www.basejump.org Click on the "Articles" link, and read ALL the "Must Read" articles.
http://www.blincmagazine.com Pay special attention to the "Knowledge BASE" and "BASE Board" sections.
http://www.crmojo.com Especially look through the "Articles" section of the "Library".
Books:
Understanding the Sky. Dennis Pagen. Sport Aviation Publications; ISBN: 0936310103; (February 1992): Buy this book. Read it, then keep it. You'll want to read it again when you have around 100 BASE jumps, and then again around 500 jumps. Each time, it will become more useful.
Groundrush. Simon Jakeman. Jonathan Cape; ISBN: 0099232618; (July 1993): The first (and so far only) book ever published about BASE jumping.
Album of Fluid Motion. Milton Van Dyke. Parabolic Press, Inc.; ISBN: 0915760037; (May 1982): The most valuable picture book I've read. You may not understand why it matters at first, but once you start jumping cliffs and buildings in wind, the basic concepts in this book become invaluable. Don't worry about the technical jargon-just look at the pictures.
BASE Gear Manufacturer Web Sites
http://www.crmojo.com
http://www.basicresearch.com
http://www.BASErig.com
http://www.vertigobase.com
Used BASE Gear Classifieds On Line
http://www.basejumper.com/
Other Informational BASE web sites of interest
http://www.basejumper.com
http://www.vertical-visions.com
http://juliabell.home.att.net
http://www.bridgeday.info
http://www.thebasepoint.com
And one inspirational web site:
http://www.yosemite.org/vryos/
© Copyright 2002 Tom Aiello. Permission to reproduce and distribute in this exact form only is hereby granted. Please address any questions, comments or corrections to the author at [email protected].
By admin, in Disciplines,
My First BASE Rig
For BASE jumping information, BASE jumping articles, photos, videos and discussions visit BASEjumper.com
This article was written entirely by Tom Aiello, BASE 579. Tom has made more than 500 BASE jumps in the past 3 years, from over 100 objects. He is not an authority or expert of any kind on BASE jumping or any other type of parachuting, so all his advice should be taken with a grain of salt. All opinions are those of the author only. By making any fixed object parachute jump, you are taking your life in your own hands, and accepting responsibility for any possible outcome. Copyright 2002. Permission to reproduce and distribute in this exact form only is hereby granted.
So, the time has come to buy your first BASE rig. You've made the skydives, practiced your canopy control, and have an experienced mentor to keep you out of trouble. But what rig should you buy? If you have less than 30 jumps, here are my recommendations (more jumps than that, and you're on your own).
The really critical thing is to buy purpose-built BASE gear. Lots of people have been BASE jumping with converted skydiving gear for a long time. It is time for this to stop. Skydiving gear is very dangerous for BASE jumping, and has caused, and continues to cause, fatalities, especially among beginners, in the BASE world. Please don't become a statistic.
The guiding principle for selecting a first BASE rig is "Keep it Simple." If you are faced with a choice between a simpler and a more complex option, always choose the simpler one.
In this article, I will focus on stock (non-custom) gear from major manufacturers, which is what the majority of first BASE gear purchasers must choose from. Note that I will pick and choose from various manufacturers. If you want to take advantage of the "package" prices offered by most manufacturers, you will not have this option. If you are doing this, I strongly recommend selecting your canopy first, and letting that choice determine your package. In the end, it is the canopy that will make or break your system. The container is, in the words of one BASE jumper, "just the garage you park your Ferrari in."
Canopy
Not Optional: Tailgate
It is absolutely mandatory that any BASE canopy deployed with the slider removed or tied down use a tailgate. The tailgate is reefing device developed by Basic Research to promote nose first inflation, and reduce the incidence of line over malfunctions. Under no circumstances should a beginner jump a canopy without a tailgate.
Option: Secondary Inlets
Several BASE canopies (FOX Vtec, Flick Vtec, Blackjack, Troll) are now available with secondary (bottom skin) inlets. These additional inlets provide faster inflation, give rear riser response earlier in the inflation sequence, and can help keep the canopy inflated in some emergency situations (such as an object strike pinching off the nose). They slightly increase pack volume, especially on the canopies (Troll, Blackjack) where they are covered with one way valves to retain the canopies original flight characteristics. They may also create some poorly understood, but relatively undesirable phenomenon, such as opening backsurge in deep brakes. There is no real consensus in the BASE world on the suitability of secondary inlets for beginners.
I believe that beginners should avoid canopies with bottom skin inlets. There are several reasons for this. First, no beginner should jump a system that has poorly understood effects of any kind. Second, a beginner should not be jumping objects in which the advantages of secondary inlets are critical (for example, opening very near to an object). Third, secondary inlets add expense to the canopy (especially the one-way valve systems, which are generally superior to the open vents). My recommendation is to avoid bottom skin inlets until you know enough to want them for your particular (advanced) jumping style.
Option: Multi Bridle Attachment
The multiple bridle attachment is available on FOX canopies from Basic Research. Essentially, the multi replaces the standard, single bridle attachment point with a line cascading to four separate attachment points (one in the standard location, one near the rear of the center cell, and one each on cells three and five). The objective is to reduce center cell stripping (the center cell pulling out of the free packed canopy on deployment), and thereby improve opening heading and consistency. While the theory is sound, I am not convinced of the practical benefits, especially at subterminal airspeeds. Given that, I would not recommend the system for a beginner, as it adds both complexity and price (US$150) to the parachute system.
Option: ZP/Composite Topskin
Most BASE manufacturers offer topskins made either wholly or partly of zero porosity material. There are several advantages to this configuration, including better flight performance, stronger flare, and faster openings. Unfortunately, there is one big disadvantage-packing. When you are learning to pack for BASE, there are enough difficulties and distractions without throwing in another one. I'd recommend that a beginner get an all F-111 canopy, for simplicity and ease of packing, which translates into better opening heading.
Recommendation: Ace, all F-111, Consolidated Rigging
My favorite all around BASE canopy is the Ace, from Consolidated Rigging. The Ace airfoil (which is identical to the Blackjack) has tremendous control range, giving both very high and very low speeds. It flares quite well, although you may have to adjust toggle settings for your personal arm length and preference. It also opens (the real issue in BASE canopies) faster, cleaner, and more consistently than any other unvented canopy on the market. In my opinion, the best canopy for a beginning BASE jumper is a standard, all F-111 Ace.
Avoid: Any Skydiving Canopy, Unvented Troll
Do not jump any skydiving canopy (PD 7 Cell, Raven, PD Reserve, etc) in the BASE environment. This is an archaic practice that should be stopped. With real, purpose built BASE canopies available, there is virtually no reason to ever leave a fixed object with a skydiving canopy on your back (and the few reasons that do exist-salt water landings, gear confiscation-are pretty much inapplicable to a beginner). Don't kill yourself trying to save a few dollars. Buy real BASE gear.
I personally have had very bad openings on my Troll (Atair Aerodynamics). My openings have been wildly inconsistent, and included unacceptable snivels, end cell closures, and asymmetric inflation (leading to off-heading openings). As a relatively experienced jumper, using every technique I can think of, including those recommended by the manufacturer, I have been unable to achieve consistently good openings in my jumps (just under 100) on this canopy. Although the Troll's flight characteristics are fantastic, the openings make this canopy unacceptable for a beginner.
Container
Velcro or Pin?
The first thing you have to decide is if you want a Velcro or pin closed container. For a first container, get Velcro. Velcro rigs are simpler, cleaner, and easier to pack and use. Pin rigs are advanced gear, because you must have your pack job dialed in to achieve the correct pin tension, because many acquire adjustment for various altitudes, and because it's harder to close a pin rig without disrupting your pack job. The only case in which you should consider a pin rig for your first rig is if you are an experienced wingsuit pilot determined to jump right into wingsuit BASE. Velcro rigs are unsuitable (and very dangerous) for wingsuit flights. However, Velcro rigs are well proven for delays from 0-15 seconds, so any non-wingsuit jumper should definitely start with a Velcro closed BASE rig, regardless of their intended objects and delays.
Option: Alpine
Basic Research offers a built in climbing harness as an option on their BASE rigs. I have owned a rig with this option for some time, and have found that I rarely use it. For the extra cost and complexity (the extra buckles have some small potential to confuse the uninitiated), I'd definitely skip this option.
Option: Saddle Bags
Saddle bags are built in "pockets" sewn onto the leg straps of the rig's harness. These can be handy for stashing bits of rescue, first aid, or climbing gear, or just as a place to put your camera after shooting exit shots of your friends. I also have this option on one of my rigs, and while I do use it, I haven't found it indispensable enough to recommend it. For a first rig, avoid the saddle bags.
Option: B-12's
B-12's are the snap closures on old-style skydiving leg straps. They can be extremely useful on some relatively advanced jumps (those where room to gear up is limited). However, the use of B-12's with a hand held pilot chute (which is the proper beginner deployment technique) has caused at least one BASE fatality. If you do use B-12's on your BASE rig, be sure that you always snap your leg straps before removing your pilot chute from the bottom of container (BOC) pouch. In the interests of simplicity, this is another option I'd leave off a first BASE rig.
Option: Stainless Steel Hardware
Following the popularity of stainless hardware in the skydiving world, most BASE gear manufacturers now offer rigs with stainless hardware, both in the harness geometry and the three ring system. Unless you know that you will be making a large number of water landings, there is very little reason to add the expense of stainless hardware to your rig.
Option: Sorcerer
The Sorcerer is a two parachute BASE container manufactured by Vertigo BASE outfitters of Moab, Utah. Although some skydivers will like the extra confidence of a second canopy, the truth is that the Sorcerer is really an advanced trick rig. Advancing technology has made BASE gear so reliable (statistically more reliable than skydiving reserves), that adding a second canopy really gives very little additional insurance. In addition, the two canopy system is a poor choice for beginners because (a) it makes them less likely to pay the proper level of attention (meticulous) to their pack job, (b) it may make them overconfident, even in situations where the Sorcerer's second canopy (which deploys admirably quickly, in less than 150' under ideal conditions) will have insufficient altitude to inflate, (c) the system is more complex, and a beginner should use the simplest system possible, (d) it is cumbersome to carry around a second canopy you never use, and (e) The extra bulk of large canopies tends to make most Sorcerer jumpers use canopies that are significantly undersized for BASE landing areas, which could be a very costly and injurious problem for a beginner. Note that some skydivers may feel that having a "reserve" is worth the cost. However, the second canopy on a Sorcerer is no more a "reserve" than the first. Any BASE system, properly assembled, maintained, and packed, will open more reliably and consistently than any skydiving reserve system. Jumping a Sorcerer isn't like having a reserve-it's like having two reserves. Save the Sorcerer for advanced trick jumps (like BASE fun-aways), when you are more experienced. For now, stick with a standard BASE system.
Option: Para-pack
The Para-pack is specialized BASE rig that allows you to stow gear (camping gear for long approaches, for example) between the back pad and the pack tray. The rig is remarkably clean, and maintains tension over the pack tray quite well. However, unless you have a specific need for this type of expedition jumping, there is no need to spend the extra money (it's something like US$500) and deal with the extra complexity of the system.
Option: Hook Knife
Originally, a hook knife was considered mandatory equipment for BASE. However, as gear technology advanced, and it became clear that the incidence of slider up line over malfunctions was extremely low, hook knives started to be left off of BASE rigs. However, there have been at least three documented cases of slider up line overs in the past two years, and one of them required the use of a hook knife to clear. Even if this happens on only one in 1000 jumps, it is worth carrying a hook knife for the other 999. Since the cost of a hook knife is quite low, and there is no inconvenience in carrying one, you should purchase a hook knife with your first BASE rig.
Recommendation: Vision, Gravity Sports Limited
My personal favorite Velcro rig is the Vision, from Gravity Sports Limited. The Vision was designed, built, re-designed, and re-built by Dennis McGlynn while he was jumping very aggressively. Everything about this rig screams "ease of use." It is incredibly simple, it is very comfortable, and it absolutely minimizes distortion of your pack job, both on the way into, and on the way out of, the pack tray.
Secondary Recommendation (Pin): Gargoyle, Morpheus Technologies
If, and only if, you are an experienced wingsuit pilot intending to take your wingsuit to the cliffs as soon as possible, you should skip a Velcro rig (very dangerous for wingsuit jumps due to the potential for a premature deployment) and go straight to a pin rig. It would be far better to buy a Velcro rig and become an expert BASE jumper before launching your wingsuit. However, if you are dead set on moving straight to wingsuit flights (which I do not recommend), you will need a pin rig. My favorite pin rig is the Gargoyle, by Morpheus Technologies. If you are jumping a wingsuit, you will definitely want the dynamic (open) corners option. The Gargoyle has superb pin protection (better than any other two pin rig), does an excellent job of maintaining pack symmetry both into and out of the pack tray (it is probably the best of the pin rigs in this critical area), and can be closed exactly the same at any altitude (reducing complexities that could be troublesome early in your BASE career).
Avoid: "Home Made"Rigs
Many jumpers (including myself) begin their BASE careers using "home-" or "rigger-made" BASE gear. Unfortunately, many of the minor manufacturers who produce these rigs are so far out of the main stream that they make rigs with design flaws (minor or major) that have long since been worked through and eliminated from the rigs built by major manufacturers. Avoid purchasing a rig from a friend, or your DZ rigger, and instead purchase your gear from a major manufacturer. In general, if you cannot buy a real, purpose built, BASE canopy (Ace, Blackjack, Mojo, FOX, Flick, Dagger or Troll) with your rig, from the same shop, you should look to purchase the container elsewhere.
Avoid: Unstiffened Side Velcro
Some older Velcro rigs have unstiffened side flap Velcro. Examples include early Odysseys and Reactor 3's. Unstiffened side flap Velcro can shrivel with the shrivel flap during a head down deployment, and should be retrofitted with a stiffener to prevent a pilot chute in tow malfunction. All major manufacturers have rectified this design flaw, and will retrofit older rigs to eliminate the problem.
Pilot Chutes
Eventually, every BASE jumper accumulates a large collection of pilot chutes for various delays. As a beginner, you will need to acquire at least three. To paraphrase my BASE mentor, you will need one PC each for terminal jumps, really low jumps, and everything else. In general, that means one 32-36" PC (terminal), one 46-50" ZP PC (low) and one 42" ZP PC (everything else). Unless you live in Norway or Australia, you will quickly find that the 42" ZP is your workhorse PC, and that you leave it on your rig for everything from 2-6 second delays. Later on, you will want to fine tune your PC's for your delays. For example, one manufacturer recommends a set of four PC's (32", 38", 42", and 46") to cover all possible delays. When you are starting, though, you can save money (and simplify your systems) by going with just three-little for terminal, big for go and throws, and 42" for everything else. Just about everyone uses ZP material exclusively for BASE PC's. In some cases, F-111 can have advantages over ZP, but all your subterminal PC's ought to be ZP in the beginning.
Option: Bridle Attachment Point
There are several different configurations possible for bridle attachment on a pilot chute. The standard configuration used by virtually every BASE gear manufacturer (CR, BR, Morpheus) allows the jumper to asymmetrically attach the PC to the bridle. The older style of attachment (Paratech Rigging) is far superior, as it makes an asymmetric attachment (which greatly contributes to orbiting, and hence degrades heading performance on opening) virtually impossible. If at all possible, order your PC's with the older "loop" style attachment point.
Option: Apex Vents
Some manufacturers are now offering pilot chutes with mesh vents at the apex. The purpose of these vents is to dampen the oscillation inherent in a pulled down apex round (like a pilot chute), as well as reducing the orbiting that often results from a vigorous PC toss. This is one of the few options that I would strongly recommend for any jumper, even a beginner. The vents really don't create any added complexity packing, and really do help improve opening heading (which suffers dramatically from oscillating and orbiting pilot chutes). Vented pilot chutes are not recommended for low freefalls with very short (less than one second) delays, as they do inflate slightly slower than unvented PC's.
Recommendation: Apex Vented 42", Consolidated Rigging
My favorite 42" PC is the A-V pilot chute from Consolidated Rigging. The CR A-V series, in addition to the apex vent, has a slightly oversized topskin, which contributes to stability.
Recommendation: 36" F-111, Basic Research
For terminal delays (without a wingsuit-wingsuit PC's should be slightly larger), the standard BASE PC is either a 32" ZP, or a 36" F-111 PC. For a beginner, I would recommend a 36" F-111 PC, as F-111 PC's appear to be more stable than ZP (even vented) PC's, and the advantages of ZP (faster inflation) should not matter to a beginner at terminal (no beginner should pull low enough that the PC inflation time difference becomes important).
Recommendation: 48" ZP, Basic Research
For low, hand held deployments, I prefer the Basic Research 48" ZP PC. BR does not put a handle of any kind on their 48", which is mandatory for hand held deployment. Further, they do not put any kind of cap or vent on the PC, either of which could slow inflation, and cost critical feet at low altitudes.
Avoid: The Hook, Gravity Sports Limited
Gravity Sports pilot chutes have the load tapes applied on the block, rather than the bias of the ZP material. This allows the pilot chute to stretch and deform, both over time with wear, and instantaneously during each deployment. This can result in asymmetries and oscillation, both of which can degrade opening heading.
Risers
Although almost all BASE specific risers meet certain criteria (type VIII, LRT style toggles, etc), and you should be fine sticking with whatever riser and toggle system comes standard with your first rig, it is slightly better to purchase toggles and risers separately, to allow a wider choice in available options. If cost is a primary consideration, just go with the standard setup. But if you have a bit more money to spend, consider ordering exactly the riser setup you want.
Not an Option: Mini-Risers (Type 17)
Occasionally, skydivers (and one German BASE manufacturer) will attempt to use mini-risers on a BASE rig. This is totally unacceptable. Mini risers have failed in actual use, and if that were to happen on a BASE jump (more likely than on a skydive, as BASE openings are harder), you would be lucky to survive. Under no circumstances should a beginner (or any other BASE jumper) use equipment with mini-risers.
Option: Pin v. Cloth Toggle Stubs
BASE toggles are available with either standard (stiffened cloth) or metal pin toggle stubs. The standard stubs are generally preferred. Although the metal pins have virtually no chance of toggle hang-up, the incidence of hang-ups on the cloth stubs (with the thick Dacron lines used for BASE canopies) is near zero. Also, the metal pins tend to wear the brake settings more quickly, and are slightly more likely to prematurely release ("blow" a toggle) during the opening sequence.
Option: Mini Rings (RW8)
Most BASE gear manufacturers offer mini three rings, either as an option, or standard equipment. Since the manufacturing tolerances for these rings are tighter, and there is no disadvantage in using standard large (RW1) rings, avoid mini-rings on your first BASE rig. If possible, you might wish to use large tandem strength (RW10) rings, which are available from some manufacturers.
Option: Big Grab Toggles
Several manufacturers now offer stiffened toggles. These go by a variety of names, including "Big Grab" and "EZ Grab". Although the best way to avoid object strike is to correct heading on risers, there are some situations in which a BASE jumper wishes to release the toggles immediately, with no hesitation and no fumbling. Stiffened toggles are designed to make this much easier, and generally work in that regard. They do make packing marginally more difficult, and for that reason, should be avoided by a beginner. However, like line release toggles, this is a piece of equipment you should consider adding quite early in your BASE career. If cost is a major issue (you don't want to spend the extra money on a second set of toggles), it is possible, but not recommended to start with big grab toggles.
Option: Integrity Three Rings
BASE risers are now available in both standard three ring and reversed (integrity) configurations. Most BASE jumpers consider the reversed (integrity) three ring to be standard equipment for BASE. Integrity risers are marginally stronger than standard risers, but are also a bit more difficult to manufacture properly. Since a standard type VIII riser has never failed in actual use, either riser set up should be fine for a beginner. The standard set-up (with a grommet through the riser) is probably more familiar to a beginner, and is definitely more field tested (there have been two reported incidences of unintentional riser release on BASE jumps-although the cause is undetermined in both instances, both releases occurred on integrity style risers). On balance, the standard three rings are probably a slightly better option for a beginner.
Option: Line Release Toggles
Several BASE manufacturers now offer toggles that can release the control line, allowing a jumper to clear a line over malfunction without resorting to a hook knife. These line release toggles are the best currently available line over clearance technology. However, the extremely low occurrence of line over malfunctions in the BASE environment, combined with the added complexity of the line release toggles, indicate that beginners should avoid their use. Although they may become standard equipment for BASE, they are not yet sufficiently proven to recommend their use to a beginner. As an aside, in the event that you do choose to purchase line release toggles with your system, I would strongly recommend a toggle with a one handed operation (such as Vertigo BASE Outfitters' WLO [What Line Over?]), rather than a toggle with a two handed operation (such as the Gravity Sports Supertoggle. All things considered, though, a beginner should avoid adding this extra complexity to their system until they are comfortable with their basic equipment.
Recommendation: Standard Three Rings, Standard Toggle, Morpheus Technologies
My favorite standard riser is the one manufactured by Morpheus Technologies. Essentially the same as the risers made by BR or CR, Morpheus' standard riser is a non-integrity three ring, with the LRT toggle system, and RW10 (tandem) three rings.
Stash Bag
Option: Waist Band
Some manufacturers (Vertigo BASE Outfitters, Gravity Sports Ltd) offer stash bags with waist bands, either permanent or removable. For technically difficult approaches, or just for longish hikes, these waist bands are an absolute life saver. Since they are generally removable, and add negligible bulk, they are highly recommended for all jumpers.
Option: Waterproof Material
Some manufacturers offer stash bags made of waterproof material. Whether you decide to use one will depend on your jumping environment. If you live somewhere that it rains often, you will find the water protection well worth the investment. However, if you live in a dry area, or frequently need to wad up and pocket your bag quickly, you may find that the extra bulk of the waterproof fabric makes it more trouble (and cost) than it is worth. I know that my waterproof stash bag (Gravity Sports, Ltd) more than paid for itself the first time I had to swim across a creek to reach the trail and hike back to the car (my rig stayed completely dry on my back).
Option: Cliff Pack
You may want to consider adding a heavier cliff pack to your gear collection. A cliff pack is a backpack, sized to fit your rig, protective gear and a bit more, with a decent suspension for hiking, and which can be collapsed into a waist pack for jumping. Although most modern jumps do not require this gear, there are certain areas with long hikes (Norway comes immediately to mind) where a cliff pack will significantly improve your hiking experience. Although you probably won't need one initially, if you are planning a trip to a site with long hiking approaches, definitely consider purchasing a cliff pack.
Recommendation: Heavy Duty Stash bag, Gravity Sports Limited
My favorite stash bag is Gravity Sports' heavy duty stash bag. This bag is burly, will take tons of abuse, has no plastic buckles (which can break at inopportune moments), and compresses moderately well. If you have a chance to pick one of these bags up, grab it.
Avoid: Stash bag, Paratech Rigging
I had very bad luck with my Paratech stash bag. The fabric was too light, and the bag survived very few jumps. In addition, the cord lock that closed the bag kept sliding open, so I had to stop every few hundred yards to verify that my gear was still in the bag.
NOTE:
My recommendations have evolved considerably during the course of this writing. Although the basic equipment I recommend for a beginner (Ace in a Vision) is the same, my views have changed as to several options (Big Grab Toggles, WLO toggles, Integrity Risers) for this writing.
Resources
BASE Gear Manufacturers
Consolidated Rigging
4035 Grass Valley Highway
Auburn, California 95602
530 823-7969
530 823-7971 fax
[email protected]
http://www.crmojo.com
Basic Research
236 East 3rd Street, Unit C
Perris, California 92570
909 940-1324
909 940-1326 fax
[email protected]
http://www.basicresearch.com
Morpheus Technologies
5107 Lantana Street
Zephyrhills, Florida 33541
813 780-8961
813 788-7072 fax
[email protected]
http://www.BASErigs.com
Vertigo BASE Outfitters
P.O. Box 1304
Moab, Utah 84532
435 259-1085
[email protected]
http://www.vertigobase.com
Gravity Sports Limited
10472 Iris Road
Truckee, CA 96161
530 582-4747
530 582-4345 fax
[email protected]
http://www.gravitysportsltd.com/dennis/
Leading Edge BASE
1425 Century, Suite 100
Carollton, Texas 75006
972 245-5300
972 245-0598 fax
[email protected]
http://www.leadingedgebase.com
Paratech Rigging
6416 Cardinal Road
Vernon, British Columbia
Canada V1H 1W3
250 260-8053
[email protected]
Used BASE Gear Classifieds On Line
http://www.blincmagazine.com/cgi-bin/forum/dcboard.cgi?az=list&forum;=classified&conf;=blinc
http://www.dropzone.com/cgi-bin/classifieds/page.cgi?g=BASE_Gear%2Findex.html&d;=1
BASE Gear Reviews
http://www.blincmagazine.com/reviews/Gear/
© Copyright 2002 Tom Aiello. Permission to reproduce and distribute in this exact form only is hereby granted. Please address any questions, comments or corrections to the author at [email protected].
By admin, in Disciplines,
BASE jumping injuries and treatment in the field
You just landed after throwing a double gainer from a cliff in Moab. Adrenaline surges through your system as you think of the amazing visuals you just saw. As you gather up your canopy, you pause to watch the next jumper exit. After a short delay, he tosses his pilot chute and the canopy deploys offheading. He takes evasive measures but the strikes the wall repeatedly. After finally getting the canopy turned away from the cliff, he lands hard on the talus and tumbles to a stop thirty feet below and doesn't move… Now the real adrenaline kicks in. What do you do?
Introduction
The scenario above is a severe one, but all too possible. In the hazardous environment we know as BASE jumping, we often place ourselves in situations which may result in our injury or death. Due to the inherent risk involved with this activity, every time we jump there is a possibility that something will go wrong. Fortunately, the most common BASE injuries are relatively minor and having a basic knowledge of first aid can help dramatically. With immediate care you can reduce the lasting effects of many injuries, and the time it takes to recover. Another goal is to improve the comfort level of the injured. The scene of an accident is not the place to be thinking about learning lifesaving skills. Preparing yourself ahead of time will make you a more confident jumper and knowing your partners have the same skills will go a long way if you yourself happen to be the one needing help. For the purposes of this paper, I have tried to explain thing in layman's terms wherever possible and assume that you have taken a basic CPR course. (Call the American Red Cross or go to www.redcross.org.)
Assessment
This is where you size up the situation and the extent of the jumpers injuries. This is a process you will use for serious injuries. Your basic assessment should take about one minute. Not slow enough to waste valuable time, but not so fast that you miss important signs. Your minute will be divided into two phases: the Primary survey or ABC' s (15 seconds), and the Secondary survey (45 seconds).
Primary: Establishing the severity of the situation.
Make the scene as safe as possible. Move anything that may be a risk to you or the injured and get hysterical people out of the area. Send someone for help.
Airway. Make the jumper has an airway. If they can talk to you, they have an airway. If not, check yourself. Use the head tilt/chin lift or a jaw thrust. (These techniques can be learned in a basic CPR course.)
Breathing. Are they breathing? Put your ear to their mouth/nose area and look for the chest to rise and fall. If no breathing, revert to your CPR training.
Circulation. Do they have a pulse? If not, start CPR. Is there profuse bleeding?
Deformity. Are there obvious injuries?
Expose. Weather conditions permitting, remove the clothes of the jumper (cut preferably) and cover with blankets as needed. Hypothermia is a possibility now and you need to be aware that the jumper may go into shock.
Secondary:
Eyes, ears, nose, and mouth:
Eyes; in sunlight, cover the eyes then uncover them and see if the pupils react. At night use a light to check.
Ears; is there any fluid coming out? Don't try to stop drainage.
Nose; any bleeding?
Mouth; look for blood or broken teeth. Teeth can be a choking hazard so remove loose, broken pieces.
Neck: Can you see any obvious deformities?
Chest: Can you see any section of the chest that moves opposite the rest when the patient breathes? (Broken ribs) Is there any tenderness?
Abdomen: Is there any tenderness or does the abdomen seem more rigid than normal? (Internal bleeding) Are they trying to keep you from touching them?
Pelvis: Any tenderness? Can you feel bones rubbing or grinding? Someone with a broken pelvis will sometimes feel like they're, "falling apart."
Arms: Do you see any obvious fractures? Can you feel any bones grinding? Can you feel a pulse in the wrist? Check circulation by pressing on the fingernails and seeing how fast they get red underneath. Try this on yourself for a comparison. Can they feel you touching their hands? Can they move their arms? Have them squeeze both of your hands at the same time and feel if one side is weak.
Legs: Do you see any obvious fractures? Can you feel bones grinding? Can you feel a pulse behind the ankle? (Check behind the big ball on the inside of the ankle.) Check the nail beds. Can they feel your touch? Can they wiggle their toes?
By now, you should have an overall impression of how severe the jumpers' injuries might be. Now you can plan the best course of action for the rescue efforts. Redo this assessment every 3-5 minutes until EMS personnel take over. Be sure to report these findings to EMS personnel as it will provide useful information to them.
For a quick set of field vital signs:
Check the pulse and count beats per minute.
Approximate blood pressure can be obtained without a stethoscope or BP cuff.
A cool trick: If you can feel a wrist pulse, the systolic pressure is about 80. If
you can feel a pulse on the inside of the arm where the bicep and tricep meet,
it's about 70. If you can only feel it in the neck, it's about 60.
Check breaths per minute.
This may not mean much to you but if you can provide EMS workers with a sheet of vital signs detailing every five minutes in the past half hour, it can increase your friends' odds of surviving. This is because it shows the "trend" of vital signs and can give valuable clues about the condition of the jumper.
Shock
Shock can have several different causes but the likely causes in our situations would be trauma to the nervous system, or loss of blood. Shock occurs when tissues and vital organs are not getting enough oxygen from the bloodstream.
Symptoms of shock include:
Pale, cool, clammy skin
Restlessness
Nausea/vomiting
Rapid breathing
Drop in blood pressure
The first step in treating shock is to stop blood loss. Then, cover the jumper with a blanket. As long as injuries don't prevent you from doing so, elevate the feet about 8-10 inches over the heart. They may get thirsty but try not to give anything to eat or drink. If there may be a long delay until help arrives, you can give small amounts of water at room temperature. Even if a jumper doesn't display symptoms of shock, treat for shock anyway. They might not be in shock yet.
Bleeding
There are three types of bleeding: capillary, veinous, and arterial. Capillary bleeding is the oozing blood you see when you skin your knee. It is minor and not life threatening. Veinous bleeding is blood from a vein. It is dark red and flows out of the wound. Arterial bleeding is pretty obvious since there will usually be an arc of bright red blood spurting out of the body. Arteries carry lots of blood and arterial blood loss can be immediately life threatening.
Stop the bleeding:
Apply pressure directly over the wound. If you have a clean dressing,
use it. If you don't have something sterile, use what you have. A shirt or towel will work. If the wound gets dirty, we can treat it with antibiotics later.
If direct pressure fails to stop the bleeding, combine direct pressure
with elevating the wound over the heart.
If the bleeding still hasn't stopped, apply direct pressure to a pressure
point. There are eleven pressure points on each side of the body
If all else has failed, use a tourniquet. The decision to use a tourniquet
is a serious one. This will completely stop the blood supply to the extremity involved and may result in that limb being amputated. Use it in a life or death situation. To apply a tourniquet:
Wrap a band around the limb. Preferably, use something flat and at least one finger wide. A strap from a stashbag will work.
Tie it in a knot around the limb.
Lay a stick or similar object directly on the knot and tie another knot over it.
Twist the stick to tighten the band. Twist it until the bleeding stops.
Tie the stick in position
Record what time you applied the tourniquet and once it's on, DO NOT remove it.
Femur Fractures
The femur is the long bone between your hip and knee. Alongside your femur, lies the femoral artery. The femoral is one of the largest arteries in your body and cutting it can result in bleeding to death very rapidly. For this reason, proper attention to femur fractures is extremely important. Fortunately, the femur is a serious chunk of bone so it takes a lot of force to fracture it.
If you suspect that the jumper has a femur fracture, you must not let them attempt to walk on it!
After the thigh is injured, the muscles will spasm. If the femur isn't there to support the muscle, the sharp bone ends can cut muscle tissue, nerves, and the femoral artery. The way to prevent this is to apply traction in the long axis of the bone. The easiest method of applying traction is to use a traction splint. (The Kendrick traction splint™ is a very BASE friendly item to have. It costs about $100 and folds into a pouch that will fit inside a hip pouch or cargo pocket. If you were sitting there with a femur fracture I could offer you one for a couple thousand dollars and you'd accept.)
To apply traction, pull straight on the ankle. Imagine trying to stretch the leg and make it longer. You will need to keep constant traction until an actual traction splint is available. It is very important that you never let up the tension or else serious damage may result. If the shoe comes off, the resulting rebound will be excruciating and bad things will happen. For this reason, remove the shoe on the broken leg. The jumper won't be walking anyway.
Splinting
Splinting is not really a science. When a bone breaks, the ends are usually very sharp. When these sharp edges move around, you can damage muscle tissue, nerves, and blood vessels. In order to prevent this, you splint the affected bone to immobilize it. Sometimes, you use whatever is available.
There are two classifications of fractures, closed fractures and open fractures. Closed fractures include any fracture where the bone does not break the skin. In such instances, proper treatment includes immobilizing the fracture and seeking medical attention. Open fractures occur when a bone breaks through the skin.
Signs of a fracture include:
A bone end sticking out of the body,
A grinding feeling at the site of the suspected fracture,
Deformity of the limb,
Loss of ability to move the limb,
Loss of pulse or sensation,
Muscle spasms.
Your first step in treating a possible fracture is to stop and take a deep breath.
Few fractures are life threatening unless they are mishandled. If there's no apparent life threatening injury, the best approach is a slow methodical one.
Cut away clothing from the area and control any bleeding. If you find an open fracture, treat it like any other wound.
Generally, you don't want to attempt to straighten out a broken limb. Don't try to realign the bones yourself. There are exceptions to this. If the limb has no pulse or is losing color, you may need to reduce the angle of the fracture to restore circulation. If you need to transport the jumper over rough terrain, a limb sticking out to the side will make things difficult. In these situations, not splinting would be more dangerous. IF YOU DECIDE TO ADJUST A FRACTURE, keep in mind that the sharp end can do major damage to the surrounding tissues so limit movement as much as possible. Also, have someone hold the jumpers arms so you don't catch a right hook.
The goal in splinting is to immobilize the bone that is broken. You should try to immobilize the joint above and below the fracture.
Find something to use as a splint. Most sites where we jump are in wooded areas so there is usually a variety of sticks and branches to choose from. If possible, pad the splinting materials with a towel or shirt to take up the space between the limb and the splint. This will also improve the comfort of the jumper. Use your imagination and you can usually come up with a splint for most fractures.
Forearms can be fractured when you try to catch yourself during a less-than-graceful landing. Fractured forearms should be splinted with a natural curl of the fingers. Place a roll of gauze, or something similar in the palm of the hand. This will go a long way to improve comfort.
If you suspect fractured ribs, you can pad the chest and gently wrap it. Placing the arm on the affected side into a sling helps. Try so calm the jumper and have them sit down until help arrives. Limit movement since a fractured rib can puncture a lung.
If you suspect a skull fracture, DO NOT place pressure on the head. Monitor level of consciousness and do not give morphine!
Joint injuries
Damaging joints is a constant threat to BASE jumpers. Ankles are the most frequently injured joints skydiving, BASE jumping, and most sports. There's a saying that goes, "An ounce of prevention is worth a pound of cure." This applies to us because it is pretty easy to reduce the number of ankle injuries. Wearing an ankle brace is an easy and effective measure to prevent hurting your ankles in a sketchy landing. They're available at any sporting goods store. A simple low-grade sprain can keep you grounded for a weekend. A serious sprain can keep you from jumping for a year or longer.
If you break a bone, it will usually heal stronger than it was before you fractured it. Ligaments, tendons, and other soft tissues may never completely recover from injuries. Ask anyone who's been jumping for a few years.
If a jumper injures a joint in the field to the point that it will not bear bodyweight, you should treat it as a fracture until an x-ray can prove otherwise. Splint it and proceed to the nearest hospital for evaluation.
All Sprains can be treated with the acronym, R.I.C.E.
Rest: stay off the affected joint and give it time to heal.
Ice: apply ice, cold packs or frozen vegetables to the joint. Peas work well because they will conform to the shape of the joint. Just don't eat them after several freeze/thaw cycles.
Compress: wrap the joint firmly but not too tight. An ACE wrap can is ideal. If your fingers or toes turn purple, it's too tight. If you squeeze your nail-beds, the color should return immediately. If not, re-wrap more loosely.
Elevate: Kick back and have a cold one. Try to keep the injured joint at about heart level.
This regimen can be supplemented by taking Motrin (ibuprofen) or Aleve (naprosyn). Follow dosing directions on the package. Both are anti-inflammatories and will help with the pain. If this treatment isn't working, it might be a good time to see a doctor.
Summary
This paper is by no means, a complete set of first aid information for the BASE jumper. In addition to reading this paper, I highly recommend enrolling in a CPR class, a basic first aid course, and an EMT Basic course. Most junior colleges offer an EMT course and CPR is usually included. These classes will show you how to approach an injury and decide on the most appropriate course of action.
First aid is a skill-set we hope to never need. The harsh reality of our sport is that there will be more injuries, and there will be more fatalities. Hopefully someday BASE jumpers will stop being injured and killed. Until that day comes, we all need to know what to do when accidents happen.
---Dexterbase
By admin, in Disciplines,
Mixed Formation Skydiving - The Next Big Thing
Mixed Formation Skydiving Is Ready To Take Over The World
Andy Malchiodi--neck deep in his multi-hyphenate (medalist/coach/musician/filmmaker) life--didn’t set out to co-invent a skydiving discipline. He just wanted to enjoy competition. Luckily for us, he did it anyway. He’s quick to refuse to take credit for being the first person to combine flat and vertical orientations into one discipline, but there’s no denying that he’s the one who has done the most to make it official.
The building blocks were there, but Mixed Formation Skydiving (“MFS”) in its current iteration wasn’t even on the radar when Andy’s freefly team, SoCal Converge, was stacking up medals on the competition circuit. From 2008 to 2012, Converge won four U.S. National Championships, took back-to-back gold and silver at the World Championships and racked up two world records.
“In my years of [freefly] competition with SoCal Converge,” Andy begins, “Even though we were working within an artistic discipline, we really thrived on--and enjoyed training--the compulsory rounds. In those years, the freefly compulsories were essentially 2-way MFS; teams flew two flat points out of a 10-point pool over two rounds.”
As well as being fun to fly, Andy and his team saw several very compelling elements in these compulsory rounds.
“We noticed a lot of cool stuff,” Andy explains. “You can train this without a videographer in the beginning--you can just de-brief from your GoPros until you recruit one. You can take it home to a small drop zone with a small plane. People are attracted to the idea of fusing all four primary orientations into one discipline. For those people, it’s a discipline with it’s own identity. And for those who only wish to focus on the vertical, it’s a stepping stone to 4-way VFS.”
“The beauty of it is the modularity,” he explains. “Even newer skydivers, who aren’t freeflying yet, can do the flat points and grow into it.” To be clear: The advanced class does not do any of the belly or back points, and some of what are considered the more difficult vertical points are omitted from the advanced dive pool as well.
Clearly, the latter makes MFS a very compelling inclusion into a newer skydiver’s arsenal. With the inclusion of the flat points, 2-way MFS is a discipline unto itself, where the training progression from advanced to open nicely follows a well-rounded skill-building arc. “You might choose to do advanced MFS,” Andy says, “When you’re at a skill set where you can’t quite take on the VFS open dive pool, but you’re interested in doing VFS.”
“It was initially my hope,” Andy continues, “That advanced do two purely flat rounds and four vertical. The open class would then ‘mix’ them. The current rules are designed, by suggestion of the USPA, to appeal to those who want to use MFS as a method of progression into VFS.”
In 2011, as Andy and Converge were getting excited about the possibilities of their nascent discipline, the freefly compulsory rounds changed. The rules moved away from speed compulsory rounds and into artistic compulsories, where teams receive four moves to style a routine around.
“It is pretty different than it used to be,” Andy sighs, “And we weren’t very happy to see that change. We had our reasons for believing it was good the way it was. So I took it upon myself to take that really good stuff and make it its own discipline.”
Andy had a lot of work in front of him to create an official space for MFS. He took the moves that existed in the pre-2011 artistic freefly compulsory dive pool, brought in several of the points that existed in the wind tunnel competition dive pool (which, at the time, wasn’t as widespread as it is now) and started to work out the details.
The biggest challenge Andy faced surprised him. MFS is, after all, at heart a formation skydiving discipline--and, in formation skydiving, you cannot have one point that begins or ends with the same grip of another point. “You would think,” Andy muses, “That with multiple orientations--head up, head down, belly and back--that would open up infinite options, and you wouldn’t have a problem creating points that didn’t start or stop with the same grip as another point. It was more challenging than I would have guessed.”
The tunnel competition dive pool, developed in great part by Arizona-based skydiving legend Jason Peters, included several points that--unsurprisingly, considering its non-FS provenance--did not abide by that FS-specific rule. “At the beginning, if you watched a very fast 2-way tunnel draw,” Andy explains, “It looked like a game of patty-cake, because you would finish one point and then begin the next point with the same grip. Pulling off that grip and going right back to it looked kinda funny.”
Challenging as it was, Andy stayed the course to, as far as possible, mirror MFS’s rules and regulations to match existing formation skydiving disciplines. He brought a few other top-shelf skydivers to help him work out the engineering puzzle--among them, Ari Perelman and Rook Nelson. The think-tank communicated with the USPA (specifically, James Hayhurst, Director of Competition, and Randy Connell, Competition Coordinator) to get multiple sets of eyes on the points, rules and regulations. With all those collaborators on board, 2-way MFS enjoyed an intuitive and logical evolution as it came into its own.
With staunch USPA support, MFS made its public debut in 2013. The first test event, at the U.S. Nationals, was “very well attended;” Andy remembers, “Everyone was very enthusiastic about it.” The first official event was MFS’s inclusion in the 2014 U.S. Nationals. From there, the discipline has consistently ramped up with every passing season.
“It’s easy to see why. It creates very challenging and intriguing engineering dilemmas,” Andy grins, “And there are a couple ways you can slice the onion there.” The training videos say it all.
Official international recognition is the next logical step, and MFS’s next big push is the one that will send it over the ocean into Europe and Australia. Slotting into place at the IPC level would allow MFS to be included in events like the World Cup and the World Meet, and that’s exactly what its inventors intend for it. So far, the U.S. is the only country with 2-way MFS on the docket--which is stupefying, considering the discipline’s flexibility, portability and low infrastructural requirements.
“They’re waiting to see how it goes in the U.S.,” Andy says, “And they’re slow to move, but the more competition skydivers who push for MFS at their Nationals level, the closer we’ll get.”
Interested? Check out the 2-Way MFS dive pool from the USPA website. To learn the MFS ropes, reach out to Andy himself, Jason Peters or Nik Daniel with Axis Flight School.
By admin, in Disciplines,
Learning to Fly With Weights
With today's fast fall rates, weights are essential for lighter weight jumpers. Small jumpsuits are not enough, especially when jumpers in the base are also wearing smaller jumpsuits. There is nothing more embarrassing than making a nice swoop to your slot only to pop three feet above everybody else when you break for the second point. Been there, done that.
But it is not as simple as just slapping on ten pounds of weight and swooping. There is a learning curve involved. Jumpers wearing weights for the first time face the fear of going low. They have to learn how to fly with the extra ballast. They have to learn how to fly like a heavier jumper. That means they have to set up a little higher on approach. They also have to stop a little sooner then they are used to doing. Maybe for the first time, they have to fly cautiously. And some jumpers have to learn how to use different amounts of weight for different sizes of formations. It is a challenge, but one you have to face head on if you want to get invited on the good loads.
For jumpers wearing weights for the first time, the roles can suddenly be reversed. The big boys in the base might get their chance to watch the lightweights sucking air as they go low. (I'm sure this puts a little smile on the big fellas' faces.) But don't fret. Show the big boys how quickly you can pop back up and get in. For those of you who have never had to worry about going low, here's a little primer.
If you go low, move away from the formation and turn sideways to the formation. While keeping the formation in sight, lower your head and spread your arms and legs out as far as possible to assume a flat stance. Push down on the air as much as you can with your hands and feet. Crunch your gut muscles if you have to. Hold this position until you are far enough above the formation to make a good approach. (Forget the old 'hugging the beachball' theory. That actually lets air spill out all around you.)
Let's say you made it in and you're fairly proud of yourself. You glided smoothly into your slot without having to fight to stay down with the formation. Of course, you had to watch your altitude. No more approaches from below the formation. The weights kept you honest.
Now it's time to move to the next point. When you let go, you feel like you're in sequential heaven! You don't have to swim and flail to stay down with the big boys. You simply move laterally to your next position. What a treat!
But don't get too cocky just yet. The next point is a "floaty" one. The big boys in the middle quickly build a 4-way compressed accordion and you are moving around to pod the end. "What happened?" you think as you sink two feet below your slot. Whoops! You've never had to watch your altitude this closely before. "Hee-hee!" go the big boys again as they watch you recover (again).
But you're a good jumper and it only takes you a second to pop up and move into your slot. You tell yourself that you'll watch your altitude a little closer on the next move, and you do. The last point is a round and you feel like one of the big boys as you meet them in the center and don't have to work to stay down with them.
"Piece of cake," you think to yourself. As you track off, you feel some of the old cockiness returning. But the cockiness starts to fade after you land and start wondering if the big boys will let you jump on the next load with them. Well, don't worry about it. You might not be ready for another big-way just yet. In fact, your next step should be to check out the weights on some smaller formations, preferably 4-ways. Remember I said that some jumpers have to use different amounts of weight for different size formations?
So don't rush things. Check out the weights on several smaller ways. Depending on how often you make it out to the DZ, this could take several weeks, even months. Just remember that you are learning to fly all over again. You might have gotten into some bad habits by flying like a lightweight. I know I did. I had gotten used to diving down and not stopping until I was level with the formation. Then I'd make a perfectly level approach from where I had stopped. Boy! Did I ever get my wake up call the first time I tried this with weights.
Another factor to consider is where to wear the weights on your body. From my experience, vests seem to work better for women and belts for men. It's just pure physiognomy. Women are typically lighter in the upper torso area, men in the hip area. But this isn't a hard and fast rule. Take me for instance. I wear both a vest AND a belt, but I only carry three pounds in the vest, whereas I carry six in the belt, nine pounds in all.
What works for one person may not work for another. A couple of guys at my home DZ wear about ten pounds in a belt. All I know is that without the weights I wouldn't be jumping on the hot loads at my DZ. I wouldn't be doing hot 4-way either. I'm sure if you talked to my DZ's head organizer, he would tell you that I have made great strides in my performance since getting the weight thing figured out. It was hard work but it was darned well worth it. I know I'll be in some of the hot skydives in the year-end videos!
By elightle, in Disciplines,

Health gymnasiums
Two other advantages offered by good gymnasium are constant supervision, which enables you to exercise with safety confidence, and a congenial atmosphere. Exercising with people who share common purpose can provide extra enjoyment and incentive.
It is necessary first of all to distinguish between the different types of gymnasium. Training gymnasium are essentially for athletes and other men and women who wish to develop their skills for particular athletic activities. They provide facilities for athletes to keep themselves for their chosen sports. Health gymnasium provide advice, instruction and facilities for everyone who wishes to become or keep fit, whatever his or her initial physical condition. Their clients range from professional athletes to office workers who wish only to make the best use of their lunch hours.
Health gymnasium vary widely in quality. When choosing one of yourself, you should check that is staffed by qualified and responsible instructors. You may feel flattered to be attended by a sports celebrity, but professionally trained physiotherapists and physical education instructors can be equally, if not more, beneficial to an unfit person. You should expect to be asked details of your medical history, and to be carefully examined before being allowed to use all the facilities.
Three types of exercise
The accessories provided in health gymnasium to help you exercise range form simple wights and benches to more sophisticated equipment such aș pulleys and rowing machine. These accessories are appropriate for different kinds of exercises.
Isometric exercises, the simple type involve a applying muscular strength by pulling or pushing immovable objects. The muscles are tensed and this tension is sustained for short periods of time. Because little movement is involved in these exercises, they develop static rather than dynamic strength.
Isotonic exercises involve pulling or lifting an object to certain position and then returning it to its original position. They cause the muscles to contract as you move but, because the weight or force employed is to the same degree throughout the exercise. The weight or force used can only be that which you can lift or pull at the weakest point in the range of motion involved and at other points your muscles are not sufficiently strained to develop in strength.
The third type of exercise, known as isokinethic, requires more sophisticated equipment. Isokinetic exercises can be designed for particular needs. For example, a person who is training for a particular sport can do exercises that stimulate exactly the demands of this sport, and also developed precisely the muscles he or she most needs.
Massage
Facilities for massage may be available at health gymnasium or sauna baths. Massage is used in physical therapy as a means of rehabilitating patients who are suffering from certain physical pain or aliments but, as a mean of getting or keeping fit, its value is very limited.
Sauna baths
Sauna baths may be attached to health gymnasium or may exist as separate establishments. Most sauna baths are organized according to similar basic principles, although Finnish sauna baths retain their original national characteristics. They have an invigorating effect on the whole body and aid physical and mental relaxation, but their effect on the whole body and aid physical and mental relaxation, but their effect are temporary rather than long-term.
Sauna baths provide a healthy and enjoyable means of relaxation, but the sudden rise and pulse rate can be dangerous. Pregnant women and people with high or low blood pressure, should therefore avoid them.
By admin, in Disciplines,
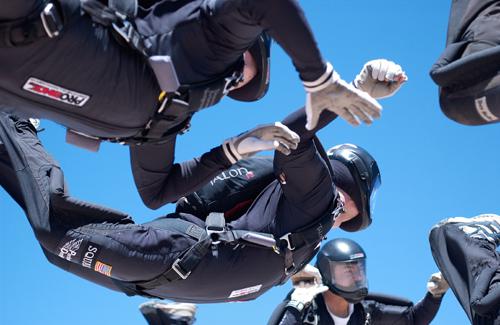
Looking for the perfect team
You might as well be searching for The Holy Grail.
How often have you heard of a team who's had a big argument and broken up before, during or immediately after Nationals, having already spent an exorbitant amount of money? Most of the time this could have been avoided by simple communication, honesty and a little bit of compromise from the outset. Instead, the 'volcano effect' takes hold, and petty grievances, built up over the course of the year, come to an ugly head, usually at an important and stressful event - like Nationals.
Quite often the issue that causes the break-up seems pretty minor a couple of months down the line. But it's an all-too-common practice in skydiving, and one that detracts from teams and individuals being able to perform at their best. Most teams require two years minimum to even scratch the surface of their full potential. It takes time for teams to gel to the extent that they have true communication, anticipation and knowledge of working together. But this all-pervasive attitude, which makes it acceptable to break up a team over somewhat insignificant differences, prevents the sport and individual skydivers from growing and progressing.
It's the syndrome of seeking the 'perfect' team, and it's become so commonplace in skydiving that we could almost be forgiven for thinking it's acceptable.
What is 'the perfect team'
Most competitive skydivers have an idea of what the 'perfect' team is. They look at teams like Airspeed, Deland fire and Sinapsi PD, see these teams communicating and performing well, and make the assumption that to some degree, team members are virtual clones of each other. They never see individuals disagreeing or arguing, and believe these must be 'perfect' teams comprised of 'perfect' skydiving
individuals with 'perfect' personalities. They imagine how great it would be to be part of a team like this, and that their own problems stem from being unable to replicate this perceived 'perfection' in their own teams.Because of this unrealistic expectation, too many talented skydivers waste their time not training with a team at all. There's nothing worse than not training - in fact, some of my steepest learning curves have come from being part of what could be described as 'dysfunctional' teams.
In a similar way, teams waste time by constantly replacing 'flawed' team members in search of the 'perfect' team dynamic; instead they should be working together, getting over personality differences to achieve a common goal, which is performing at the team best.
It may come as a shock but - there is no perfect team!
The truth is that on any team, individuals have their own ideas, flaws and times of stress - and often disagree with their teammates. Our unique qualities and imperfections make us part of this diverse human race, and differences are inevitable. I can't think of a more diverse group of people than Airspeed 8 - our disagreements ranged from how many jumps to do, to physical training and jumpsuit colours (you should see what we finally came up with in 1996)!
Despite this, I often hear how up-and-coming jumpers idealise the top teams and think they always get along perfectly with each other. The result is that when a disagreement naturally occurs on their own team, they assume it's an inherent and insurmountable fault in the team - and subsequently break up or switch members. Differences like this are to be expected, and are part and parcel of team training, no matter what level you're at.
A reply I often hear to this is, 'Yeah, but we're not Airspeed,' - implying it's easier to deal with team disagreements and personality conflicts when you're a professional team; if you have to put up with it for 'work', then somehow, you can. But when non-pro teams nowadays are spending between $5,000 and $25,000 per person per year on this sport - it seems like a few minor differences could be worth dealing with for longer than just one season! More to the point - there's really no alternative, if you want to perform, you have to deal!
It's easy for teams to think their issues are unique, and that problems can't be resolved because of this; however, the case is most likely that the individuals are not willing to work out their 'unique' issues. Usually the problem is nothing more than the result of someone's need to express themselves, and this, in turn, being taken the wrong way. Problems like this could have been resolved months earlier with the input of a good coach, or by using truthful 'pass the rock' sessions where team members get the opportunity to vent and communicate openly.
Teams need to realise that what they're going through is normal, and conflict is part of a natural evolution for every team. There is not a single team that does not go through conflicts. The difference between a successful team and a failing team is that the former works out their differences, whereas the failing team does not. It's not a matter of individuals being unable to resolve their conflicts - it's simply that they are unwilling to. Airspeed has gone through few big decisions without some pretty heated opinions being cast around the room.
Because every team goes through the same cycles of development, it's worth outlining what those cycles are, so they know what to expect. One way of looking at how teams grow and mature is to use Bruce Tuckman's 'forming, storming, norming, performing' model.
Forming - Stage 1
The 'honeymoon phase'
When most teams join up, they all seem to get along - everyone is excited about the new team and keen to get started; this is also known as the 'honeymoon phase'. Most skydivers are jubilant that they actually have a team to skydive with, morale is high, and negative personality traits are kept in check. It's very important in the 'forming' stage to get an experienced coach for guidance and direction. Many teams also benefit from having a team leader, and this is the time to appoint them.
You should also spend quite a bit of time discussing your goals and aspirations as honestly as possible, as this will avoid problems down the line. There could be nothing more frustrating than being in a team where people have completely different agendas - one wants to take the team to the World Meet and another just wants to get the swoop at the end of the dive!
Levels of commitment in terms of number of jumps, tunnel, money and time should be discussed as a priority, and while not every member of the team will have exactly the same objectives here, as long as they are in the same ballpark the team can succeed. It's important to come to a workable compromise and move on - rejecting a team whose goals don't precisely match yours, and ending up not jumping, is much worse than doing only 200 team jumps that year instead of the 300 you wanted to do!
Individual long-term goals can even be different - it's fine if one person eventually wants to become a World Champion, and another just wants to compete for a couple of years before moving on to other things - as long as the collective team goal is agreed upon and compatible for the duration of the agreed term of the team. I refer to this as 'buying into the contract'. The key agreements of this 'contract' are:
Individuals agree to work together to achieve the common goal.
Individuals agree to communicate honestly with each other, more commonly known as having regular 'pass the rocks'.
Individuals value their differences, i.e. they recognise that every person has a different background and personality, and will therefore have different ways of relating and behaving.
Individuals seek to gain insider learning about their impact on the team, i.e. thinking before speaking and recognising that what they say has the potential to impact the team in a negative (or positive) way. Individuals should be responsible and accountable for their actions and words.
Storming - Stage 2
Guess what? The honeymoon is over!
This is the frustrating stage of learning with the team; individual quirks start to come out and team members vie for position as they attempt to establish themselves. Cliques can also start to form within the team - questions and uncertainties come up and the 'contract' itself may be questioned. This is where most teams sow the seeds of inevitable self-destruction.
Simply put, this is the stage where arguments might occur over block techniques, individual performance and styles of relating. Even table manners, personal hygiene and fashion sense can all come under attack! It's important to realise that this is natural human behaviour in a goal-orientated team environment. It's also important for individuals and the team to reiterate the goals they set and believe that the team outcome is more important than individual needs. At this stage, outside help in the form of a coach experienced in dealing with team dynamics is invaluable.
I've heard more times than I'd like to recollect, 'I guess I'm just not a team-player'. I don't believe this to be true. That individual is just not willing to compromise, or never bought into the 'contract' in the first place. People who are described as 'team players' are just more willing than others to suppress their need to be heard all the time. I also believe there's no such thing as a natural team player. Anyone has the ability to become a team player as long as they are willing, at times, to put aside their own ego for the good of the team.
Knowing that the 'storming' stage is normal and can be overcome by focusing and refocusing on the agreed team 'contract' is critical at this time. There's no knowing when the 'storming' will occur, or how long it will last. However the sooner a team recognises it and then accepts it as normal, the sooner the team will leave this phase behind.
Norming - Stage 3
Congratulations - you've got further than most teams and are on your way to performing your best!
This is the phase where the team has recognised individuality as a strength, and has matured as a group. Commitment and unity is strong. It could feel similar to the 'honeymoon phase', but instead of being based on enthusiasm alone, it marks a time of personal growth and acceptance.
Roles and responsibilities are clear and welcomed: the team's everyday interactions and dealings have become like clockwork, and the daily training routine, including team meetings and 'pass the rock' sessions, is more instinctive and needs no prompting.
It's important to realise the individuals themselves have not fundamentally changed, and disagreements will still occur - however teammates have come to understand that having their personal needs met is secondary to team growth. The same disagreements teams had in the 'storming' stage suddenly seem less important and are dealt with more quickly and in a more mature manner.
Performing - Stage 4
The fun part!
In this stage the team has a high degree of autonomy and will be running like a well-oiled machine. The team is able to focus on performance; personal issues that would have held them back previously as a distraction have melted into the background and become irrelevant.
This is also the phase where individual relationships and trust are consolidated within the group. On a personal level, team members trust that each one will always act for the good of the team - communication between piece-partners is open and honest. In the sky, teams feel that everything falls into an instinctual rhythm, more so than a forced or conscious act. Trust in individuals' ability runs high, allowing team members to be sure that others will also fly their slots with confidence. This in turn allows for faster keys, more confident moves, and ultimately, more points.
Teams should expect that disagreements will still occur - even arguments - but now issues are resolved within the team positively. It's also important to recognise that just because a team has reached the 'performing' stage, they may not be the 'best of friends' - however teammates trust and respect each other, because of the understanding that they are all focused on the common goal, i.e. the 'contract'.
This phase is more easily attainable than most people think, or believe. It's the most fun part of training, and the pay-offs are numerous. Individual growth, realisation of your potential, a load more points and the best skydiving you'll ever do are just some of them.
And it's a choice that anyone can make.
Gary Beyer was a member of multiple World and National Champion team, Arizona Airspeed, between 1995 and 2002. He has since retired from World level competition and dedicates his time to team and tunnel coaching. www.onthelineskydiving.com
This article was first published in Skydive The Mag (UK) and is republished here on request and with permission from the author.
Photos by Mike McGowan
By admin, in Disciplines,
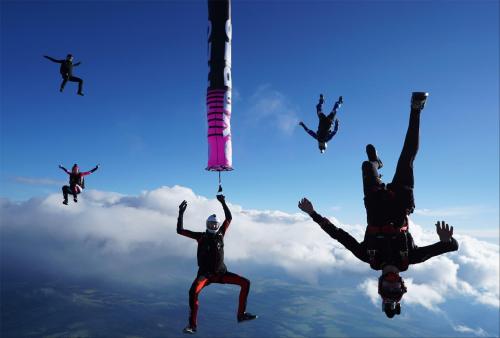
Indoors Outdoors - Translating Between The Tunnel & The Sky (Part 5)
Part Five: Head Down
Learning to fly upside down can be tough. Once a student reaches the point at which the coaches and instructors in charge of their progression and safety invite them to start, he or she should be suitably skilled in the other main orientations of flight in order to manage the variables involved in practicing head down with confidence. However, all too often this is not the case - and although things are improving as training methodology evolves and becomes more widely understood - too few students invest as much time as they should in the right foundational skills in their big rush to get to head down.
The main thrust of these articles is to highlight some of the many ways that various elements of freefly training feed into and stack upon each other to create a deeper understanding of how flying actually works. The process of learning head down is a great example of exactly how many things someone could and should be able to do before they begin with those expensive headstands on the net - in order to make the whole endeavour much smoother, easier, cheaper, and vitally - more fun.
Safety First!
On the most basic level, good backflying and sitflying skills will keep you safe while learning head down. The ability to properly control yourself in these positions on high windspeeds is the minimum by which you should be allowed to get started. Even for those us totally devoid of maths, the ability to reset yourself onto the net in just a handful of seconds after needing to bail instead of fifteen or twenty (or more) spent bouncing around the top of the tube is clear to see.
Investing in your backfly and sitfly early on will save you a great deal of time and money down the road.
In addition, every bit of progress you make in the other areas of your training feeds directly back into your ability to fly head down. Doing this other stuff is more fun and easier on your body than spending hour after hour on the net.
How Does Head Up Help?
Aside from simply being able to safely get in the tube on wind speeds high enough for head down flying, many of the ways you sitfly about the place can be practiced and then switched the other way up as a means of making you brain understand what is going on. The most efficient way to figure out a line or a sequence of moves when you are first learning on your head can be to get it right with some sitfly first where it is easier to maintain awareness and fly with a position in which you are stronger - then flip it over. The way movements are flown from the one orientation to its opposite can be very similar - the space, the lines and the subtleties are very often one and the same.
How Does Carving Help?
Carving your way up from low wind speeds on both your belly and back help your head down flying from the very start by helping your brain to recognise the single most important rule to maintaining positional awareness:
When you go from head up to head down - left is right and right is left.
Once you have got the hang of static head down, moving around is next. Understanding how carving works and practicing it on low speeds is the way to both good technique and a much quicker mastery of it on high speeds. The best way to frame the process is to think of carving in the tunnel as learning the ability to fly at any angle and velocity as opposed to separating high speed and low speed into two categories. Once you get steep enough, the skill set you need to apply to carving becomes closer to that of head down flying - but the most important thing to understand is the fluidity. The golden moment is when your carving drills and your head down meet in the middle.
How Do Layouts Help?
Proper layouts are tough to get right. Frequently people have to do a great many, working through the smallest refinements in technique before nailing them. Training layouts teaches you body many things, but within the context of this article the most prescient value they have for helping with your head down skills is to get your body up over your head and travelling through the axis you need the most control of when flying (or transitioning through) a head down position. Head down is scary at the start - the wind is fast and is hitting your control surfaces from the wrong sides - having some layouts under your belt will help with being relaxed at the idea of your feet being high up and your body low down.
The thing to remember is that all the pieces matter. While it is entirely possible to learn how to fly head down buy achieving the minimum possible requirements to be allowed to try, and then spend a great deal of time and money hammering away at it the way people used to do all the time - there is now a way that is more fun, less tiring, and that will ultimately give you a stronger skill set, better understanding and more useable tools for skydiving.
By admin, in Disciplines,