0

Disciplines

    How To Get That Wind Tunnel Job - Vince Arnone Talks You In


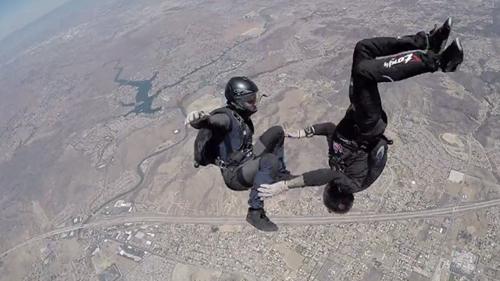
    Image by Wolfgang Lienbacher
    When it comes to the windytube, Vince Arnone has a few solid miles under his belt. He’s worked in the wind tunnel industry since 2010 (and in the skydiving world for a few more years before even that). He runs Indoor Skydiving Source, a community-based resource for indoor skydiving and bodyflight.
    During his many years as a tunnel instructor--working with first-time flyers and skydivers alike--he has constantly been approached by wanna-be tunnel rats. If you’re one of them, he has some advice to share with you. I asked him some questions about it, and here’s what he had to say.
    Q: What’s the first step? Are there prerequisites?
    Vince: Just apply!
    At the end of the day, great timing and a solid application really is the key to working in the wind tunnel. Beyond that, there are a few important factors to consider before filling out that app.
    The physical requirements of the job should be the first thing you consider before seriously looking at getting a job as a wind tunnel instructor. Being a tunnel instructor, and especially working with first-time flyers, is a physically demanding job. Sometimes you work with children, but sometimes a 250lb man walks through the door. They are both your responsibility, and bothcan kick your ass!
    Both the IBA and Tunnel Instructor rating programs administer a physical fitness test that you must pass in order to be an instructor. The test normally includes pull-ups, sit-ups and running. You don't need to be superhuman, but being generally in shape is a good starter.
    Q: Do you need a lot of previous tunnel experience? Is it, like, only shredders need apply?
    Vince: No. The training will be part of the job, and it’s an investment. It goes like this.
    In order to work in a wind tunnel with first-time flyers, you need a tunnel instructor rating. Earning this rating requires a 3-4 week course which teaches you how to safely introduce and monitor a flyer's first flight. Most wind tunnels include this as part of your initial hiring period.
    You might have to sign a contract or have some money withheld from your paychecks to pay for the training, but rarely do you have to pay out-of-pocket for it. Training programs like this are designed to take anyone off the street with no previous experience and set them up with the key skills they need for the job.
    Q: Do you have any insider tips that might give an application the edge?
    Vince: If you remember one thing from this article, remember this: a staff at a wind tunnel is a close-knit team, and the team has to work well together. Because of this fact, knowing and having a standing relationship with other instructors or managers can make the difference when applying.
    A hiring manager is always looking for a good fit to the team, not just a skilled individual. This means they are looking for someone who will mesh well with the other instructors on the staff and work hard. This is the most important thing to remember when applying.
    If you don't know anyone, but you know the job is for you, don't worry! I don't mean that you have to be long-time buddies with someone at the tunnel in order to get a job. Hang around. Get to know the staff at the tunnel you want to work in. Show interest. Small acts like this will go a long way, and you just might learn about the tunnel and bodyflight in the process.
    Q: What should a potential tunnel employee do to prepare for the interview?
    Vince: Treat it like a “real interview.” Don’t be too casual about it. All the standard job application best practices apply.
    The opportunity to work in the wind tunnel is a unique -- and possibly life-changing -- one. Approach it with a good attitude and tons of passion, and see where it might take you. Good luck!
    Q: What are the major differences between tunnels for flyers with an eye on growth?
    Vince: Back when I first started--I guess I’m sounding old now--there were just so few tunnel jobs out there. The number of tunnels from 1982 to the year 2011 was around 40. From 2012 to 2015, that number jumped to around 80. Today, looking at the database, there are 113.
    So rather than jumping at ANY possibility--as someone who sees the tunnel job as an opportunity to grow their personal skills and maybe even start coaching--it really matters which tunnel you land at.
    The days where everyone would flock to a single tunnel because it was the only tunnel, only high speed tunnel, or only 14 ft tunnel, are long gone. There are more coming, too; since 2013, the number of tunnels opening each year has also exploded. This also means the number of instructor positions has grown. Just by the numbers, setting out to get an instructor job is more likely to end successfully. This also means that the experienced flying community has spread out.
    Consider working at a tunnel that mainly serves first-time clientele. There will be lower experienced flyer traffic, and the other instructors might not be flying- and coaching-focused. That’s a much different environment than a tunnel that sees experienced flyers as a larger percentage of their business.
    Working with experienced flyers and other coaches will play a big role in your personal progression. Surrounding yourself with people who have similar goals will immerse you in the culture. Consider the location and culture of the tunnel you land at. A location that will support your flying goals will help you reach them much quicker--and this is about you going all-in for personal development, isn’t it?

    By nettenette, in Disciplines,

    Mixed Formation Skydiving - The Next Big Thing

    Mixed Formation Skydiving Is Ready To Take Over The World
    Andy Malchiodi--neck deep in his multi-hyphenate (medalist/coach/musician/filmmaker) life--didn’t set out to co-invent a skydiving discipline. He just wanted to enjoy competition. Luckily for us, he did it anyway. He’s quick to refuse to take credit for being the first person to combine flat and vertical orientations into one discipline, but there’s no denying that he’s the one who has done the most to make it official.
    The building blocks were there, but Mixed Formation Skydiving (“MFS”) in its current iteration wasn’t even on the radar when Andy’s freefly team, SoCal Converge, was stacking up medals on the competition circuit. From 2008 to 2012, Converge won four U.S. National Championships, took back-to-back gold and silver at the World Championships and racked up two world records.
    “In my years of [freefly] competition with SoCal Converge,” Andy begins, “Even though we were working within an artistic discipline, we really thrived on--and enjoyed training--the compulsory rounds. In those years, the freefly compulsories were essentially 2-way MFS; teams flew two flat points out of a 10-point pool over two rounds.”
    As well as being fun to fly, Andy and his team saw several very compelling elements in these compulsory rounds.
    “We noticed a lot of cool stuff,” Andy explains. “You can train this without a videographer in the beginning--you can just de-brief from your GoPros until you recruit one. You can take it home to a small drop zone with a small plane. People are attracted to the idea of fusing all four primary orientations into one discipline. For those people, it’s a discipline with it’s own identity. And for those who only wish to focus on the vertical, it’s a stepping stone to 4-way VFS.”
    “The beauty of it is the modularity,” he explains. “Even newer skydivers, who aren’t freeflying yet, can do the flat points and grow into it.” To be clear: The advanced class does not do any of the belly or back points, and some of what are considered the more difficult vertical points are omitted from the advanced dive pool as well.
    Clearly, the latter makes MFS a very compelling inclusion into a newer skydiver’s arsenal. With the inclusion of the flat points, 2-way MFS is a discipline unto itself, where the training progression from advanced to open nicely follows a well-rounded skill-building arc. “You might choose to do advanced MFS,” Andy says, “When you’re at a skill set where you can’t quite take on the VFS open dive pool, but you’re interested in doing VFS.”
    “It was initially my hope,” Andy continues, “That advanced do two purely flat rounds and four vertical. The open class would then ‘mix’ them. The current rules are designed, by suggestion of the USPA, to appeal to those who want to use MFS as a method of progression into VFS.”
    In 2011, as Andy and Converge were getting excited about the possibilities of their nascent discipline, the freefly compulsory rounds changed. The rules moved away from speed compulsory rounds and into artistic compulsories, where teams receive four moves to style a routine around.
    “It is pretty different than it used to be,” Andy sighs, “And we weren’t very happy to see that change. We had our reasons for believing it was good the way it was. So I took it upon myself to take that really good stuff and make it its own discipline.”
    Andy had a lot of work in front of him to create an official space for MFS. He took the moves that existed in the pre-2011 artistic freefly compulsory dive pool, brought in several of the points that existed in the wind tunnel competition dive pool (which, at the time, wasn’t as widespread as it is now) and started to work out the details.
    The biggest challenge Andy faced surprised him. MFS is, after all, at heart a formation skydiving discipline--and, in formation skydiving, you cannot have one point that begins or ends with the same grip of another point. “You would think,” Andy muses, “That with multiple orientations--head up, head down, belly and back--that would open up infinite options, and you wouldn’t have a problem creating points that didn’t start or stop with the same grip as another point. It was more challenging than I would have guessed.”
    The tunnel competition dive pool, developed in great part by Arizona-based skydiving legend Jason Peters, included several points that--unsurprisingly, considering its non-FS provenance--did not abide by that FS-specific rule. “At the beginning, if you watched a very fast 2-way tunnel draw,” Andy explains, “It looked like a game of patty-cake, because you would finish one point and then begin the next point with the same grip. Pulling off that grip and going right back to it looked kinda funny.”
    Challenging as it was, Andy stayed the course to, as far as possible, mirror MFS’s rules and regulations to match existing formation skydiving disciplines. He brought a few other top-shelf skydivers to help him work out the engineering puzzle--among them, Ari Perelman and Rook Nelson. The think-tank communicated with the USPA (specifically, James Hayhurst, Director of Competition, and Randy Connell, Competition Coordinator) to get multiple sets of eyes on the points, rules and regulations. With all those collaborators on board, 2-way MFS enjoyed an intuitive and logical evolution as it came into its own.
    With staunch USPA support, MFS made its public debut in 2013. The first test event, at the U.S. Nationals, was “very well attended;” Andy remembers, “Everyone was very enthusiastic about it.” The first official event was MFS’s inclusion in the 2014 U.S. Nationals. From there, the discipline has consistently ramped up with every passing season.
    “It’s easy to see why. It creates very challenging and intriguing engineering dilemmas,” Andy grins, “And there are a couple ways you can slice the onion there.” The training videos say it all.
    Official international recognition is the next logical step, and MFS’s next big push is the one that will send it over the ocean into Europe and Australia. Slotting into place at the IPC level would allow MFS to be included in events like the World Cup and the World Meet, and that’s exactly what its inventors intend for it. So far, the U.S. is the only country with 2-way MFS on the docket--which is stupefying, considering the discipline’s flexibility, portability and low infrastructural requirements.
    “They’re waiting to see how it goes in the U.S.,” Andy says, “And they’re slow to move, but the more competition skydivers who push for MFS at their Nationals level, the closer we’ll get.”
    Interested? Check out the 2-Way MFS dive pool from the USPA website. To learn the MFS ropes, reach out to Andy himself, Jason Peters or Nik Daniel with Axis Flight School.

    By admin, in Disciplines,

    How To Tube: Getting It Right

    Tunnel instructors are a very special bunch Outside of the physical progress with your tunnel flying skills, there are some things to keep in mind when you visit your local tube that will aid both efficiency and enjoyment for yourself and those around you.
    Once signed in at the facility the instructor for your session (each session as they rotate) is the one in charge and should be the person you approach first with any questions or concerns - not the hoity-toity fancy coaches or other flyers (or even the other instructors).
    He or she does this every day and is under pressure to make everything run smoothly and on time. If you instructor is doing their job properly he or she will find you plenty previous before your session and discuss what is going to happen - they should enquire after your intentions but also let you know who else you will be sharing the tunnel with and what they are doing too. If you are with a coach who has overlooked this quick but necessary part of the process then consider getting a better, more communicative coach.
    Instructors are very fragile - try to help them out If you are a student - do not hesitate to get involved! Not asking when you need to know something will probably only result in looking like an arse in front of a bunch of people than a functioning human in front of one.
    If you are not with a coach and are relying on instruction from the tunnel staff - seek them out and talk to them before you start. The job of tunnel instructor is all about good efficiency - with time and energy both - and if you embrace this they will go the extra distance for you will do better out of your training as a result.
    Tunnel Monkeys enjoy teaching people stuff in the tube, it is why they do a physically demanding job for crappy money - yet those same reasons lead to short patience with disorganised and unhelpful flyers. You can aid them by personally finding and talking to either the instructor for your session, or if your instructor is nowhere to be found or prohibitively busy - the tunnel driver. The driver will (should) be halfway responsible for keeping track of your session anyway so you can relay your intentions - the two should constantly relay information to one another before and throughout the session.
    Happy instructors will make your life easy Here are a few things to remember:
    Be Ready: Tunnels all try to avoid running late and to buffer against the things that make this happen they will try to operate ahead of time as often as possible. Arrive early.


    Brief early. Be ready to start and ready to go first.
    Accommodate: When conducting a session an instructor has to consider many things, not only the requirements of every individual in the group, but what is happening both beforehand and afterwards. It might seem quiet but there can be anything form a long list of circumstances that require the maintenance of a tight ship - things like television crews and scheduled maintenance always require more time and extra work from the staff.

    Don’t Leave Your Shit Everywhere: The tunnel might let experienced flyers take drinks and such into the staging area but not the newbies - this is because you can be trusted to be safe and organised with your things. The same goes for around the building.
    Tunnel facilities are public places and the companies that operate them want to appear suitable as such, so put your pants back on and clean up after yourself.

    Know What Else is Happening In Your Session: Learn how long you will have between each of your rotations. Never rely on having long enough gaps between your flights to brief as you go (see part 3 for more). Plan accordingly. You are paying for those twelve seconds it takes your team to put their helmets on and set up - the clock is running.

    Thou Shalt Not Take The Piss: The instructor for your particular session is the only one you need to talk to about your plans, and they are in charge. They do not give a single fuck about “what they let you do last time” or what “usually happens” because you “fly there all the time”.

    News Travels Fast: Instructors whine and gossip like nobody else. If you are difficult with one of them everyone will know it before the day is out. This works the other way around too. It only takes a small amount of communication and consideration to get the staff on your side, and they will see you right. Finally - remember be nice and have fun. There is no substitute for more tunnel time and quality coaching, but everything you can do at the edges to facilitate a positive and productive experience at the tube helps. Putting in a bit of effort to try and make things easier for those around will reflect in both you own skills and the opportunities you are presented with amongst your flying community.

    By joelstrickland, in Disciplines,

    How To Tube: Managing Sessions and Understanding Rotation

    Image by Annette O’Neil
    Tunnel flying can be physically demanding, especially at the beginning. Being in good shape will help but tunnel fitness is largely built through learning good technique and trying to fly as regularly as possible.
    The more you fly the more you will be able to fly, in terms of both duration of each period you spend in the tunnel and the necessary rests in between. ‘Rotation’ is the term widely used to refer to the process of sharing time in the tunnel amongst the flyers in each session - of rotating them around so everybody gets to use their minutes in sensible portions and with ample rest periods.
    Not all indoor skydiving facilities are the same - some have an enclosed (i.e. locked) staging area immediately next to the flight chamber that necessitates formalised sessions of a set duration (usually 30 minutes) which those booked to fly divide amongst themselves. Others tunnels might have an open staging area (i.e. not locked) in which the flyers can come and go as required - which leads to a little more freedom and flexibility for deciding upon the order of rotation, but more chance for things to turn into a shambles if those concerned do not manage the time properly and let it get out of hand.

    Playback monitor and session information at Hurricane Factory Slovakia. Image by Annette O’Neil
    As indoor skydiving facilities grow progressively fancier, the most likely way sessions will be displayed is via a monitor where each and every minute of flying is listed via software that is linked directly to the tunnel’s manifesting system. The programmes used to run the daily activities is most likely specific to that tunnel (or that type of tunnel) and will have its own particular idiosyncrasies. However - there are many places to fly where the primary method of marking people’s time is by writing everything out on a white board and crossing off the rotations one-by-one with an actual finger.
    Here is a simple list of some different ways of splitting up time:
    Sharing Sessions with the General Public: People off the street giving indoor skydiving a try will likely have bought a package that involves a couple of rotations of a minute or two each. If you are in a mixed session with some newbies you can really help by being on point with your personal plans as your instructor will likely have his or her hands full with the nervous and baffled. Look out for small children bailing out early or people faffing with their gear - if you and your coach can jump straight in when the instructor needs to tend to a tiny crying human or fix a gear issue in the staging area so they don’t have to interrupt a flight they will love you for it.

    The more the merrier - just be sure everyone knows the plan.
    Sharing Sessions with Belly Teams: Belly flying is very serious so much coaching, practicing and remembering needs to be achieved. Teams are often fond of shorter rotations such as 1:30s or 1:40s so they can squeeze another go out of a session. If your tunnel has a video playback system on a delay it will likely be set for longer than this so it is easy to get repeatedly caught with your pants down still watching yourself on the screen as the belly types get out.
    Sharing Sessions with Freeflyers: Freefly training these days is all about the low speeds. Flying on lower wind is easier on your body and the mixture of positions and training methods means it is possible to fly for longer. Rotations of 2.5 minutes have become standard and some coaches and flyers prefer three minutes. Remember, nobody sensible really wants to high five this much - but it is the done thing.

    British VFS team QFX at the World Air Games. Image by Ewan Cowie
    Sharing Sessions with VFS Teams: VFS is hard work so teams frequently like one minute rotations which can be a pain in the balls. They should be nice to you about it. You might find your rest periods very brief or even be asked to do shorter rotations in your own time so they can rest too. Stand your ground - as policy tunnels do not guarantee the breakdown of sessions but you are a paying customer an as such should be accommodated. As you progress you might be fine with one minute gaps but as a new flyer it can be too much work.
    Although it really only involves some very simple maths, organising rotation can be confusing at first which sometimes puts people off figuring it out - resulting in experienced flyers (who should know better) with a total inability to behave efficiently when at the tunnel. The most important thing you can do to make your sessions as smooth and beneficial as possible is communicate with the other people involved - and once you understand a few simple principals you are ready to go.

    By joelstrickland, in Disciplines,

    How to Tube: Buying and Using Time

    Tunnel time is not cheap. For casual flyers there is no real way to make it be cheap, short of selling your soul to a tunnel company for a position as an instructor. However, there are a few things to learn about the process of procuring time that can help make every minute as useful as possible.
    The important bit of information here is the more time you buy the less expensive it is per minute.
    For example - if you but 10 minutes of flying you will be paying a standard rate, but if you buy an hour you will qualify for a slightly cheaper category and save a small percentage on each minute. If you buy five hours you might qualify for the next cheapest level and save a little more. To qualify for the lowest rate that the facility offers you may have to commit to something like 20 hours of time. This is a lot of money to stump up for tunnel flying but if you are committed to getting good and have to cash to invest in it early then the savings start to make sense.
    Generally speaking there are a couple of ways to buy time - either from a tunnel or from a coach.
    Coaches make their money by purchasing time at the cheapest per-minute rate then selling it on to their students at a higher price and banking the difference as the fee for their services.
    As would make sense for an industry where different standards and levels of experience are available - coaching fees are not all the same. A multiple world champion with many years of experience might cost you more than a new instructor with a year of working at the tunnel under their belt. However, a general rule is:
    If you are buying smaller amounts of time the difference in price of buying form a tunnel or from a coach is negligible.
    
The advantage of buying from a coach:
    You get to learn stuff in a structured and efficient manner and you do not rely on the uncertain system of being coached by tunnel instructors.
    The advantage of buying from a tunnel:
    You may be at the stage in your flying where you can choose wether you need coaching or not. If you just want to zoom around practice without having to talk to anybody then you can. If you do want coaching for a session that you have already booked you can pay someone separately as a separate arrangement. If you want to invite your friends for some group play you can.
    Important: If you are relying on the tunnels instructors to teach you, remember that they learn on the job and might not be qualified to spot what you want to learn. Tunnel facilities often have a system with which to request an instructor of a high enough level to cover what you need, so don’t forget to ask (A good coach understands this system and will make the appropriate arrangements automatically). Remember that the more advanced you get the greater the chance that a tunnel instructor will not be able to teach you.
    For the majority of casual flyers it makes the most sense to buy time through a coach. This is because the best way to learn at the tunnel is from and experienced flyer that can effectively and efficiently communicate ideas, demonstrate techniques and provide a quality one-on-one service. The pool of instructors at your local tube may well be good coaches, but are often simply too busy to offer sufficient depth - and if the money you are is not really any different then the choice is an easy one.
    Some Tips:
    Look out for loopholes: If the tunnel is running a special promotion you might be a be able to take advantage of it. Buy-One-Get-One-Free on introductory flight packages you say? How many can you buy? Likely nobody cares that this is not proper pro-flyer time - certainly not the instructors. They would probably much prefer to teach you something for a session than process a family of newbies.
    Events: Tunnels might run special events for group flying - tunnel scrambles, night parties etc. Organised group events can be bags of fun and a great way to find flyers of a similar level to practice with.
    Last minute rates: If a tunnel has a particularly quiet period or a big group cancels at the last minute they might offer the empty time at a heavily discounted rate. This is often a regulars-only type thing - make nice with the right people and be sure the tunnel has your contact details.
    Locations: There are a lot of tunnels now, and a lot more on the way. Some places where you can train are cheap to fly to and cheap to live in. Depending on how much time you want to do it can cost less to go abroad than visit your closest tunnel. Plus you get to see somewhere else and maybe learn some stuff.

    By joelstrickland, in Disciplines,

    How To Tube: A Guide To Getting The Most From Your Tunnel Sessions

    Part One: Instructor vs. Coach
    A tunnel coach and a tunnel instructor are different things. This can be confusing as they may look the same, sound the same, perhaps wear the same suit and even be the same person performing two different roles from one session to the next. They will all high-five you too many times.
    What exactly does an instructor do? What exactly does a coach do? What are the differences between the two and how do they apply to me? Also, what is spotting and who does it? Do I need some? Also, how do I go about finding a good coach that is the correct fit for my personality and flying goals?
    What does a tunnel instructor do?
    An instructor is an human employed by the facility itself to oversee and conduct the tunnel sessions. This includes managing the time, keeping everyone safe and teaching students as and when it is required. Instructors are also responsible for taking turns controlling the tunnel and during downtime performing maintenance around the building.


    Coaches provide tuition in different ways. Sometimes from outside the chamber...


    ...And sometimes from within. Instructors provide support where it is needed.

    What does a tunnel coach do?
    A tunnel coach is an accomplished flyer that buys time from the tunnel as a private individual and offers it as lessons to potential students. Coaches buy bulk time from the tunnel company to secure it at the cheapest available rate and sell it on to their students including a fee for their services.
    Do I need to get a coach?
    Yes, no, sometimes, maybe, yes.
    At any given tunnel there is an instructor in the immediate vicinity of the action at all times (watching from the doorway or in the chamber itself). They are present for safety and are available to teach anyone in their session who requires help. You can go to the tunnel without booking a coach and have the instructor teach you, but there are a few things to consider:
    1. Instructors learn on the job - they begin with a very basic amount of training and advance through levels of qualification while working at their tunnel. This means the instructor for your session can be a veteran of many years or a new employee conducting their very first class.
    2. Instructors have other duties to perform. The busier the tunnel is the less time the instructor will have to talk to you before and after your session. If they have a birthday party of tiny children to fill with joy they will probably not have the time and energy to discuss your backfly position in any detail.
    3. You will likely get a different instructor each time you visit. While there is something to be said for mixing up the sources of your learning, there are couple of things that are important to consider - An instructor you do not know might want a demonstration of your skills before they will teach you anything new, thus eating into your valuable time. Also, the more you fly and more skills you acquire, the higher the chances that an instructor will not be qualified to teach you anything new.
    4. If you want to learn head down flying you need to have a coach to give you feedback from the front as the instructor will be holding on to (spotting) you from behind. (While it is possible to learn this from just one appropriately qualified person, it is a very inefficient and time consuming way to do it). Both instructors and coaches will tell you to get a good coach.
    5. As you gather more experience and your skills grow, you will recognise the times when you might or might not want or need coaching for a particular session. There are times when you a required to have a coach in order to progress, and there are times when you can improve by practising alone or with a group of friends.

    For learning head down you will need the help of both an instructor and coach.
    The coach (left) is there to teach you what to do. The instructor (right) is there for your safety.
    An instructors job is to spot transitions when required.

    What is spotting?
    Spotting is the term used to refer to the techniques used by by instructors to control and catch flyers in the flight chamber.
    This term is commonly used in two ways:
    1. As action. For example - A student flips onto their back and is caught by the instructor. This is a spot.
    2. As method. For example - An instructor is teaching a student how to sitfly. The instructor is doing the teaching, but is also spotting the student should anything go wrong.
    The duty of spotting falls to the instructor of the session. The flying activity that takes place will be equal to the level of qualification of the instructor. The exception to this is that if there is another person in the tunnel that has more advanced qualifications. An example of this might be another instructor doing some private coaching outside of his duties at the tunnel.
    Tips for finding a good coach:
    There is no enforced rating system for coaches. As a result of this there are many excellent ones and just as many terrible ones. Someone can easily be a very accomplished skydiver but have skills and methods that simply do not translate well to the tube, just as a tunnel coach might be the best flyer you have ever seen and have never set foot in a jump plane.
    - Does your coach provide a proper briefing and de-briefing? It is very important to have the right information and suitable practice before your session begins. This can mean the difference between rewarding progress and frustrating failure. If your coach turns up at the last minute or books their sessions so they are back-to-back with another student and have no time to brief you then they are crappy - get someone else. Does your coach de-brief you properly with video after your session? Deconstructing and analysing your flying can often be the part of the process in which you learn the most. If your coach stays in the tunnel with another student or disappears without de-briefing you properly then they are crappy - get someone else.
    - Always find out peoples experience level. Ask around, it doesn’t take much to find out if someone is full of shit.
    - Does your coach have time to perform a backflip or some such each time you get in and out of the tunnel? If yes, you have a crappy coach who is more interested in their flying skills than yours. Get someone else.
    - Does your coach perform moves or fly in a way that is beyond your current skill level while you are flying together? If yes, you have a crappy coach - visual feedback is an important tool for your progress. Your coach should be using their body position to teach you about yours. Get someone else.

    Coaches will sometimes be qualified to spot transitions themselves.
    Sometimes the instructor's help is not required.
    Sometimes the instructor's help is mandatory.
    Many tunnel instructors also offer their skills as coaches. As a general rule people who have honed their skills working as an instructor make the best coaches. However, there are a few things to consider:
    Advantages:
    Instructors make their bones by doing a lot of sessions with people of all levels of ability. This makes them very efficient at communicating ideas and techniques both in and out of the tube.
    An instructor who offers coaching will likely be able to perform any spotting you require. This makes the logistics of booking sessions easier and the sessions themselves more efficient.
    Disadvantages:
    An instructor who offers coaching will be required to arrange their private sessions around their duties for the facility. This can affect their availability and make booking sessions more complicated.
    An instructor might be broken. Tunnels work their employees hard and pay them very little - this can harm a worker’s attitude toward other humans. A broken instructor will likely be off to do something else soon, but until then they can be reckless and unprofessional.
    Good coaching from an accomplished flyer is a worthy investment and an important part of speedy progress. Tunnel flying is expensive so everything you can do to aid the efficiency of your learning helps - a little leg work before your actual tunnel sessions can go a long way. Get involved involved in you local flying scene, either at your local tunnel or dropzone - there will be established individuals or teams that can help you directly or put you on the right path. If you are brand new then don’t be afraid to ask questions - everyone starts from the beginning and everybody knows how much there is to learn. Don’t be shy - good quality instructors and coaches value students that constantly enquire about the techniques and processes involved.

    By joelstrickland, in Disciplines,

    Canopy Safety on Large Formation Skydives

    Image by Andrey Veselov This article is a continuation of my previous article “Diving and Tracking Safety on Large Formation Skydives”. Some of that article is repeated here because maximum separation under canopy cannot be achieved without proper breakoff and tracking.
    On any skydive, it is critical that jumpers keep their heads on a swivel at all times. Nowhere is this more important than large formation skydives where separation is paramount and there is no place for canopies weaving in and out of traffic or front-riser spiraling below other jumpers and cutting them off in the landing area.
    A few years ago, Kate Cooper-Jensen and other big-way organizers compiled what they called “Rules of the Sky” for canopy piloting on big-way formation skydives. Cooper-Jensen makes sure that everybody knows about these rules at every big-way event she runs. This article reiterates those rules and provides a few additional rules a jumper must follow from the time he breaks off until he opens.
    Let’s start with responsibilities during breakoff and tracking.
    At breakoff, jumpers turn and track with their designated tracking groups. Breakoff turn directions should have already been established in the dirt dive to avoid collisions. But turn direction is one thing; how far to turn is another. Jumpers facing the center of the formation turn a full 180 degrees at breakoff. A jumper who is already facing, say, 45 degrees away from the center of the formation turns only about 135 degrees.
    Jumpers track with their groups for at least five seconds, staying level with their tracking leaders then fanning out a few degrees from the center until the designated opening altitude for their group.
    A “flat track” is required and absolutely no steep (or “dive”) tracking is allowed! If a jumper goes low, he moves off to the side, assumes a slow fall rate, and tries to get above the formation until the outer wave breaks off, at which time he turns and tracks as far as he can until 2500 feet.
    Jumpers on the outside of the formation break off first, track the furthest, and open the lowest. Jumpers in the middle break off next and track as far as they can until time to open (at the highest altitude on the load). Jumpers in the base ring track the least distance and open at a low altitude like the outer groups. These staggered openings make it is easier for jumpers to see each other and fly their canopies. Imagine how congested the skies would be if everybody on a 100-way opened at the same altitude.
    Image by Andrey Veselov As a jumper tracks, he scans the sky in front, below, and on either side. It is his responsibility to watch out for jumpers below. It is also his responsibility to check the sky directly above before he waves off. If another jumper appears directly above or below as he waves off, the jumper can continue tracking to get out of the way.
    Once a jumper is under a good canopy, the first thing he must do is grab his rear risers and be ready to yank down on a riser if another canopy is coming at him. The general rule is to yank down on the right rear riser if another canopy is approaching directly from the front. If a canopy is coming from another direction, however, say, from the right, it is obvious that the left rear riser should be used.
    Once the jumper is absolutely sure he is clear of other jumpers, he can collapse his slider, flip up his visor (if applicable), and release his brakes. However, jumpers on large formation loads are normally not permitted to remove booties under canopy.
    The jumper is now ready to navigate his canopy alongside other canopies in his group on their way to the landing area.
    Here are the “Rules of the Sky” that big-way jumpers must follow under canopy:
    Know the recommended canopy wing loading for the event. While not set in stone, a wing loading between 1.25 and 1.75 is typically recommended on large formation skydives so that all canopies will be flying at roughly the same speed. Weights increase a canopy’s wing loading and jumpers should already know if they can safely fly their canopies with the additional weight.
    Inspect a map of the DZ and landing areas prior to jumping. Know the “outs” and alternate landing areas. This applies mostly to visiting jumpers unfamiliar with the DZ.
    Know the designated landing direction and landing areas. At most DZs, jumpers follow a left-hand landing pattern unless the spot and wind direction make it impossible to do so. A mandatory landing direction is often assigned. If separate landing areas have been assigned to different sections of the formation, a jumper must follow the same pattern as his landing group.
    Note: Downwind or crosswind landings may be required by the predetermined landing direction or because of a wind shift after the first canopy lands. Jumpers should already possess the skills necessary to land their canopies crosswind or downwind.
    Do not cross over into the pattern of another group. If the spot is long, try to make it back to the designated landing area unless doing so would interfere with other jumpers trying to get to their landing areas. In this case, pick an alternate landing area before reaching 1000 feet.
    Enter the group’s landing pattern around 1000 feet. Follow but stay off to the side of other jumpers entering the landing pattern. Never fly directly behind another canopy. The leading jumper can’t see you and the depressurized air behind the leading canopy can cause your canopy to collapse.
    Make the final turn between 300 and 500 feet and make no more turns after that. On final approach, turn no more than 90 degrees and never perform S-turns, spiral or hook turns, or fly in deep brakes. This includes camera personnel, organizers, and DZ staff.
    After landing, turn around while stowing breaks, etc. This allows you to get out of the way of jumpers landing behind you. If the landing area is congested, move off to the side as quickly as possible while watching out for other jumpers trying to land.
    If landing off the DZ, gather in groups and walk together to the nearest road.
    If required, check in with the group’s/plane’s designated person. This is especially important if jumpers have landed off the DZ.
    Conclusion
    Safety starts with the attitudes and the actions of each and every one of us. While it is perfectly acceptable to demonstrate confidence and experience, it is never acceptable to show off with a blatant disregard for the rules and the safety of others. On the other end of the spectrum, it is never acceptable for a jumper to put himself on a load or in a slot that he is not experienced enough to handle. At one extreme there is over-confidence, at the other, lack of experience. Either one can kill.
    Reading fatality reports is a sad undertaking but it also makes us angry – angry that the poor judgment of a few puts the rest of us at risk and gives our sport bad press – angry that needless injuries and deaths still occur – and, finally, angry that dear friends had to make the ultimate sacrifice in order for the rest of us to learn.
    Big-way organizers can only do so much. They can invite the most experienced skydivers in the world, but if just one skydiver doesn’t follow the rules, the results can be fatal. So let’s police ourselves and follow the rules, not just on big-ways, but each and every time we strap on a rig or get a student ready for his first skydive. This sport is a heckuva lot of fun when we do.

    By admin, in Disciplines,

    Diving and Tracking Safety on Large Formation Skydives

    Image by Brian BucklandBy Ed Lightle
    This is the first of two articles geared toward safety on big-way formation skydives. This article deals mostly with the freefall part of the skydive whereas the second article “Canopy Safety on Large Formation Skydives” deals mostly with safety under canopy. To get the most benefit, it is recommended that you read both articles.
    In Formation Skydiving, hundreds of big-ways are completed every year without incident. This is a testament to both the skill level of today’s formation skydivers and the screening process utilized by big-way organizers. To qualify for most big-way events, a participant must obtain the recommendation of a big-way plane captain or organizer and must have recently participated in a big-way camp or big-way event.
    Organizers take safety seriously. A safety violation on a big-way, whether at a training camp or on a big-way attempt, will get a jumper benched when an honest learning mistake might not.
    Diving and tracking on big-ways are special areas of concern. With longer diving and tracking times and more jumpers in the air, big-ways naturally increase the risk of a freefall collision. But this risk can be eliminated if jumpers use good common sense and think safety on each and every jump. Here are some tips that can help.
    Watch Jumpers Ahead of You While Diving
    As soon as a diver leaves the plane and gets squared away, he must identify the base and the jumpers who will be docking ahead of him in the formation. He must keep them in sight while he dives, stops, sets up and moves in to dock. He should constantly scan the sky in front of him, starting from the base and extending all the way out to the person he will be docking on. He should keep an eye out for camera flyers as well.
    Because several divers are heading to the same sector of the formation, each diver must follow a straight line from the plane to the area outside the formation where he wants to be stopped and ready to follow jumpers ahead of him into his slot.
    A jumper should never dive directly behind another diver in case the leading diver comes out of his dive early. The trailing diver should always stay a few feet off to the side.
    Don’t Zigzag
    If a diver flares (comes out of his dive) early, he should not zigzag from side to side to bleed off altitude. If he does, he risks being hit by jumpers who are diving behind him. To bleed off altitude at this point, he should either get back into his dive (if he has a lot of distance to make up) or assume a fast fall position while keeping jumpers ahead of him in view.
    Get to the Red Zone on Time
    Another area of concern is getting down to the red zone in time. (The red zone is the area around and outside the formation where jumpers have stopped their dives and are lined up and moving straight ahead and down into their slots. From a camera flyer’s perspective, jumpers in the red zone look as if they are lined up in various seats in an imaginary football stadium as them move down to their slots on the field.)
    A jumper who arrives late in the red zone more than likely has to maneuver around jumpers who are already closing on their slots. He also prevents later divers from getting to their slots. All of this increases the chance of a collision.
    A more serious situation can occur when a jumper arrives so late that the first wave of jumpers is breaking off. This is not serious if he immediately turns and tracks away with this first wave. If he doesn’t, he risks a head-on collision.
    Break Off with Your Group
    To maximize horizontal separation and avoid congestion, jumpers on big-ways break off in “waves”. Imagine how congested it would be if everybody on a 100-way turned and tracked at the same time! On a 100-way, for example, the outer wave might break off around 7000 feet, the next wave around 6000 feet, the next wave at 5000 and so on until only the base group is left. Obviously, the outer wave tracks the furthest horizontal distance and the base tracks the shortest. Again, a jumper who doesn’t arrive in the red zone until break off should turn and track with the outer wave.
    Track with Your Group
    When their wave breaks off, jumpers should track away in groups. A group can consist of a few jumpers from one whacker and a few from an adjacent whacker with one jumper in the center of the group designated the tracking leader. At breakoff, jumpers from each whacker turn in the direction of the tracking leader, track side by side for a few seconds, then fan out away from the center.
    A jumper who goes low should move off to the side, assume a slow fall rate, and try to get above the formation until the outer wave breaks off, at which time he should turn and track away with them.
    Flat Track, Don’t “Dive” Track
    A jumper should stay level with other trackers in his group, and everybody should “flat track” to conserve altitude and maximize horizontal separation. “Dive” tracking (very steep tracking) is not acceptable behavior on a big-way,” says Kate Cooper-Jensen, big-way organizer and multiple world record holder, adding, “A jumper can almost stop dive tracking simply by choosing to alter his body position during the turn away from the formation.”
    To initiate a flat track, a jumper assumes a slow fall position while turning away from the formation, essentially de-arching as he turns. This prevents him from immediately dropping into a dive track below other jumpers in his group. Keeping his hips elevated as he finishes his turn, the jumper then locks his knees, points his toes, and points his head toward the horizon. His arms are initially extended 45 degrees away from his sides and his feet shoulder-width apart. As he picks up speed, he rolls his shoulders forward, and brings his arms closer to his sides and his feet closer together. He should feel the lift as he picks up speed.
    Open at the Same Altitude as Your Group
    As an additional safety measure, opening altitudes of the various waves are staggered to maximize separation and make it easier for jumpers to account for open canopies around them. According to one theory, groups in the middle wave open at the highest altitudes while the outside and base groups open at the lowest. The result is a curve of open canopies, starting lowest at the base, curving up in the middle then down again on the outsides.
    Conclusion
    A successful big-way is a team effort with the goal of building a completed formation the safest way possible. Diving and tracking on a big-way is like driving on the highway. A safe driver knows more than just how to push the accelerator and go fast. He maintains a safe distance from the driver in front, he doesn’t switch lanes without looking, and he doesn’t cut in front of other drivers just to beat them to the exit. He gets to where he needs to be in plenty of time without causing an accident. So does a safe big-way formation skydiver.

    By admin, in Disciplines,

    Flying Techniques for New 4-Way Teams

    (This article was first published in Parachutist magazine under the title "The ABCs of 4-Way", and has been published with consent of the author)
    4-way is a group activity, so jumpers should learn it as a team. This article offers advice for doing just that. As such, it is geared toward jumpers new to 4-way, but you don’t have to be a student to be “new to 4-way.” Jumpers with experience in other disciplines like freeflying, canopy RW, or skysurfing can be new to 4-way. Even jumpers with experience on big-ways can be new to 4-way flying.
    Before you read another word, remember this: Learning 4-way is a gradual process. You have to start with simple drills and work your way up, adding to your skill set as you go. The skills you learn in the beginning will be useful down the road, even in the most complicated block moves. So, learn 4-way correctly from the get-go.
    Here, then, are suggestions for learning 4-way flying techniques from the ground up, so to speak.
    Train with video.
    No team should jump without video. Jumpers might have to swallow a little pride the first time they see their screw-ups on video, but it’s well worth it. Video helps jumpers identify and correct problems before they become bad habits, and it saves money. What might have taken a couple hundred jumps to learn in the pre-video days, jumpers today can learn in 20 or 30 jumps. Camera flyers deserve every penny put toward their slots.
    Match fall rates and fly no-contact.
    A team’s first few practice jumps should be devoted to finding a compatible fall rate and basic body control. Both can be accomplished on the same jump. Here is a good drill: Launch a 2-way with the other two jumpers exiting as close as possible.Build a Star then drop grips and try to stay level with the formation and in your slots. Adjust your fall rates to match that of the fastest falling jumper.
    Jumpers who float after adjusting their body position should wear weights on the next jump. If three of the jumpers are arching the whole time to stay down with the fastest-falling jumper, that jumper should probably wear a looser jumpsuit on the next jump. The rest of the jumpers should wear slick suits. It might take several jumps to get fall rates and body control worked out, but it is important. You can’t do 4-way if you can’t stay level and in your slot.
    Practice turning in place.
    After jumpers learn to fly no-contact and fall at the same rate, they can move on to turning in place. Here is a drill: From a no-contact Star, two jumpers across from each other turn 90 degrees (either direction) while the other two jumpers stay put (facing in). Fly these positions while staying in your slots. Try to stay close enough so you could take grips if you wanted to. After a designated jumper gives the “key,” go back to the no-contact Star. (A “key” is a signal to break for the next point.) Make two or three jumps doing this drill, then two or three more, this time substituting 360-degree turns for the 90-degree ones.
    Practice single formations.
    After teams can fly no contact and turn in place, they can start on randoms(single formations) selected from the 4-way dive pool *.
    * The 4-way dive pool is published in USPA’s Competition Manual. The dive pool is used for parachuting competitions around th world and is agreed upon by the IPC (International Parachuting Commission) at the beginning of each year. In the 4-way dive pool, single formations are called “randoms.” As of this writing, there are 16 randoms in the dive pool.
    Teams should start with simple randoms, where jumpers are facing in and nobody moves more than 90 degrees to go to the next formation.
    The following illustration shows a sequence of three simple randoms.
    Jumpers perform the sequence in the order shown (Star-Satellite-Zipper) then repeat the sequence. (For more challenging flying, a team can build the Zipper before the Satellite.)
    (Note: The Zipper is not a formation in the current 4-way dive pool but it is a good tool for learning how to stay level.)
    Techniques to practice while performing this sequence include:

    Flying with little tension on grips.
    Paying attention to the keys. If you can’t see the person giving the key, look into the eyes of a jumper who can see the key – it will tell you a lot!
    Moving smoothly and in control to the next point.
    Stopping the move and flying level before taking grips.
    Once teams can do drills like the one above, you can move on to more difficult randoms.But they shouldn’t do so without proper coaching. With all the formations in the dive pool, new teams can easily get lost in a fog deciding how to transition (move from one point to the next). What might look like a good move for one jumper might hinder the moves of other jumpers. Dive engineering is not rocket science, but it requires experience to see the most efficient moves for each jumper.
    Let a coach map out the moves so the team can focus on performance.
    Practice exits.
    The success of any 4-way jump depends on a solid exit. New teams should dedicate several jumps to exit practice. They should start with simple exits where all jumpers can look into the center. And they should check with a coach before they go up to make sure they are doing it correctly. A good way to focus only on exits is to jump at a lower altitude, say 6,000 feet so there is little time for anything but the exit.

    With 16 randoms and 22 block sequences in the 4-way dive pool, there are 38 possible exits. But the same principle applies to each. Jumpers exit as one stable unit by presenting themselves and the formation to the relative wind*. The formation should ride smoothly on the relative wind without buffeting or creating undue tension on grips.

    * Relative Wind is the air coming at you from the direction you are falling. On exit, the prop blast is the first type of relative wind you encounter, although this lasts only a second or two. As you fall away from the plane, the relative wind comes more and more from straight up from the ground.
    Learn your slots.
    On a 4-way team, there are four slots: Point, Outside Center, Inside Center and Tail. The camera flyer, the fifth (and invaluable) member of the team, does not turn points with the team, so the camera position is not discussed here. (But be good to your camera flyer – you can’t do without video!) The Point typically flies in the “front floater” position on the high end of the formation as it leaves the plane. He or she is responsible for launching out and up on exit.
    The Point usually makes bigger moves, especially in the block sequences. Typically, this slot is given to the jumper who is better at the longer moves.
    The Outside Center flies in the “middle floater” position and works with the Inside Center to build the center of most formations. The Outside Center also catches the Point in some block moves.
    The Inside Center exits from inside the door across from the Outside Center. It might appear that this is an easy position since the jumper is often facing out, but timing and body position are important. The Inside Center exits “with” the group and normally presents his or her chest to the relative wind. If the relative wind catches them in the back, they can fold underneath the formation.
    On some teams, the Outside Center gives the count and keys transitions. On other teams, the Inside Center gives the count and keys the next point. For this reason, both the centers should be able to lead the skydive and fly their slots at the same time.
    The Tail usually flies in the “rear floater” position and is responsible for anchoring the formation down as it flies off the plane. Sometimes it appears that the Tail exits early. Whether this is true is up for debate. The important things are timing and placement. As long as the Tail stays low on exit, the formation has a better chance of flying smoothly on the relative wind.

    Learn to fly on the hill.
    Experienced 4-way teams transition to the second point right off the plane while the formation is semi-upright relative to the ground. This is called flying “on the hill.” New teams should not try to transition on the hill until they can consistently pull off good exits. Even then, they should transition to simple formations where not much movement is involved. Also, teams should not try block sequences on the hill until they can consistently transition to single formations.
    Here is a simplified look at hill flying. The exit is the first part of hill flying. Moving to the next point is the next part. As long as the exit formation flies stable on the relative wind, you can make the same moves on the hill that you make when the formation is falling at terminal velocity. You just have to put more punch into some moves because the air is a little “mushy” (meaning the formation hasn’t yet reached terminal velocity). Probably the hardest part about hill flying is learning to ignore the fact that it seems like you’re sometimes standing on your head (or vice versa) when making your move.
    In Summary:
    If you can perform the techniques discussed in this article, you’re a darn good skydiver. But you have so much more to look forward to, like block sequences where you fly with piece partners. But don’t jump ahead just yet. Piece flying injects a completely new set of dynamics into 4-way flying and builds upon the fundamentals discussed in this article.
    So learn the basics first. Learn them as a team. Find a compatible fall rate before you practice randoms. Learn how to make smooth, controlled moves. Set aside jumps for practicing nothing but exits. Learn all the randoms in the dive pool. Then keep practicing. Spend an entire season doing randoms if necessary. Then you will be ready move on to the block sequences.
    Don’t expect miracles overnight, but do expect rewards for hard work. It might be weeks before your team has a breakthrough, but when you do, it will be exhilarating! The light will come on for the team all at once - you’ll see it in each other’s eyes in freefall. You’ll feel it in the rhythm of the skydive. And, most important, you’ll see it in your score!

    By elightle, in Disciplines,

    Annexure A – ARW2 Intermediate

    Intermediate
    Both competitors participate exclusively in the orientation of Frontmonaut.
    Make-up of the 5 manches:
    Manche 1 : 3 [Free]

    Manche 2 : 3 [Free]

    Manche 3 : 2 [Free] + 1 [Block]

    Manche 4 : 3 [Free]

    Manche 5 : 2 [Free] + 1 [Block]
    For every manches there will be a draw of the individual moves for the respective and eventual sequence.
    Moves for the Category Intermediate


    By admin, in Disciplines,

0