0

Disciplines

    Indoors Outdoors - Translating Between The Tunnel & The Sky (Part 4)

    Part Four: Belly Flying


    It is probably important clarify exactly what we are talking about when referring to belly positions. Not to be confused with ‘Relative Work’ or ’Formation Skydiving’ or whatever saucy nomenclature is used in your part of the world for gathering up your bootie friends and doing as many doughnuts and thingys as you can - within the sphere of freefly training ‘belly’ means the various forms in which the side of your body with your belly on it is presented towards the wind.
    An important part of evolving into a wise and learned freefly type is the difference between merely teasing belly flyers for being lame and actually meaning it. Serious flat flying is very technical and contained within it are many of the concepts it is crucial to understand to fly competently in other orientations - such as developing spacial awareness, using multiple surfaces of your body at the same time to control both place and position, and the processes of planning and executing bigger, more complex skydives.
    The better you are at one element of flying the easier the others are to learn.
    Freefly is about mastering movement across all three axis, any way up and at any angle, and learning to fly with the wind hitting the front parts of your body is not only as important as any and all of the other parts - it is available right from the start. There are a couple of very good reasons why good belly basics are not something to dismiss or overlook. Firstly, the circumstances you are training under (indoors or from aircraft) require you to achieve some kind of basic proficiency anyway - so why not use the opportunity to cram as much of it into your brain as possible? Secondly - down the road when you are ready to attempt some of the more advanced tricks and transitions, understanding more advanced methods of how to fly on your belly will help a great deal.
    How Does Belly Carving Work?
    The general rules about learning to carve in (or from) a belly position are the same as doing so on your back. The mechanics of carving do not change wether you are head up or head down, facing inwards or outwards, and if flying on high speeds or low speeds:

    The combination of a drive and a turn creates a carve.
    When carving, the input with your body required to generate the turn part of the equation is small. Controlling everything else is the same - the surfaces you apply to the wind to alter your speed both horizontally and vertically remain constant, so when you are learning to carve in the tunnel you are training the same movements and positions that you use for tracking and angle jumps. You start flat and work up through to higher speeds and steeper angles - which is directly reflected by the skydives you perform as you build your confidence with tracking jumps.
    Orientation and Awareness
    It cannot be overstated how important spacial awareness is. As you work through the various stages in a training programme there are drills in which you are re-programming your muscle memory to do the exact opposite of what it has normally done every time in your life up to this point. Up is down, left is right, forwards is backwards. It takes time and is frequently frustrating, so anywhere you can find the opportunity to gain a head start is valuable. The same drill we discussed in the last chapter - where you can fly in a flat orientation (on your back) and switch (as far as your brain is concerned) between a head up and a head down position simply by moving your head is also applicable when on your belly. The opposite version of the same procedure has a comparable outcome and similar advantages:

    Helping you to fly an outface carve in the tube without losing control or getting dizzy.
    Setting you up for learning to fly head down positions and then perform transitions between head up and head down without being bamboozled by it.
    Progressing your angle skydives into steeper and steeper positions while maintaining safety and awareness.

      As we touched upon in the previous chapters, as you push through the training stages the symbiosis not only between each orientation of flight but that of the indoor and outdoor environments becomes more and more apparent. Knowing some details of how things all work together with each other hopefully de-mystifies the process somewhat and puts you on the good foot from the start. Getting to where your ambitions lie is a long road and the key to a more rewarding and fulfilling time with it is to recognise each step of the way as being of equal value. Every small push forwards is an important victory and an essential part of the bigger picture.
     

    By joelstrickland, in Disciplines,

    Atmonauti MOPs and PASA

    CONTENTS1. GENERAL


    1.1 THE CATEGORY TESTS ARE DESIGNED FOR

    1.2 ATMONAUTI COACHES

    1.3 TEACHING FORMAT

    1.4 COACHING CRITERIA & LAYOUT OF INSTRUCTIONAL COURSE

    >2. EQUIPMENT


    2.1 CONTAINER

    2.2 DEPLOYMENT SYSTEM

    2.3 ALTIMETERS

    2.4 CLOTHING

    2.5 AAD (AUTOMATIC ACTIVATION DEVICE)

    2.6 RESERVE HANDLES

    2.7 GOGGLES

    2.8 HELMET

    3. PROCEDURES & RULES OF THE SKY


    3.1 DEFINITIONS

    3.2 GROUP LOADS

    3.3 FLIGHT PATTERNS

    4. CATEGORY TESTS AND REQUIREMENTS


    4.1.a FRONTMONAUTI

    4.1.b CATEGORY II

    4.2.a BACKMONAUTI

    4.2.b CATEGORY III

    4.3 FLIGHT NAVIGATOR

    4.4.a FOOTMONAUTI

    4.4.b CAT IV

    5. LICENCE REQUIREMENTS
    6. COACHES

    1. GENERAL
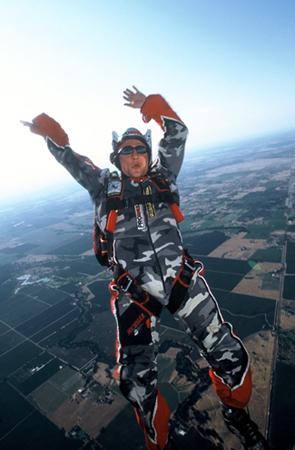
    Atmonauti, unlike traditional freefall - including tracking and flocking - (that utilises the relative gravitational wind from “below” to achieve a multitude of stable body positions at terminal velocity) is the term given to the technique that intentionally utilises lift to compensate for the effect of gravity, in order to achieve relative wind (or a custom “tube”) at an angle of between 30deg - 75deg, where after the atmonaut (atmosphere navigator) introduces a multitude of three dimensional body positions, transitions, and docks, while “falling” at greatly reduced speeds (70mph – 110mph), resulting in extended free-fall time and increased safety.
    Atmonauti, due to the reduced air speeds, is a social discipline, which is accessible to the masses.
    Atmonauti incorporates Frontmonauti, Backmonauti, Footmonauti, and Inverted Footmonauti.
    The Atmonauti coach is the navigator in the group jumps, is capable of coaching single jumpers and/or groups of jumpers at ground-school level specific to safety, technique, navigation, slot positioning and break-off etc. and is furthermore responsible to fly as base navigator in the formation, while communicating body position improvements and general flight path direction and break-off.
    It will be necessary that the coaches are involved in the management of the activity at the centres and be responsible for all activities different from vertical fall, specific to flight planning.
    The logical progression of skills is:

    1. understanding the concept of flight vs. fall,

    2. understanding the concept of no-fly zones and flying on “level”,

    3. “flying” the tube (frontmonauti and backmonauti),

    4. adjusting speeds,

    5. adjusting levels,

    6. rotating around two of the three axes,

    7. transitions into the various body positions,

    8. break-off direction and altitudes.
    As soon as a student has successfully completed ISP progression, such a student can choose to progress to Atmonauti.
    An Atmo ISP programme is designed to assist ISP Students who wish to progress to Atmonauti CAT II and CAT III.
    Jump 1 - one on one with coach

    Jump 2 - one on one with coach

    Jump 3 - one on one with coach

    Jump 4 - one on one with coach

    Jump 5 - group jumps, with maximum 2 Cat I students

    Jump 6 - group jumps, with maximum 2 Cat I students

    Jump 7 - group jumps, with maximum 2 Cat I students
    B licence and above may join coaching groups without the Cat II requirement.
    1.1 THE CATEGORY TEST JUMPS ARE DESIGNED FOR
    The student who has obtained Category I status through the successful completion of the Intermediate Skills Programme.
    1.2 ATMONAUTI COACHES
    The Atmonauti category system is instruction based. In order for students to progress safely and without learning bad habits, it is essential that coaches actively participate. Current and competent PASA rated Atmonauti Coaches, who need not be PASA instructors, can teach it. Provided that the teaching is standardised (taken directly from the manual) the student should be able to visit any drop zone in the country and receive the same coaching and information. The holder of a current coach rating must sign off Category II, Category III and Category IV tests.
    CATEGORY SYSTEM COACH’S OBJECTIVES
    • To provide information before, during and after the skydive

    • To teach basic Atmonauti and further discipline skills, as laid down in this section

    • To teach SAFE Atmonauti flying in any one of the disciplines in a way that both the coach and student never loose sight of having fun

    • To communicate in the air by using “in air” signals

    • To teach and remedy mistakes as they happen in order that the student may carry on learning throughout the skydive

    • To give the student a good deal


    NOTE: Acknowledge if you have made a mistake – the student will appreciate an honest coach.
    1.3 TEACHING FORMAT
    Before the jump:


    • Check student’s logbook - look for indication of a student’s ability.

    • Talk through student’s objectives - applicable to the skydive.

    • Talk through the jump sequence and show a video if possible.

    • Teach each new skill in turn - applicable to the skydive.

    • Discuss importance of flying minimum 45 degrees off jump run, and following the Coach/Navigator at all times.

    • Dirt dive the jump sequence as best as possible from exit to pull (talking the student through).

    • Dirt dive the jump sequence as best as possible from exit to pull (the student talking you through).

    • Confirm in air signals (practice these with student).

    • Confirm break off altitudes and direction of break-off.

    • Confirm emergency procedures.

    • Check equipment and dirt dive more.
    In the Aircraft:


    • During the climb (approximately 5000ft) ask the student to talk you through the skydive from exit to pull.

    • Suggest that the student mentally dirt dives periodically until run-in.

    • On run-in and before exit check pins and puffs.

    • Take student to the door and observe the spot.
    After the Jump:


    • Debrief – first the student’s version then the coach’s (dirt dive exactly what happened from exit to pull)

    • Corrective training – establish the student’s weak points and give corrective training. Advise the student what to practice on the next jump.

    • Logbook – student to fill in the logbook making comments on each part of the jump sequence. Coach must write in their recommendation for a repeat or pass on the skydive.
    NOTE: It is recommended that the coach jump with a camera. Video is one of the best training tools.
    NOTE: The next coach can obtain valuable information if the logbook has been filled in correctly.
    1.4 COACHING CRITERIA & LAYOUT OF INSTRUCTIONAL COURSE
    1.4.1 Introduction
    Atmonauti is the term given to the technique that intentionally utilises the torso (as an aerofoil) to generate lift, while ‘diving’ at an angle of between 30deg – 75deg to generate relative wind required for lift.
    1.4.2 Comparison Freefall vs Atmonauti/Flight (including tracking)
    Freefall = no lift attempted. Tracking = spilling air. ATMO = lift generated with angle + torso.
    1.4.3 Concept of lift, how to use the torso as an aerofoil, including angle
    Discuss aerofoil, relative wind striking leading edge travelling over torso, importance of angle.
    1.4.4 Round vs Square canopies (drag vs flight)


    • Round = Drag, no lift, freefall

    • Square = angle of attack to generate air speed, use of aerofoil to create lift, front/rear risers
    1.4.5 Body Positions – Frontmonauti only, Backmonauti as reference


    • General Body Position - Chin Down, Arms Forward, hips back, retaining curvature

    • Control surfaces – Arms and legs to speed up and down, use of hips to change angle

    • Backmonauti position discussed briefly for reference only.
    1.4.6 Fly Zones, flying on head level


    • General set up above and ahead, seeking opposite horizon

    • Discuss head level at angle in relation to the ground

    • Discuss no fly zones and reasons
    1.4.7 Exit – placing in door, count, exit order, correct body position on exit
    1.4.8 Flight path – 45 min deg to jump run (safety 1st)
    Discuss importance of flying off jump run and staying with group to avoid risk of collision, move to centre on opening i.e. after break-off return to common centre away from jump run until other canopies open.
    1.4.9 Break-off and varying altitudes of break-off for groups
    Maintaining position in group, breaking off with angle of 45 deg between jumpers “fanning out”
    1.4.10 Signals
    Turn left/right, speed up, increase angle, break off, other
    1.4.11 Equipment including audible altimeters
    1.4.12 Log book and reference to Manual of Procedures, briefing and debriefing of jump, signing of logbook, informing NSTO of category qualifications, etc.

    2. EQUIPMENT
    Every skydiver’s nightmare is a premature opening. Firstly, the jumper may be transitioning and become entangled; secondly, they will be going faster than the recommended canopy opening speed; potentially fast enough to hurt, seriously injure or even blow up the reserve.
    2.1 CONTAINER
    Containers must be tight fitting and should never allow for exposure of risers, pins and most importantly the bridle and pilot chute. Exposed risers are not recommended. Ensure that all pin protection flaps and riser covers are secure as with AE container requirements.
    2.2 DEPLOYMENT SYSTEM
    Bottom of container (BOC) throwaway or a pullout deployment are vital as the pilot chute and bridle must be stowed tightly away from the airflow. NO leg strap throwaway’s allowed. Keep your closure loop tight and in good condition, inspect it for wear on a regular basis (every pack job) and check Velcro for wear.
    2.3 ALTIMETERS
    It is advisable for every participant to wear not only visual, but audible altimeters on all Atmonauti flights.
    However, it is a compulsory requirement that a minimum of 50% of the atmonauts on the same formation wear audible altimeters.
    2.4 CLOTHING
    It is important that clothing does not restrict movement and that it does not cover cut-away / reserve handles
    2.5 AAD (AUTOMATIC ACTIVATION DEVICE)
    An AAD is recommended to all those who can afford it. The potential for collisions exists.
    2.6 RESERVE HANDLES
    Ensure that Velcro is in a good condition. One can also decide to change the metal D – handle to a puff the same as the cutaway puff. However if you prefer to jump with your alti on your palm the D – handle is the preferred option.
    2.7 GOGGLES
    Should not limit visibility and should be securely tightened, as the varying body positions and higher speeds easily dislodge them.

    2.8 HELMET
    A hard shell helmet (and goggles – for open face helmets) is compulsory for all Atmo skydivers excluding “D” licence holders.

    3. PROCEDURES AND RULES OF THE SKY
    3.1 DEFINITIONS
    Student refers to the person performing the test
    Coach refers to the coach of the test, as well as the reference point or Navigator for the student. It is the responsibility of the student to appoint a capable coach / cameraperson and confirm it with the CI.

    Navigator refers to the person in the sky toward whom the student or the rest of the formation is working towards, who sets angle and speed, and who’s responsibility it is to fly minimum 45 degrees off of jump run.

    Atmonauti Relative Work (ARW) refers to Sequences and Blocks, including transitions and inters, to include Frontmonauti, Backmonauti and Footmonauti positions.

    Backmonauti refers to the performer flying on heading on his back with his back towards the earth.

    Frontmonauti refers to the performer flying on heading on his belly with his back towards the sky.

    Footmonauti refers to the performer flying on heading feet-first with his back towards the ground.

    Break Off refers to separation in the sky prior to opening altitude. Minimum break off altitude is 4500ft AGL to allow for good separation and time to slow down. Please see 3.2 Group Loads for additional information specific to Group break off minimum requirements.

    Grip is a recognisable stationary contact of the hand(s) of one competitor on a specified part of the body or harness of the other competitor, executed in a controlled manner.

    Dock is a recognisable stationary contact of the foot (feet) of the one competitor on a specified part of the body or harness of the other competitor, executed in a controlled manner.

    Atmonauti position: objective is to achieve head-on relative wind (or a custom “tube”) at an angle of between 30deg – 75deg to the ground, with horizontal movement in relation to the ground, whilst searching for lift with the torso - freeing up the limbs to achieve hand grips and foot docks.

    Heading refers to the direction in which the “leading edge” of the performer faces.
    Leading edge refers to a specific body part of the performer (either head or feet) which is the first point of contact with the relative wind generated from the angle of attack.

    No Fly Zone Frontmonauti: Behind, below, and not on head level during the approach

    No Fly Zone Backmonauti: Ahead, above, and not on head level during the approach
    Head level: The level of the approaches - utilising the head as reference in relation to the angel of attack set by Navigator.
    3.2 GROUP LOADS
    Groups from 2 – 3 jumpers will break off at an altitude of 4500 feet AGL, in accordance with the break-off pattern as briefed by the coach/navigator.
    Groups from 4 – 7 jumpers will break off in two phases, with 4 jumpers breaking off at 5000 feet AGL and the remaining jumpers breaking off at 4500 feet AGL, in accordance with the break-off pattern as briefed by the coach/navigator.
    Groups from 8 – 11 jumpers will break off in three phases, with 4 jumpers breaking off at 5500 feet AGL, 4 jumpers breaking off at 5000 feet AGL, and the remaining jumpers breaking off at 4500 feet AGL, in accordance with the break-off pattern as briefed by the coach/navigator.
    Groups from 12 – 15 jumpers will break off in four phases, with 4 jumpers breaking off at 6000 feet AGL, 4 jumpers breaking off at 5500 feet AGL, 4 jumpers breaking off at 5000 feet AGL, and the remaining jumpers breaking off at 4500 feet AGL, in accordance with the break-off pattern as briefed by the coach/navigator.
    Minimum exit altitude for Atmonauti jumps is 7000 feet AGL.
    3.3 FLIGHT PATTERNS
    Flight patterns are in accordance with aircraft exit patterns as briefed by the coach or navigator, but whereby in general it is important to note that experienced navigator groups exit first and whereby inexperienced solo jumpers/groups will exit last (excluding wingsuit jumpers), and should be discussed prior to boarding with the pilot.
    In general the Atmonauti groups fly at minimum 45 deg to run-in so as to fly away from, and create separation to, freefall jumpers exiting closer to the dz.
    In the event that more than one Atmonauti group is present on the aircraft, the first group will exit at 45 deg to right and the second group 45 deg to the left and third group 45 deg to right (as with first group) and so on.
    Inexperienced groups exiting last should be aware that a flight pattern of 130 deg might be required in order to avoid flying away from the recommended landing area. Attention should be paid to the direction of the preceding Atmonauti loads to avoid opening close to such preceding groups.

    4 CATEGORY TESTS AND REQUIREMENTS
    Cat I and B, C & D licence jumpers may commence a Cat II and Cat III Atmonauti progression course.
    One-on-one instructionals are not obligatory but highly recommended.
    4.1.a Frontmonauti


    • have passed a theory exam on the basic Frontmonauti rules and techniques.

    • have passed a test that consists of performing a flight with the instructor who, during the flight, will perform changes of speed, of angle and of trajectory.

    • the candidate will have to demonstrate the ability to always remain at a constant distance in relation to the coach, and never be in the “no fly zones”.

    • have passed practice jumps that consists of being able to synchronize with the formation and remain at a constant distance, and on level with it, for the duration of the flight, while never going into the “no-fly zone”.

    • have shown the ability to correctly separate in frontmonauti at break off.

    • to execute the above test correctly on three consecutive flights.
    4.1.b CAT II


    • have successfully passed Frontmonauti brevet/license requirements (see above).

    • have passed a test of exiting the aircraft 1 second after the coach, taking a stable dock from the fly-zone within 10 seconds, holding the dock for 5 seconds, releasing and crossing over the coach to the opposite side, taking a stable dock and holding the dock for 5 seconds.
    Once the Atmonauti CAT II is obtained, the candidate will be free to participate in large Atmonauti groups utilising the Frontmonauti body position exclusively without a recognised coach present.
    4.2.a Backmonauti


    • have passed a theory exam on the basic Backmonauti rules and techniques.

    • have passed a test that consists of performing a flight with the coach who, during the flight, will perform changes of speed, of angle and of trajectory.

    • the candidate will have to demonstrate the ability to always remain at a constant distance in relation to the coach, and never be in the “no fly zones”.

    • have passed practice jumps that consists of being able to synchronize with the formation and remain at a constant distance, and on level with it, for the duration of the flight, while never going into the “no-fly zone”.

    • have shown the ability to correctly separate in backmonauti at break off.

    • to execute the above test correctly on three consecutive flights.
    4.2.b CAT III


    • have successfully passed Backmonauti brevet/license requirements (see above).

    • have passed a test of exiting the aircraft 1 second prior to the coach, taking a stable dock from the fly-zone within 10 seconds, holding the dock for 5 seconds, releasing and sliding under the instructor to the opposite side, taking a stable dock and holding the dock for 5 seconds.
    Once the Atmonauti CAT III is obtained, the candidate will be free to participate in large Atmonauti groups utilising the Frontmonauti and Backmonauti body positions, including transitions, without a recognised coach present.
    4.3 Flight Navigator
    The navigator qualification allows the navigator to navigate group Atmonauti loads of recognised Cat II and Cat III atmonauts. This qualification is not a coach qualification.


    • Must have a JM rating

    • Must pass a theory exam on Atmonauti Navigation rules and techniques.

    • Must exit the aircraft stable, and maintain a stable and consistent frontmonauti body position.

    • the candidate will have to demonstrate the ability to fly and maintain a safe and correct flight path.
    4.4.a Footmonauti


    • have passed a theory exam on the basic Footmonauti rules and techniques.

    • have passed a test that consists of performing a flight with the coach who, during the flight, will perform changes of speed, angle and trajectory.

    • the candidate will have to demonstrate the ability to always remain at a constant distance in relation to the coach, and never be in the “no fly zones”.

    • have passed practice jumps that consists of being able to synchronize with the formation and remain at a constant distance, and on level with it, for the duration of the flight, while never going into the “no-fly zone”.

    • have shown the ability to correctly separate in footmonauti at break off.

    • to execute the above test correctly on three consecutive flights.
    4.4.b CAT IV


    • have successfully passed Footmonauti brevet/license requirements (see above).

    • have passed a test of exiting the aircraft 1 second prior/after the coach, taking a stable footmonauti position from the fly-zone within 10 seconds, holding the position for 5 seconds.

    • Demonstrate the ability to transition safely (180 side transition) into backmonauti.

    • Demonstrate the ability to transition safely (180 side transition) from backmonauti to footmonauti
    Once the Atmonauti CAT IV is obtained, the candidate will be free to participate in large Atmonauti groups utilising the Frontmonauti, Backmonauti and Footmonauti body positions, including transitions.

    5. LICENCE REQUIREMENTS
    A-Licence:

    As per section 2 of the MOPs.
    B-Licence:

    As per section 2 of the MOPs.
    CAT II & CATIII qualification in Atmonauti - signed off by a recognised Atmonauti Coach.
    C-Licence:

    As per section 2 of the MOPs.
    Flight Navigator and Coach qualification in Atmonauti - signed off by a recognised Atmonauti Coach.
    D-Licence:

    As per section 2 of the MOPs.
    CAT IV qualification in Atmonauti - signed off by a recognised Atmonauti Coach.


    6. COACHES
    The coach rating is designed to give a formal qualification to those who teach Atmonauti jumpers up to Cat IV level. All applicants for coach ratings must be recommended by a CI and endorsed by the Atmonauti sub committee of the SSA (see Form 19).
    The Atmonauti coach is the navigator on the coaching group jumps, and is capable of coaching single jumpers and/or groups of jumpers at ground-school level specific to safety, technique, navigation, slot positioning and break-off etc.
    The coach is qualified to fly as base navigator in Instructional Formations, while communicating body position improvements and general flight path direction.
    The candidate should know perfectly all the rules specific to Atmonauti, as well as general club rules, and general knowledge of the MOPs and above all he should be able to explain them in an easy and correct manner.
    An applicant for an Atmonauti Coach Rating must:


    • Have a minimum of 200 jumps?

    • Hold a PASA B, C or D licence?

    • Have successfully completed a PASA-ADZO approved Jumpmaster, Static Line Instructor, or AFF Instructor Course.

    • Have matured his/her experience in Atmonauti, and holds a valid Cat II and Cat III in Atmonauti.

    • Hold a valid Navigator qualification.

    • Have acquired the technique and philosophy of the Atmonauti discipline and is capable of communicating such information in a simple and understandable fashion.

    • Have passed an Atmonauti Coach Evaluation Test that consists of:

    - exiting the plane a second after the coach

    - performing a frontmonauti hand grip on his right within 10 seconds from the exit

    - flying the grip perfectly for 5 seconds

    - leaving the grip and passing above the coach at not more than a meter, passing to his left and performing a hand grip on the left hand of the coach

    - flying the grip perfectly for 5 seconds

    - leaving the grip and performing a transition to backmonauti

    - performing a grip in backmonauti on the left hand of the coach

    - flying it perfectly for 5 seconds

    - leaving the grip, while remaining in backmonauti and passing under the coach to the right side of the coach, and performing a grip on the right hand of the coach

    - flying the grip perfectly for 5 seconds

    • Have passed an oral exam on the Atmonauti technique, and have the necessary knowledge required for the instructor rating, specific to organising large formations (coaching, planning the formations, break-off etc)

    • Have passed an evaluation practice test that consists in organizing an Atmonauti group jump including verbal instructionals, preparation on the ground (analysis of the conditions and parameters), flight planning, briefing, and debriefing all the phases of the flight.
    Once having passed these tests, the candidate will receive an Atmonauti Coach Rating and can start the activity of Coach and organizer of instructional flight groups.
    It will be necessary that the Coaches are involved in the management of the activity at the DZ’s and be responsible for all activities different from vertical fall, specific to flight planning (flight patterns).
    To remain current as an Atmonauti Coach the rating holder must:


    • Have performed at least 50 jumps in the previous 12 months of which 25 must be Atmonauti coaching jumps.

    • Have performed the Atmonauti coach evaluation jump with a current Atmonauti coach, respectively changing roles to prove ability as a coach and flying skill accordingly.

    • Attendance of an Atmonauti sanctioned coaching seminar in the previous 12 months is highly recommended.

    By admin, in Disciplines,

    Canopy Safety on Large Formation Skydives

    Image by Andrey Veselov This article is a continuation of my previous article “Diving and Tracking Safety on Large Formation Skydives”. Some of that article is repeated here because maximum separation under canopy cannot be achieved without proper breakoff and tracking.
    On any skydive, it is critical that jumpers keep their heads on a swivel at all times. Nowhere is this more important than large formation skydives where separation is paramount and there is no place for canopies weaving in and out of traffic or front-riser spiraling below other jumpers and cutting them off in the landing area.
    A few years ago, Kate Cooper-Jensen and other big-way organizers compiled what they called “Rules of the Sky” for canopy piloting on big-way formation skydives. Cooper-Jensen makes sure that everybody knows about these rules at every big-way event she runs. This article reiterates those rules and provides a few additional rules a jumper must follow from the time he breaks off until he opens.
    Let’s start with responsibilities during breakoff and tracking.
    At breakoff, jumpers turn and track with their designated tracking groups. Breakoff turn directions should have already been established in the dirt dive to avoid collisions. But turn direction is one thing; how far to turn is another. Jumpers facing the center of the formation turn a full 180 degrees at breakoff. A jumper who is already facing, say, 45 degrees away from the center of the formation turns only about 135 degrees.
    Jumpers track with their groups for at least five seconds, staying level with their tracking leaders then fanning out a few degrees from the center until the designated opening altitude for their group.
    A “flat track” is required and absolutely no steep (or “dive”) tracking is allowed! If a jumper goes low, he moves off to the side, assumes a slow fall rate, and tries to get above the formation until the outer wave breaks off, at which time he turns and tracks as far as he can until 2500 feet.
    Jumpers on the outside of the formation break off first, track the furthest, and open the lowest. Jumpers in the middle break off next and track as far as they can until time to open (at the highest altitude on the load). Jumpers in the base ring track the least distance and open at a low altitude like the outer groups. These staggered openings make it is easier for jumpers to see each other and fly their canopies. Imagine how congested the skies would be if everybody on a 100-way opened at the same altitude.
    Image by Andrey Veselov As a jumper tracks, he scans the sky in front, below, and on either side. It is his responsibility to watch out for jumpers below. It is also his responsibility to check the sky directly above before he waves off. If another jumper appears directly above or below as he waves off, the jumper can continue tracking to get out of the way.
    Once a jumper is under a good canopy, the first thing he must do is grab his rear risers and be ready to yank down on a riser if another canopy is coming at him. The general rule is to yank down on the right rear riser if another canopy is approaching directly from the front. If a canopy is coming from another direction, however, say, from the right, it is obvious that the left rear riser should be used.
    Once the jumper is absolutely sure he is clear of other jumpers, he can collapse his slider, flip up his visor (if applicable), and release his brakes. However, jumpers on large formation loads are normally not permitted to remove booties under canopy.
    The jumper is now ready to navigate his canopy alongside other canopies in his group on their way to the landing area.
    Here are the “Rules of the Sky” that big-way jumpers must follow under canopy:
    Know the recommended canopy wing loading for the event. While not set in stone, a wing loading between 1.25 and 1.75 is typically recommended on large formation skydives so that all canopies will be flying at roughly the same speed. Weights increase a canopy’s wing loading and jumpers should already know if they can safely fly their canopies with the additional weight.
    Inspect a map of the DZ and landing areas prior to jumping. Know the “outs” and alternate landing areas. This applies mostly to visiting jumpers unfamiliar with the DZ.
    Know the designated landing direction and landing areas. At most DZs, jumpers follow a left-hand landing pattern unless the spot and wind direction make it impossible to do so. A mandatory landing direction is often assigned. If separate landing areas have been assigned to different sections of the formation, a jumper must follow the same pattern as his landing group.
    Note: Downwind or crosswind landings may be required by the predetermined landing direction or because of a wind shift after the first canopy lands. Jumpers should already possess the skills necessary to land their canopies crosswind or downwind.
    Do not cross over into the pattern of another group. If the spot is long, try to make it back to the designated landing area unless doing so would interfere with other jumpers trying to get to their landing areas. In this case, pick an alternate landing area before reaching 1000 feet.
    Enter the group’s landing pattern around 1000 feet. Follow but stay off to the side of other jumpers entering the landing pattern. Never fly directly behind another canopy. The leading jumper can’t see you and the depressurized air behind the leading canopy can cause your canopy to collapse.
    Make the final turn between 300 and 500 feet and make no more turns after that. On final approach, turn no more than 90 degrees and never perform S-turns, spiral or hook turns, or fly in deep brakes. This includes camera personnel, organizers, and DZ staff.
    After landing, turn around while stowing breaks, etc. This allows you to get out of the way of jumpers landing behind you. If the landing area is congested, move off to the side as quickly as possible while watching out for other jumpers trying to land.
    If landing off the DZ, gather in groups and walk together to the nearest road.
    If required, check in with the group’s/plane’s designated person. This is especially important if jumpers have landed off the DZ.
    Conclusion
    Safety starts with the attitudes and the actions of each and every one of us. While it is perfectly acceptable to demonstrate confidence and experience, it is never acceptable to show off with a blatant disregard for the rules and the safety of others. On the other end of the spectrum, it is never acceptable for a jumper to put himself on a load or in a slot that he is not experienced enough to handle. At one extreme there is over-confidence, at the other, lack of experience. Either one can kill.
    Reading fatality reports is a sad undertaking but it also makes us angry – angry that the poor judgment of a few puts the rest of us at risk and gives our sport bad press – angry that needless injuries and deaths still occur – and, finally, angry that dear friends had to make the ultimate sacrifice in order for the rest of us to learn.
    Big-way organizers can only do so much. They can invite the most experienced skydivers in the world, but if just one skydiver doesn’t follow the rules, the results can be fatal. So let’s police ourselves and follow the rules, not just on big-ways, but each and every time we strap on a rig or get a student ready for his first skydive. This sport is a heckuva lot of fun when we do.

    By admin, in Disciplines,

    Sit Fly: How to Move and Dock!

    So, you can sit fly with your friends in a group or fly in a two way. The first step to being a free flier, Congratulations! Once you have reached this level you might ask yourself “what’s next?” Today is your lucky day because this article is for you!
    After you have learned the basic position which we will cover in a second, the skill set you want to learn is 6 points of motion and then docking. This will allow you to interact with your friend in the sky and not just be a base.
    Sit Fly: The Position
    Serving as an introduction to free fly, this position is pretty difficult to get without some instruction. The idea is to sit in the sky just like you are sitting in a chair with a few minor exceptions. First you want to have your legs about shoulder width apart.
    Second, you want to have your heels aligned with your knees as not to catch any air on your shins. The foot should be flat just like if you had it sitting on the ground. It is imperative to have even consistent heel pressure when you sit fly, or you will be on your toes which makes it difficult to improve your mobility. Keep your feet pointing straight forward at all times! In sit fly your body follows your heels and your hips so you need to have a strong platform to work from.
    Third, you must consistently have a 90 degree angle at your hips to fly strait down. Sit up not back. Pretend you have a string pulling your head strait up while keeping that 90 degree angle. Sitting up will then add a quaint arch to your torso which will help you keep from falling back. Lastly, relax your arms so they keep right at head level. Do not press down on your arms in the neutral position. Pressing down the arms is a common fault of most new sit flyers. It causes you to press your torso forward catching air on it and then consequently backsliding.
    If you have problems with the position get some coaching in the wind tunnel, SkyVenture has made learning the sit fly position a snap for the student and the instructor. Let’s move on to movement, shall we!
    Sit Fly: 6 points of Motion
    Speeding up will be the first point of motion we learn. Simply press your heels down while keeping flat feet and having your hips, torso and heels in alignment. It is not necessary to straighten you legs. A small adjustment of your surface area will increase your speed greatly. Practice sitting up against a wall in the sit fly I described above, then by pressing through your heels stand up to a half squat, not all the way up and then settle back down into the sit. Do it slowly, erratic movements usually create horizontal space, so stand up and down smoothly. The reason we try not to straighten are legs at first, is because straight limbs usually create stiffness. In order to keep control of the position you must be supple.
    Slowing down is the next thing we learn. This can be done a few ways. I use them all, so it would be best to learn as many ways as you can. The first way to slow down is to press your arms down. Remember to keep sitting up while you do this or you will back slide from leaning forward. The second way to slow down is to bring your knees in a bit and then flare out your heels. This is my preferred way to slow down. This position increases your surface area a lot because your legs are a larger wing then your arms. This is also ideal because this leaves your arms free to dock or to use sign language to your friend. This position became popular in the wind tunnel because larger people needed to use there legs to keep them off the grate. Lastly if you really need to slow down learn to back fly in the wind tunnel. The back fly position will help you close huge vertical gaps quickly, for example if your friend corks up. A word of caution, learn to back fly with a coach in the wind tunnel before you use it with your friends. Using the back fly position without proper control can cause a vertical speed variation between you and your partner which can cause a high speed collision if you are not careful.
    Moving forward is our next task. Forward motion is the hardest yet most used motion in sit fly. It is technically difficult to learn so it might take some time. It is the most used point of motion because most people are back sliding in sit fly or back slide when they try something new. To move forward, get back in the half squat position or the downward motion. Then press your hips forward as far as you can while keeping your heels shoulder width apart and your feet facing forward. The best way to practice this is on the ground by leaning as far back as you can while free standing. Forward is a balance move that is why it is so hard. It also takes a little momentum in the sky to move forward so you might have to hold the position a few seconds before you actually realize you are moving. Keep those heels down!
    Moving backward is the easiest of the 6 points of motion. Most people are back sliding at first when they learn the sit fly position. To move backwards simply keep in the sit fly position and lean forward a bit. It doesn’t take much to rocket backwards, so immediately go back to the neutral position.
    The last two positions are side sliding left and right. They are tough. We won’t go into them in depth here because that would be a little advanced for this article. Besides carving is much more fun and seems to be a little more useful in every day flying. To carve go forward with a slight turn in your hips.
    Sit fly: Docking
    Docking your friend for the first time is probably the most fun you can have sit flying. This move is tough for some so listen up! First you must get your arms level with what you are going to dock. Move up or down. Then move forward slowly and stop at the target you want to dock so it is just out of your reach. Stabilize your heels by pressing down slightly. This is the key to docking; if you turn while you dock it is probably because your feet slide one way or the other. After you have stabilized reach with your hand up at the target not out. If you reach out your torso will follow and you will back slide, maybe pulling your friend with you. Make sure your arm is 90 degrees from your torso. Try not to shift with your torso. Have your arm and hand move independently of your torso. Fly your hand into the target and then dock the hand or foot lightly. If you grab on too hard you might contort your position so you fly away. Dock lightly. If you feel tension in the dock let go and go back to neutral, breathe deeply and try again.
    Keep in mind that this stuff is not easy for everybody. Don’t be afraid to ask for help or to get coaching. The SkyVenture wind tunnel is also a great tool when it comes to learning these basics of sit fly.
    Steven Blincoe is the Founder of The New School Flight University. He has 4,000 free fly jumps and over 300 hours in the SkyVenture Orlando wind tunnel. You can contact him at 530-412-2078 or [email protected]
    for advice.

    By stevenblincoe, in Disciplines,

    Beginning Freeflying

    Whether you are interested in freeflying as a main discipline, or you only want to make the occasional "fun jump", you will still want to follow the best and safest learning progression. Though freeflying can be a very fun discipline to take part in, it can also be very dangerous if you get it wrong. It is not something to rush into. You should take your time and enjoy the experience of flying in this new dimension. This article will introduce you to the steps you need to take to have a safe and fun experience and carry on doing so throughout your freeflying career.
    Not Just Vertical
    Freeflying isn’t just about learning to fly headup and headdown, it’s everything (yes belly flying too). As your skills improve you will realize that you can use all angles and positions between headup and headdown. Once you are proficient on your back, belly, feet and head, you will see that everything flows together and you end up moving in between these positions with ease.
    To get to this stage you need to have a solid base in all these positions and an understanding of what the air is doing to your body. Too many people, especially now that freeflying is becoming so popular, go straight to headup flying after AFF and quickly move to headdown. The majority of these people are limiting themselves in the future and will find that they have to go back and learn basic belly flying and back flying to progress any further.
    I will now go through the steps I believe necessary to become proficient at this discipline. Future articles in this series will go through some of these steps in more detail, explaining how to do them, how to practice them, and drill dives to improve these skills. You should try to learn these skills in the order listed to increase the learning curve.
    Belly Flying
    The most important thing is to become proficient on your belly. This doesn’t mean you need to become a 4-way master, but learning how to move around the sky with control certainly helps (especially now that hybrids are becoming more common).
    You should learn the following:
    Fall rate control
    Horizontal movement (forwards, backwards and sidewards)
    Center point turns
    Diving to a formation
    Docking on a formation
    Superpositional moves (e.g. sidesliding while moving forwards – known as carving)
    Break off procedures (flat tracking) It also helps if you experiment with barrel rolls, forward loops and back loops to get used to not just being on your belly. All these skills will become very beneficial in the future. The other advantage to learning to fly on your belly is that you will be getting used to flying close to other people and will be learning the necessary skills to do this, even though it is in a different position.
    Tracking
    By now, you should have already learned how to flat track. It’s time to take tracking one step further. Find a coach or someone who has experience leading tracking dives and learn the following:
    Tracking on exit
    Heading control
    Fall rate control
    Speed control (speeding up/slowing down)
    Moving Sideways
    Break off procedures (different on tracking dives) Tracking is a big part of freeflying. Learning these skills will help on breakoff, especially with larger groups, and will also help you when it comes to tracking dives.
    Back Flying
    Back flying is the first big step towards learning headup flight. You won’t be able to see the ground and you will start to get used to feeling the air on your back and the other side of your legs. This skill can be used a lot in freeflying when you get low on a jump or become unstable. This position is used to get back where you want to be, while preventing corking (suddenly lose speed) and hurting someone.
    You should learn:
    Heading control
    Fall rate control
    Horizontal movement (forwards, backwards and sidewards)
    Turns
    Barrel rolls from belly flying to back flying and back again
    Front/Back loops from belly flying to back flying and back again The advantage of back flying is that its speed range is huge. You can stay with a belly formation quite easily, but you can also speed up so that headdown flyers can stay with you without a problem. This diversity is what makes it such a useful technique in freeflying.
    Headup Flying
    This is where things start to get a bit different. Because you are in a vertical orientation, you have to learn how to move your body differently, move your arms and legs differently, whilst remembering that arching doesn’t make you stable at all. In later articles we will cover all of this in a lot of detail, explaining how and why, but you must always remember that an article is in no way a substitute for a coach. Whenever you have the chance, get coaching!
    Things you need to learn:
    Heading control
    Fall rate control
    Horizontal movement (forwards, backwards and sidewards)
    Turns
    Transitions (cartwheels, front loops, back loops)
    Independent arm movement (altimeter checks, taking docks, etc)
    Correct exit technique
    Breakoff procedures (you can’t simply go to your belly and track) Headup flying is much faster than any of the other positions. Because of this, every movement has a much larger effect than it would if you were going slower. The air is moving over you much faster and therefore has much more power behind it. Therefore, you have to be very careful with your movements to ensure the safety of yourself and others.
    Back Tracking
    Back tracking is a very important skill in freeflying, especially when starting to learn headdown. During breakoffs it adds a whole new perspective and gives you more awareness. Once you have learned headdown this position will open up more angles and add fluidity to your jumps. Backtracking is what I call a power position, this means that when your learning it you have to put in a lot of energy to keep an efficient position and to speed up, etc..
    Things you should learn:
    Back tracking exit
    Heading control
    Fall rate control
    Speed control (forwards/backwards)
    Moving Sideways
    Break off procedures (different on tracking dives)
    Transitions (back to belly/belly to back) Once you have learned these skills, try going on a tracking dive, getting next to the base and transitioning to your back track position, while staying relative. Talk to an experienced freefly coach and ask about leading a tracking dive; you’ll learn a lot.
    Headdown
    Learning headdown brings a whole new level to your freeflying. Everything flows together much better and you can move around the sky with more ease. While moving around becomes so much easier, collisions become much more of a danger and you must be even more cautious. This position is not a power position. By this I mean that once you are used to keeping your legs wide you will be able to move around smoothly and fast without having to push into your movement.
    Again you should aim to learn the basics before you start work on complex manoeuvres. Use this list:
    Correct exit technique for jumping with others
    Heading control
    Fall rate control
    Turns
    Horizontal movement (forwards, backwards and sidewards)
    Transitions (front loop, back loop and cartwheel) both to/from headup and from headdown to headdown
    Independent arm movement (altimeter checks, presenting for docks, etc)
    Correct breakoff procedures Once you’ve done this you can start to work on using your skills to take docks, carve, etc.
    Jumping with Others
    When you start to jump with other freeflyers, you have a lot more to think about, including where the other jumpers in your group are at all times. As a minimum you should specify the following for a freefly jump with others:
    Exit
    Content of jump (don’t just say ‘we’ll see what happens’, have a plan and stick to it)
    Base (specify someone as a person, everyone should then work towards them for a level)
    Breakoff (what is the breakoff height, make sure everyone knows where the others are and do not go straight to their belly and track, slowly decrease your speed as you track away) When you are just learning freeflying you should only be jumping solo or with an experienced freeflyer. Use the following as a rough guide to how many people, maximum, you should be jumping with:
    0-100 freefly jumps: Solo’s or 2 Ways
    100-300 freefly jumps: Up to 3 ways maximum
    300-500 freefly jumps: Up to 5 people maximum
    After this I try to use good judgement and common sense If you have only ever done 2-ways then at the most you should only allow yourself to go on 3-ways.
    Safety
    Freeflying can involve a huge range of speeds, trajectories and positions, which presents us with many possibly dangerous situations. Because of this you need to ensure you have the correct training and also the right equipment.
    Your container should fit well. You should not use a leg throwaway system, only BOC throw out or pull out is acceptable. The leg straps should fit right and not easily slip down your legs. You should also have some kind of bungee between the two leg straps to make sure they do not move around in freefall. It should have good riser and bridle protection with an absolute maximum of 1” exposed bridle near the BOC. Your pins and flaps should be tight. A good test is to gently lift your rig by each pin cover separately - if the covers stays closed then you’re good to go, but if the cover opens when lifting then get the opinion of an experienced rigger.
    You should have a minimum of 2 altimeters: one visual and one audible. This is important as when you are learning to freefly it can be difficult to see your visual altimeter and it is easy to forget that you will be falling much faster than you would be if belly flying. The audible altimeter will remind you of this.
    Wear a hard helmet. Don’t think you can get away without a helmet or just a frapp hat. Hard helmets might not save you from everything, but can mean the difference between life and death. If you’re just starting freeflying, don’t even think about wearing a camera helmet. This just adds to the list of new things you will have to think about and will take your awareness away from other more important matters. Some people get away with a full face helmet but if you are learning to freefly then I would suggest an open face. This allows you to keep better eye contact with your coach or other jumpers.
    Any clothing you wear should be durable and secure. It shouldn’t be able to cover any of your handles and shouldn’t be excessively baggy. A good all round freefly suit will do the job. When learning headup, a lot of people like to wear trousers and a baggier top to help them. If you’re doing this, then make sure the top is tucked in well and is secure.
    You should always use an AAD of some form when freeflying. You can easily have collisions when freeflying and closing speeds can be upwards of 100mph. It is also very easy to lose altitude awareness. An AAD could save your life, fatal collisions have happened to very experienced freeflyers, why couldn’t it happen to you?
    The next article in this series will concentrate on how to do the things mentioned in this progression list. There will be ground exercises and tips on performing these in the sky.
    Louis Harwood is a freeflyer from the UK and jumps at Target
    Skysports, in Hibaldstow. He has competed for the last two years in the Artistic nationals, he has two silver and one gold medal in B catagory freefly, freestyle and skysurf. www.avalore.co.uk

    By fuga, in Disciplines,

    Stretching for Freeflying

    Freeflying is a physically demanding sport (as are other disciplines in skydiving) and like any physical activity it is much easier to damage your body if you do not prepare your body properly. Stretching helps prepare your body for the physical activity it is about to go through, by offering some of the following benefits:
    Relaxes your body (which is always good in freeflying)
    Helps your coordination and allows for easier movement
    Gives you a greater range of motion
    Increases your body awareness
    Improves circulation so if you do damage your body it will repair quicker A lot of freeflyers seem to think stretching takes a long time and that it isn’t important. It is very important and if you plan on jumping for a long time then stretching is the way to allow you to keep on jumping as you get older.
    Stretching can take a long time but it can also be a short 10 minutes in the morning. The following is a short and basic stretching routine to help you prepare yourself in the morning. This doesn’t mean you should only do this in the morning when you go jumping, try to do this every morning, it only takes 10 minutes.
    Guidelines for stretching
    If you do not stretch right you can damage your body just as bad as if you do not stretch. Some people think that stretching should be painful, this is wrong. You should feel comfortable in your stretch, feeling a mild tension in the area that your are stretching. You should never bounce into a stretch, take your time, and ease into it until you feel the mild tension mentioned earlier.
    Stretching routine
    You should try to do this routine every morning to get the best effect. Start off by making sure you are warm, a hot shower to warm you up in the morning can help.
    Start by lying on your back, keeping your spine flat to the floor and look up at the ceiling/sky with your head. Start with one leg, bend it at the knee and pull it towards your chest until you feel a mild tension. Hold this position for 20 seconds and then move onto the other leg, taking a 10 second rest in between. [Figure 1]
    Next, lay on your back, keeping everything straight and looking up at the ceiling with your head. Bend your legs, keeping your feet flat on the floor. Place your hands behind your head and lift it up until you feel a tension in the back of your neck, still keeping the rest of your back on the floor. Hold this tension position for 5 seconds and then slowly lower your head back to the floor. Repeat this 3 times. [Figure 2]
    This is a good one if you have bad landings and find you hurt your ankles every now and then. Sit on the floor and have one leg flat. Grab the other leg just above the ankle. Rotate your foot clockwise providing a slight resistance with your other hand. Repeat this 20 times and then do the same but rotating your foot anti clockwise. Do not rush this. Now do the same with your other leg, again making sure you do not rush yourself. [Figure 3]
    Start by leaning against a wall with your head resting on your hands. One leg should be closer to the wall and bent with the foot facing straight forward. The other leg should be straight and behind you, foot facing the wall and the heel touching the floor. Slowly push your hips forwards, keeping your back straight, stop when you feel a mild tension in your calf. Hold this position for 30 seconds and then slowly move your hips back and relax. Repeat with the other leg, again taking your time. [Figure 4]
    Start by standing up straight with your feet shoulder width apart and facing straight forward. Slowly start bending from the hips keeping your knees slightly bent at the same time. Relax your neck and arms, keep bending until you get a slight stretch in the back of your legs. Hold this for 20 seconds and then slowly move back up. [Figure 5]
    Start by standing with the side of your body next to a wall, put the palm of your hand closest to wall against it just a bit higher than your head. Now slowly and gently turn your body away from the wall until you feel a mild tension in your shoulder, You should be between one and two feet away from the wall at this point. Hold this position for 15 seconds and then slowly turn back and relax for a few seconds. Now repeat this with your other hand. [Figure 6]
    Start by sitting on the floor and put the soles of your feet together, hold onto your toes. Now start to gently pull your self forwards towards your feet. Make sure you are moving from your hips and not bending from your shoulders or back. To help try resting your elbows on your knees for stability, this will make it easier. Keep moving forwards until you feel a good stretch in your groin. Hold this position for 40 seconds and then slowly move back and relax. [Figure 7]
    Now you’ve finished the stretching routine make sure you wrap up warm to get the best effect. Do this every morning and you will see a marked improvement in your flexibility and you will be much more relaxed in the air.
    Louis Harwood is a freeflyer from the UK and jumps at Target
    Skysports, in Hibaldstow. He has competed for the last two years in the Artistic nationals, he has two silver and one gold medal in B catagory freefly, freestyle and skysurf. www.avalore.co.uk

    By fuga, in Disciplines,

    Canopy Relative Work

    Canopy Relative Work (CRW) may be described as the intentional maneuvering of two or more open parachute canopies in close proximity to, or contact with one another during descent. The most basic maneuver in CRW is the hooking up of two canopies, one below the other. This formation, known as a "stack" or "plane"(the difference between a stack and a plane is the grip on the parachute), is the most common maneuver in CRW.
    There are two major categories of CRW formations:
    Vertical formations : Canopies are either stacked or planed one beneath the other. All grips should be on the center cell. Off-set formations : one or more docks and grips are on end-cells. These formations include diamonds, boxes and stair-steps. USPA BSRs recommends a beginner should have the following qualifications before engaging in CRW:
    At least 20 jumps on a ram-air canopy. Thorough knowledge of canopy flight characteristics, to include riser maneuvers and an understanding of relative compatibility of various canopies. Demonstrate accuracy capability of consistently landing within five meters of a target. Initial training would be conducted with two jumpers - the beginner and an Instructor experienced in CRW. The instructions should include lessons in basic docking and break-off procedures as well as emergency procedures.
    USPA BSRs has the following recommendations on equipment:The following items are essential for safely doing CRW:
    hook knife -- necessary for resolving entanglements ankle protection -- adequate socks prevent abrasion from canopy lines. If boots are used, cover any exposed metal hooks short bridle cords -- short, single attachment point bridlecords are essential to reduce the danger of entanglement. Retracting bridle pilot chute systems are desirable cross connectors -- are essential for building planes. These should be connected between front and rear risers only. The following items are strongly recommended for safely doing CRW:
    altimeter -- provides altitude information for dock, abort and entanglement decisions protective headgear -- must allow adequate hearing capability for voice commands, in addition to collision protection soft toggles -- provide less possibility of entanglement than hard toggles and better flight control trim tabs (go toggles) -- helpful for equalizing decent ratesand increasing control envelope cell crossporting (two rows) -- is recommended (when doneper manufacturer's specs) to minimize the likelihood of canopy collapse cascades -- recommended to be removed from the two centerA lines.

    By admin, in Disciplines,

    Freeflying

    Freeflying is the ability to fly your body in any position, in any direction, at any speed at any given time. This includes, but is not limited to, headdown, sit, stand, back, belly and any kind of flying you can imagine. There are no limits to freefly except those created in your own mind.
    Freeflying Safety
    Freeflying is exciting, new and so much fun. Safety must always be an issue. By maintaining a safe flying atmosphere you allow yourself to have more fun. Flying safely relates to the level of experience of those with whom you fly. The basics of freeflight can practiced in a safe atmosphere as long as the size of the flying group does not exceed the skill level of those individuals flying together. 2-ways are the best way to train your freeflying skills.
    Freeflying involves many different flying positions which relates to many different speeds ranging from 90-300 miles an hour. There is a logical progression to safe learning of freefly. It is best to first have an understanding of how to fly your body in slower flying positions before moving on to faster ones. Learning to control speed, direction and proximity at slow speeds increases awareness and reactions. These are the methods which keep everyone safe in the sky.
    As stated earlier, smaller groups are the safest way to fly. One-on-one flying is the safest way to experience flight with someone else. It allows flyers to maintain visual contact with each other at all times. As experience increases and awareness grows, flying with more people can be fun and safe. This is dependent on the skill of the fliers and how well everyone has planned their dive. There are certain safety rules for breakoff. Once again speed is an important factor. Breakoff altitudes are slightly higher for freefly jumps, 4000ft because of higher speeds. It is also important to gently transition into a track to avoid radical changes in speed. Track for clean air and check. A slow barrel roll before deployment is highly recommended to insure clean air. Following the simple rules of small groups, planning, awareness and breakoffs, insures safety and fun for everyone.
    Freefly Safety Equipment

    Container: A tight fitting container which does not allow for exposure of risers and pins is essential to every freeflyer. Increased airspeeds and varying body positions make closure necessary.
    Altimeter: Two altimeters, visual and audible, are necessary for freeflying. Altitude awareness takes on a new importance when dealing with the faster speeds of freefly.
    Clothing: It is important to wear clothing that does not restrict movement and will not cover any handles.
    Helmet: A hard shell helmet is recommended.
    Cypres: Cypres is recommended to all those who can afford it. The potential for collisions exists. Therefore, it is best to be prepared.


    By admin, in Disciplines,

    Freestyle

    Freestyle is defined as a solo free fall discipline that involves choreographed multi-orientation static and dynamic maneuvers.
    Generally speaking, it combines the dynamics of gymnastics and ice skating with the elegance of dance. The free stylist executes precise acrobatic maneuvers including loops, spins, twists and poses while falling at speeds of up to 200+ miles per hour.
    Team Composition:
    A freestyle team consists of a performer and a videographer. Teams may consist of members of one or both genders, but the gender of the team is determined by the performer. If the videographer and performer are of the same gender, either may serve as the videographer on any particular round.
    Freestyle Competition:
    In freestyle skydiving there are seven rounds, two of which are compulsory. The remaining five are free rounds. The content of the compulsory rounds contains four compulsory sequences drawn by the Chief Judge, which must be performed in order of the draw. The compulsory rounds are performed in rounds 2 and 5. All sequences must have a static start and stop.
    The content of the free rounds is chosen entirely by the team, and there may be any number of different free routines within the set number of free rounds. Each jump is from 13,000 feet with working time beginning when the first team member leaves the aircraft and ends 45 seconds later.
    Scoring:
    The compulsory routine is scored for the quality and correctness of execution of the sequences, with 10 being a perfect score.
    The free routine is scored in four different categories: difficulty, execution, artistic impression, and camera work.
    Judging rules:
    The calculation of the official score for each round is as follows: (USPA rules 2004)
    Compulsory rounds:

    All five judges evaluate the routines. For each compulsory sequence, the highest and lowest judges' scores are discarded. The average score is calculated by adding the three judges' scores and dividing by three with no rounding applied.
    The average scores of all four compulsory sequences are added, and the result is divided by four and rounded to the first decimal place.
    Free rounds:

    Two judges evaluate the difficulty and execution criteria, with three judges evaluating the artistic and camera criteria.
    The scores for difficulty and execution are added and the result divided by four with no rounding applied. The scores for artistic and camera are added and the result divided by six with no rounding applied. The two results are then added, then divided by two and rounded to the first decimal place. The first International freestyle skydiving competition was held in 1990. In 1996 the International Aeronautical Federation (FAI) gave freestyle skydiving official recognition, and free stylists competed alongside other established skydiving events at the World Cup of Skydiving in 1996, at the World Championships in 1997. Freestyle remains one of the most appealing skydiving events to media audiences.

    By admin, in Disciplines,

    Para-ski

    Para-ski is one of the competitive disciplines in parachuting and the only one to originate outside parachuting. The sport originated in Switzerland in the early 1960’s, when Swiss skiers conceived of para-ski as a form of mountain rescue. The concept was to jump from an aircraft, parachute to an open area near the victim, strap on skis, and evacuate the casualty down the mountain. Original European meets were a timed event which included parachuting onto the mountain, donning skies, and racing a course. Today, the two events are conducted separately. Para-ski international meets and cups have been held since 1964 and World Championships since 1987. Meanwhile, the modern, turbine-powered helicopter has replaced the parachute as the aerial vehicle for transporting mountain rescuers and casualties as well as today’s para-ski competitor.
    Today’s competition consists of giant slalom (GS) skiing and precision parachuting using gliding parachutes. The GS courses are approximately 1,000 meters long with a run time of one minute and average 30-35 gates. Two GS races are conducted under FIS rules.
    Each competitor makes six jumps under FAI rules. Jumps are from 3,000 feet. The target is located in a challenging and sloping mountainside venue; competitors aim for a touch-sensative pad with a five centimeter target center.
    A system of scoring combines parachuting and skiing performance to determine combined individual and team winners.

    By admin, in Disciplines,

0