0

Disciplines

    Useful Training for BASE, Right There on the Dropzone

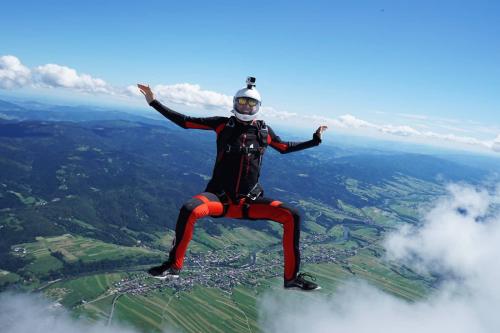
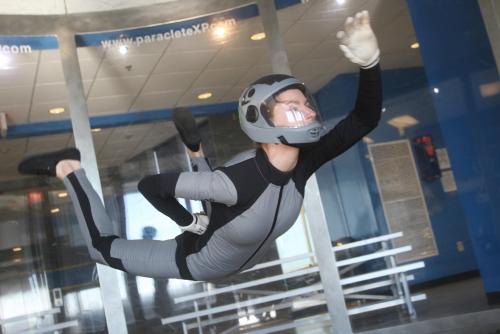
    Courtesy Apex BASE: Pascal Constantineau flying his FLiK at Skydive Perris during his BASE canopy course with Dimitrije Dadic. (Of note: Square1 offers discounted rental rigs to people taking Dimitrije’s BASE canopy courses.)
    If you’re like most people, your idea of dropzone training for the stresses of the BASE environment involves trying to look nonchalant when you climb into a hot-air balloon basket. If you have no access to such a thing (and/or if you’re significantly smarter than the average bear) you’re probably looking for more. You know you need a way to get as many jumps under your belt as possible with your BASE parachute proudly overhead--preferably, with a reserve on standby. But how?
    “Skydiving your BASE canopy is by far the best way to learn canopy skills for BASE jumping before making a BASE jump,” says Steve Doherty, who served as Director of Operations of Apex BASE for five years. “In a perfect world, everyone would be able to jump their BASE canopy skydiving--a lot--before they ever took it out on a BASE jump.”
    Ideally, if you’re serious about this, you’re not just swapping gear willy-nilly on every dropzone day. You have a dedicated skydiving system, configured for the purpose. Here’s how to build it.
    The Canopy
    “It's only with the introduction of ultralight canopies that jumping BASE canopies at the dropzone has become a possible and useful activity,” he continues. “Anything you can use in the BASE environment, you can use in the skydiving environment--of course, in the skydiving environment, you have to manage your opening speed.”
    “If you take your whole BASE setup: mesh slider, BASE bridle and BASE pilot chute, you're going to have a very brisk skydiving opening,” he adds. “In our collective experience at Apex, we found that you can make two or three slider-up skydives on this kind of setup in a day and it's okay. If you were going to make five to ten, you need to start making modifications.”
    As any seasoned BASE jumper will tell you, nothing flies quite like an actual BASE canopy--so the goal is to get as close to it as possible. Athletes who want to train BASE canopy skills should choose an ultralight canopy and seek a skydiving container that fits it.
    That said: Athletes who want to get into flying a wingsuit with the intention of BASE jumping but don’t want to jump a BASE-sized canopy for all their wingsuit skydiving training now have some options.“On today’s market, you can find seven-cell, BASE-type canopies created for the skydiving environment. The benefit is that--while these canopies do have some of the distinctive BASE properties--you can jump all day and not feel it when you wake up the next morning.
    The Risers
    Forward-facing risers are more appropriate in the skydiving environment for a simple reason: the possibility of a horseshoe malfunction. During a horseshoe malfunction, forward-facing risers are the only type that you can reliably cut away.
    “During a horseshoe malfunction with rear-facing risers,” Doherty notes, “Your body will be in the way of the twisting movement that the three-rings need to do in order to release. So, when you’re jumping a two-parachute system, we always recommend jumping forward-facing risers.”
    The Container
    As you’ve certainly noticed by now: Apart from student gear, most of the containers available for sport use won't fit BASE canopies. According to Apex, the best way around that is to jump an ultra-light parachute. (Take, for instance, the Lobo: a 250 can pack up to the size of a skydiving 180.)
    “More and more drop zones are coming around to the idea of BASE jumping,” Doherty continues, “That is to say: Not assuming that it’s attracting bad publicity to the sport of skydiving. Nowadays, they're more willing to let their student gear be used. Here in Southern California, we suggest going to Square One. They have a huge selection of demo equipment, so it’s relatively easy to get the largest demo container they have and pack into it the largest BASE canopy that fits.”
    Most drop zones have a container that's sized for a 180/200. The Apex team have, however, not been able to find a non-tandem or -military container able to fit anything bigger than a 300+ made from F-111 fabric. (UltraLite PN-9 is a different story, and large canopies are more easily accommodated.)
    The D-Bag
    Talk to your local CReW dogs: You don't have to use a deployment bag when you skydive.
    “You can free-pack your BASE canopy into a properly-sized skydiving container, just like you do in your BASE container,” he says, “except the rectangle is a lot smaller, so you’ll have to stack it up.”
    If that sounds a little unnerving, ask for help. Doherty notes that a lot of the older generations of CReW skydivers are quite familiar with that deployment method, so ask them for advice.
    If you do use a D-bag, he insists that you’re using it correctly. Take note of what BASE canopy you're using. Not all BASE manufacturers use a metal ring at the top of the parachute. Some do use a metal ring, just like you'd find on a skydiving canopy. The Blackjack and Ace canopies built by Asylum also use a metal ring. Atair doesn't. And Apex doesn’t, either. To get this right, use a metal connect link to prevent the canopy from getting sucked up into the grommet of the bag. (Very importantly, the link needs to be inside the bag.)
    The Pilot Chute
    You are going to want to use a slightly larger pilot chute for a BASE canopy than you would if you were jumping a skydiving canopy, because the BASE canopy itself is much larger.
    “You don't need to use the same-sized pilot chute that you use in the BASE environment,” Doherty notes, “We recommend a 32" non-collapsible pilot chute for skydiving. It's much larger than a sky pilot chute, which is typically 28 inches.”
    The Bridle“We typically use a longer bridle in BASE jumping,” Doherty says. “You don't need to take the BASE bridle over to make the BASE canopy work. You'd want to use the bridle that was appropriate for whatever discipline you were doing in skydiving. We recommend using a normal skydiving bridle for normal skydiving freefalls. If you’re wingsuiting, we recommend using whatever bridle length you'd normally use for wingsuiting in the BASE environment.”
    The Slider
    You can use a mesh slider, but it’s not ideal.
    “In BASE, we’re so close to the ground that we tolerate--even welcome--brisk openings,” Doherty says. “But if you make five jumps on a mesh slider at terminal, you’re going to feel it. You won’t regret using a sail slider in the skydiving environment. That said: If you’re making hop-and-pops, a mesh slider is not a problem.”
    The Jumps
    Once you’re all geared up, there’s only one place to go: Up. And when you get there, you’ll have a few more things to think about.
    “When you're jumping a BASE canopy on the dropzone, you have to think about where you're going to be in the pattern,” Doherty advises. “You're jumping a parachute that's much larger than the other parachutes around you and you're going to descend a lot slower. Especially at large dropzones where they’re flying multiple aircraft and doing multiple load drops over the same area, this can get problematic. Stay out of the way.”
    The Mentality
    If you have access to a candy-colored, fire-powered dead-air machine, then by all means use it--but don’t rely on them as the sole training platform for your BASE-jumping skills. Commit to fine-tuning your BASE canopy skills (and that impossible-to-exaggerate-the-importance-of accuracy) before and between jumps from objects. Your bones, your friends and your family will thank you. And--as always--talk to your mentor and/or gear manufacturer to clarify any points that leave you unclear.

    By admin, in Disciplines,

    Indoors Outdoors - Translating Between The Tunnel & The Sky (Part 6)

    Part Six: Wrapping Things Up
    Before you have invested the considerable time and effort to persuade your brain how to understand freefly properly it can all feel rather difficult. Witnessing highly accomplished flying in both the sky and the tunnel appears akin to magic, and the road to being able to do all that stuff yourself can seem very long indeed. However - the key to mastering the necessary skills is about breaking down complicated positions and challenging movements into manageable, digestible elements. As you learn you will start to recognise moves that you can do as being pieces of the overall puzzle - building blocks that you can assemble in a variety of ways to achieve different results.
    Without proper guidance it can be difficult to take on board the amount of themes and concepts you are required to grasp, so hopefully this series of articles has offered up some insight into the methodology behind the ways we train. To get the most from your sessions with a coach it is important to not only understand what to do and how do it, but furthermore why you are doing it.
    Now that we have looked at the individual body positions, here are some general tips to help with progression:
    Slow Is Fast - The importance of being able to control your speed cannot be overstated. Mastery of a move is not the ability to do it fast but the ability to do the opposite - the slower you can do something the more your body is registering exactly what is happening with the surfaces you are using for control and the easier it is to inter the correct technique in your muscle memory. Low speed training is a very useful way to develop good technique as you must apply more of your body to the wind in order to make the positions work. Once you have practiced something enough the good technique should transfer though to higher speeds in the tube and on your skydives. Zoom!
    Range - This begins with being able to do things as slowly as possible. Zooming flat out is no good if you cannot get there and back safely, and merely being able to go fast does not count as having mastered something. Being able to apply and remove speed with precision means you truly understand how the mechanics of how something really works.
    Less Is More - The most efficient way to fly you body is to use all of it a little bit, rather than one part of it a lot. At the start of training a particular move or position the inputs might be exaggerated to emphasise the effect they have, but as you improve and work through the drills the goal is to use your body as effectively as possible. Pay attention to the very best flyers to see how conservative they are with the energy they expend in the tunnel. Aim to be as economical with your movements as you can.
    Personal Goals - The only person you are trying to be better than is you. Learning to freefly properly takes a lot of time and effort and money. Everybody went through the same steps and recognises the same frustrations - some things you will get relatively quickly, whereas other will take more time. It can be inspiring to watch people that have been flying for years but also very frustrating. Try not to focus your too much on the huge goals - it is important to remember that every small step forwards is of equal value as they are what adds up the the whole.
    Fill the Gaps - Being a truly good flyer is about breadth and depth. Try to resist letting your skillset lead you off by the nose in a single direction - instead use the training time and resources you have available to build your skills evenly. You may well be able to zoom like a motherfucker in a single position and a single direction, but once it gets like that it is all you are ever going to want to do at the expense of everything else. If this is already you then don’t think that revisiting weak areas is ‘going backwards’ - filling in any gaps in your abilities to bring them level is very much moving forwards. All the pieces matter.
    “Keep it loose. But keep it tight.” - James Brown

    By admin, in Disciplines,

    Wingsuit Progression

    kydiving today is rife with would-be wingsuit pilots. Ask any number of new jumpers what discipline they want to pursue, and more than likely you’ll have a majority vote for wingsuiting. This is thanks in no small part to the viral popularity of wingsuit BASE videos in recent years. Let’s be honest, even your mom is sick of watching people fly ‘The Cheese Grater’ line at Aiguille du Midi. And while that trend seems to be tapering off somewhat (perhaps as the number of true terrain flyers left in the sport is itself dwindling), there are no shortage of noobs eagerly awaiting their first prom dress.
    But, for those who have already cranked out the requisite jump numbers, done their FFC, and are now exploring the freedoms of human flight, what path marks the best progression into the world of wingsuit wizardry?
    DISCLAIMER: I’m going to set aside any brand loyalties and personal biases towards/against manufacturers. There will be no suit-specific insights or recommendations. The point of what follows is to provide some simple and easy to follow suggestions through a safe and effective
    While there is no doubt that putting in serious work on a small suit is better than jumping quickly into a bigger suit, there is some divergence as to how long your mentor(s) and/or more senior jumpers/coaches may suggest that you remain in your entry-level suit before upsizing. [There is even some discrepancy as to what is deemed an appropriate entry-level suit…but I think for the most part your FFC coach should be able to walk you through that one…]. For my part, I can say that while having put 150 jumps on the small suit I started with was certainly enough for me to be safely flying a bigger suit, there’s also no doubt in my mind – looking back now with the benefit of hindsight – that I would’ve continued to benefit tremendously from growing my skillset and utterly mastering the smaller suit before moving onwards and upwards.

    To clarify, wingsuits can be considered as belonging to one of three very basic overarching “platforms”: small suits, medium suits and big suits. [This is by no means a comprehensive dissection of suit design, merely a simple and inelegant framework to help guide the discussion]. Small suits have wing-roots near the hips, and a tail that does not extend to your feet. Medium suits have wing-roots near the knee and a tail that goes straight across your feet. Large suits have wing-roots near your feet and a tail that extends past your feet.
    The obvious analogy, here, is parachute size. It’s easy to get caught up drooling over the tiny table-clothed sized wings that you see people flying online or at your home dz. [Insert any number of panty-dropping related clichés here…]. And in your hurry to get down to a smaller, “cooler” wing, you may rush through some key skills that you should already have deeply ingrained in your muscle memory and sight picture, on a larger and more docile/forgiving canopy, before continuing to progress to smaller and more aggressive parachutes. The only difference is that, with wingsuits, the reverse is true. I mean, who wants to spend 150-200 jumps wearing some tiny little baby dress? Ain’t nobody got time for that!! Am I right?! Well...no.
    The problem with this logic is two-fold:
    1) The more time you spend in a smaller suit, nailing down an array of skills and mastering the suit, the better you’ll fly in a bigger suit. This means that, in the grand scheme of things, you may well become the badass flyer you want to be even faster if you master a solid foundational skillset in a beginner wingsuit before moving on to bigger suits.

    2) The more surface area you add (as you increase suit/wing size), the more challenging and demanding the suit is to fly. As you increase size, you dramatically increase the power of the suit, and also the inherent danger of flat-spins, hard pulls, no pull-finds, losses of control, etc. While more powerful in the right hands, larger suits can also be less forgiving of pilot error. This is especially dangerous for pilots who skip a step in their progression – upsizing by more than one platform at a time.
    Recent events have tragically proven that no one is invincible to the effects of poorly chosen gear. If there are any positives to take away from the great losses our sport(s) recently suffered, they are the lessons we must learn from those who paid the highest price.
    Choose the right tool for the job! It doesn’t matter if you’re in the mountains or at the dz. Exercise good judgement and your chances of playing safely are far greater.
    It seems simple enough. But this requires an honest self-evaluation of your skill set, and an assessment of what job (type of flying) you want the tool (the suit) to perform…and in what specific conditions/environment. Always consider these factors together and choose accordingly.
    But let’s be real, my advice carries little weight relative to the allure of the sky and BASE gods you might still be watching on repeat on your YouTube or Facebook feeds. And it’s more than likely that my words are also outweighed by your own ego and pride (I know this of myself firsthand…).
    So I asked someone with just a little more experience to share his thoughts – someone who’s become synonymous with wingsuit progression – both in the sky and in the burgeoning scene of the wingsuit tunnel…and also in what some view as the pinnacle of wingsuit progression and human flight: the wingsuit jet-pack. In all domains, Jarno Cordia is an authority on wingsuit flying. And with the obvious benefit of his 4100+ wingsuit jumps, and countless hours of R&D; spent analyzing flight, and designing and testing suits, Jarno had the following to say about finding your own wingsuit progression:

     
    I think too many people look at 'good numbers' as a sign of being in control of a suit. The fact that you fly a certain distance or time just means you have a good feel for the performance, but, safety wise, the actual control is where the real importance lies.
    Learning to not just fly your suit straight, but in steep dives, turns in various ways, flat, steep, mellow, sharp, backflying, and barrel rolls. Though these may not all seem like skills needed to fly (especially) bigger suits, when your only aim is performance competitions or base, on bad exits, or tumbles, it’s those skills and spatial awareness that will make a big difference.
    It’s also important is to realize 'doing two dozen jumps without incident' is not the same as 'mastering a suit' and quite often people mistake their uneventful jumps as a sign for being ready to move up to bigger suits. Make sure you are in complete control before upsizing, and not just 'getting by' by doing some straight line flying and a few flares.
    In terms of learning, the small suits provide much more feedback and direct results in terms of what you're doing. Though, these days, bigger suits seem to be the focus. And in marketing various companies try to sell big suits as 'the new small'. Note that in the end, you're the one flying it, and not the 10.000 jump wonders in slick marketing videos.
    Nobody ever became a worse a pilot from flying a small suit, and the majority of my personal jumps I still enjoy doing in actual small suits. Acrobatics and performance…the actual inputs and feeling don't change. When flying with the right technique, any suit or size can be flown the same. Just certain techniques needing to be done with bigger or smaller moves, but any time spent on a small suit is never wasted.
    Both in BASE jumping or skydiving, the skills learnt on a small suit in terms of turns, and emergency response will be of vital importance. Big suit or small suit, the inputs are the same, but the response on a big suit are much faster and more aggressive, and sometimes violent. In all other serious disciplines, issues with flying, tend to be fixed with a strong focus on skill. A common problem in wingsuit flying is that coaches, though not all bad in intent, can sometimes put too much influence on students to look for gear solutions instead of focusing strictly on technique. This makes our discipline one that's sometimes too much resorting to blowing cash on nylon, instead of on skills.
    Gear for sure can be a factor in your flying, as not every suit, model or brand has the same degree of precise control. But make those decisions by trying various suits in the same category, as any suit upsize will on the first few jumps feel like you've just been handed a jetfighter with afterburners. But in the end, it’s the fine control that matters most, and across the board, most manufacturers have similar size models in terms of capability.
    It’s the steering and control that matter most, be it belly, backfly, acro, flocking or performance. There, demoing suits of various manufacturers in the size you're familiar with will tell you a lot more about the control, and allow you to make informed decisions, instead of basing it on the brand your (sponsored) coach may be trying to push onto you.
     
    There’s no doubt that placing your focus strictly on skill attainment – instead of relying on jump numbers, positive flysight data, or lack of problems flying a suit – is the most effective way to gauge a safe progression. I must admit that I personally regret not having kept my smaller suit, which I now wish I had for flying with newer pilots, and for generally tossing around all over the sky in ways that I’m not yet able to do as confidently on my big suit. But, as Jarno pointed out, money inevitably comes into play. And we can’t all keep throwing it towards gear hoping to become better pilots. So, in order to max out your value and your safety, please consider asking yourself the types of questions raised above relating to skill acquisition, suit mastery, and finding the right tool for the job as you progress.
    The link below also provides a great progression chart (free to download) with an indication of levels/skill that is often used at wingsuit boogies around the world:
    http://flylikebrick.com/skills-database/
    Fly safe folks!
     

    By admin, in Disciplines,

    Indoors Outdoors - Translating Between The Tunnel & The Sky (Part 5)

    Part Five: Head Down
    Learning to fly upside down can be tough. Once a student reaches the point at which the coaches and instructors in charge of their progression and safety invite them to start, he or she should be suitably skilled in the other main orientations of flight in order to manage the variables involved in practicing head down with confidence. However, all too often this is not the case - and although things are improving as training methodology evolves and becomes more widely understood - too few students invest as much time as they should in the right foundational skills in their big rush to get to head down.
    The main thrust of these articles is to highlight some of the many ways that various elements of freefly training feed into and stack upon each other to create a deeper understanding of how flying actually works. The process of learning head down is a great example of exactly how many things someone could and should be able to do before they begin with those expensive headstands on the net - in order to make the whole endeavour much smoother, easier, cheaper, and vitally - more fun.
    Safety First!
    On the most basic level, good backflying and sitflying skills will keep you safe while learning head down. The ability to properly control yourself in these positions on high windspeeds is the minimum by which you should be allowed to get started. Even for those us totally devoid of maths, the ability to reset yourself onto the net in just a handful of seconds after needing to bail instead of fifteen or twenty (or more) spent bouncing around the top of the tube is clear to see.
    Investing in your backfly and sitfly early on will save you a great deal of time and money down the road.
    In addition, every bit of progress you make in the other areas of your training feeds directly back into your ability to fly head down. Doing this other stuff is more fun and easier on your body than spending hour after hour on the net.
    How Does Head Up Help?
    Aside from simply being able to safely get in the tube on wind speeds high enough for head down flying, many of the ways you sitfly about the place can be practiced and then switched the other way up as a means of making you brain understand what is going on. The most efficient way to figure out a line or a sequence of moves when you are first learning on your head can be to get it right with some sitfly first where it is easier to maintain awareness and fly with a position in which you are stronger - then flip it over. The way movements are flown from the one orientation to its opposite can be very similar - the space, the lines and the subtleties are very often one and the same.
    How Does Carving Help?
    Carving your way up from low wind speeds on both your belly and back help your head down flying from the very start by helping your brain to recognise the single most important rule to maintaining positional awareness:
    When you go from head up to head down - left is right and right is left.

    Once you have got the hang of static head down, moving around is next. Understanding how carving works and practicing it on low speeds is the way to both good technique and a much quicker mastery of it on high speeds. The best way to frame the process is to think of carving in the tunnel as learning the ability to fly at any angle and velocity as opposed to separating high speed and low speed into two categories. Once you get steep enough, the skill set you need to apply to carving becomes closer to that of head down flying - but the most important thing to understand is the fluidity. The golden moment is when your carving drills and your head down meet in the middle.
    How Do Layouts Help?
    Proper layouts are tough to get right. Frequently people have to do a great many, working through the smallest refinements in technique before nailing them. Training layouts teaches you body many things, but within the context of this article the most prescient value they have for helping with your head down skills is to get your body up over your head and travelling through the axis you need the most control of when flying (or transitioning through) a head down position. Head down is scary at the start - the wind is fast and is hitting your control surfaces from the wrong sides - having some layouts under your belt will help with being relaxed at the idea of your feet being high up and your body low down.
    The thing to remember is that all the pieces matter. While it is entirely possible to learn how to fly head down buy achieving the minimum possible requirements to be allowed to try, and then spend a great deal of time and money hammering away at it the way people used to do all the time - there is now a way that is more fun, less tiring, and that will ultimately give you a stronger skill set, better understanding and more useable tools for skydiving.

    By admin, in Disciplines,

    Indoors Outdoors - Translating Between The Tunnel & The Sky (Part 4)

    Part Four: Belly Flying


    It is probably important clarify exactly what we are talking about when referring to belly positions. Not to be confused with ‘Relative Work’ or ’Formation Skydiving’ or whatever saucy nomenclature is used in your part of the world for gathering up your bootie friends and doing as many doughnuts and thingys as you can - within the sphere of freefly training ‘belly’ means the various forms in which the side of your body with your belly on it is presented towards the wind.
    An important part of evolving into a wise and learned freefly type is the difference between merely teasing belly flyers for being lame and actually meaning it. Serious flat flying is very technical and contained within it are many of the concepts it is crucial to understand to fly competently in other orientations - such as developing spacial awareness, using multiple surfaces of your body at the same time to control both place and position, and the processes of planning and executing bigger, more complex skydives.
    The better you are at one element of flying the easier the others are to learn.
    Freefly is about mastering movement across all three axis, any way up and at any angle, and learning to fly with the wind hitting the front parts of your body is not only as important as any and all of the other parts - it is available right from the start. There are a couple of very good reasons why good belly basics are not something to dismiss or overlook. Firstly, the circumstances you are training under (indoors or from aircraft) require you to achieve some kind of basic proficiency anyway - so why not use the opportunity to cram as much of it into your brain as possible? Secondly - down the road when you are ready to attempt some of the more advanced tricks and transitions, understanding more advanced methods of how to fly on your belly will help a great deal.
    How Does Belly Carving Work?
    The general rules about learning to carve in (or from) a belly position are the same as doing so on your back. The mechanics of carving do not change wether you are head up or head down, facing inwards or outwards, and if flying on high speeds or low speeds:

    The combination of a drive and a turn creates a carve.
    When carving, the input with your body required to generate the turn part of the equation is small. Controlling everything else is the same - the surfaces you apply to the wind to alter your speed both horizontally and vertically remain constant, so when you are learning to carve in the tunnel you are training the same movements and positions that you use for tracking and angle jumps. You start flat and work up through to higher speeds and steeper angles - which is directly reflected by the skydives you perform as you build your confidence with tracking jumps.
    Orientation and Awareness
    It cannot be overstated how important spacial awareness is. As you work through the various stages in a training programme there are drills in which you are re-programming your muscle memory to do the exact opposite of what it has normally done every time in your life up to this point. Up is down, left is right, forwards is backwards. It takes time and is frequently frustrating, so anywhere you can find the opportunity to gain a head start is valuable. The same drill we discussed in the last chapter - where you can fly in a flat orientation (on your back) and switch (as far as your brain is concerned) between a head up and a head down position simply by moving your head is also applicable when on your belly. The opposite version of the same procedure has a comparable outcome and similar advantages:

    Helping you to fly an outface carve in the tube without losing control or getting dizzy.
    Setting you up for learning to fly head down positions and then perform transitions between head up and head down without being bamboozled by it.
    Progressing your angle skydives into steeper and steeper positions while maintaining safety and awareness.

      As we touched upon in the previous chapters, as you push through the training stages the symbiosis not only between each orientation of flight but that of the indoor and outdoor environments becomes more and more apparent. Knowing some details of how things all work together with each other hopefully de-mystifies the process somewhat and puts you on the good foot from the start. Getting to where your ambitions lie is a long road and the key to a more rewarding and fulfilling time with it is to recognise each step of the way as being of equal value. Every small push forwards is an important victory and an essential part of the bigger picture.
     

    By joelstrickland, in Disciplines,

    Indoors Outdoors - Translating Between The Tunnel & The Sky (Part 3)

    Part Three: Back Flying
    Backflying, in the manner that you learn as the entry point into freefly training in the tunnel, is not something much done up in the sky. Back tracking yes, and transitioning through your back from one place or position to another also yes, but static backfly not so much. Nonetheless, it is a crucial skill for many reasons - not only as a safety position that you can control at any speed, but also to build your awareness and ability with more advanced techniques.
    These days, people understand much better the importance of being able to backfly with confidence. From the perspective of coaches and instructors the resistance to students spending time learning this skill is more manageable than it was not such a long time ago. If you are feeling morbid and have substantial gap in you day, go dig up an old tunnel monkey and set them off about teaching backfly - then watch as their eyes bulge and the veins on their neck stick out.
    Investing in you backfly skills now will save you a lot of time and money later.
    The ways in which this orientation sets you up for strong progression are important and various. Not only is it your rescue position when practicing high speed drills in the tunnel, it is the jumping off point for understanding carving, how to build your back tracking and angle flying skills, and develop your awareness when switching between head up and head down.
    How Does Back Carving Work?
    Carving all works in the same way regardless of which way, which way up, or on which side you are approaching it:
    The combination of a drive and a turn creates a carve.
    If you just drive in a straight line with no turn then you fly straight into the wall. If you just turn and don’t drive at all then you spin on the spot. The balance between these two inputs dictates the size of the carve. Ok, so now jump back to just driving and not turning - when learning to carve hitting the wall is not your goal, but what if there is no wall to hit? The surfaces you use to control your speed and pitch are the same wether you are going around in a circle or in a straight line, so the muscle memory and technique you develop while learning to carve in the tunnel is immediately applicable to your angle jumps. Hooray!


    Orientation and Awareness
    So much of learning how to fly is teaching your brain and your body to do the opposite of what it is naturally programmed to do. Slow is fast, left is right, up is down. When practicing moves that are initially complicated and difficult, it can be very challenging to consider any other factors than simply getting to body position right. As your skills grow so does your ability to process more information - such as where you are, where anyone else is, where you have just come from and where you are going.
    Awareness drills that you can practice early on help greatly toward overwriting your brain with the correct information about which inputs move you in which direction.
    For example, transitioning from head up to head down while facing the same way switches the direction of you whole body - shoulders, head, eyes, brain - everything that was on your left side is now on your right side and vice versa. Without training your body to understand how this effects movement and swap things around accordingly, you will find yourself going the wrong way because it feels correct to go the wrong way.

    Building your understanding of how, why and when to switch direction is a vital part of moving around safely and with purpose while freeflying.
    So start now. When you are flying on your back looking down across your chest towards your feet you are in a head up position. When you are flying on your back with your chin up as far as it will go, your eyes pointing backwards and the top of you head down towards the net you are in a head down position. It does not matter that your body remains horizontal - for all intents and purposes you brain is learning the differences between the two. When you move on to higher wind speeds and and positions that are tougher on both your body and attention, having been aware of how this works from the start and including it in your training will help a lot with how fast you move on.
    So, right from the start there are things you can do in the tunnel that will improve your skydiving. Learning to freefly properly is something that requires attention to detail and practicing backfly skills on low wind speeds in no way diminishes the rate at which you learn.


    By joelstrickland, in Disciplines,

    Indoors Outdoors - Translating Between The Tunnel & The Sky (Part 2)

    Of all the basic orientations and body positions available, good old sitfly is the one that changes the most between indoor and outdoor flying. If you have done any head up training in a tunnel, your coach will very likely have been hitting you over the head from the very beginning about how you need to use your back more and your arms less. Learning to freefly is about understanding how each and every surface of your body can be presented to the wind in different ways that work together to create lift and drive. Your back is the biggest single surface that you have - and as such knowing how to use it properly and from early on not only makes flying head up easier on every other surface you use, it feeds into many, many other skills.
    Head Up Is Cool
    Just a mere handful of years ago it was much more common that sitfly abilities were seen as another frustrating speed bump on the way to ‘getting head down’ - and as with belly and backfly only the minimum possible understanding and skill development was needed (or tolerated) before you do the ‘proper flying’ that was cool and not lame. In no small part thanks to the macroscopic nature of modern tunnel training people now seem to mostly accept and understand that the path to improving as a flyer is one that embraces good foundational skills that cover all the orientations properly. The ways that programming your body via repetition to understand movement and build both confidence and awareness have such a strong symbiotic relationship that the better you are at one thing, the easier it is to learn another.

     
    Even a well fitting harness might develop space that can hinder your movement  
    Being diligent and thorough with something that is comparatively easy will make the harder thing easier and you will get it much quicker.
    Also, some imaginative people did awesome, progressive things with their feet pointing at the ground and as a result we have learned that doing head up flying is as challenging, rewarding and fun as anything else. With bigway records and complex feetsdown angle flying becoming more and more regular - head up has never been more exciting.
    What About My Parachute?
    Herein lies the difference. Your container assembly is made from a really grippy material and from the ass-end is not so aerodynamic. Also, as often as not, when flying head up your body position will generate a little (or a big) space between your back and your rig, exposing more surfaces to the wind that you need to consider. The sum total of these factors is that your rig hampers your ability to use your back to get about the place, and the balance of how you move shifts over to the other surfaces you have available - your arms and legs. When learning to sitfly a good coach will explain and demonstrate exactly how all the surfaces of your body work together and how to safely manage the difference between indoor and outdoor movement. Once you have learned how to do it, using your back for movement in the tunnel is easy peasy. When you put on a parachute and try the same thing while skydiving you will feel like your rig is trying to anchor you on the spot and you must adapt how you fly accordingly.
    Technical Difficulties
    While the following is true of other positions, a good early example of how developing good technique between the tunnel and sky is with sit. The tunnel is an enclosed space in which you need to generate the correct amount of lift with your body to fly and remain in the right place - whereas In the sky there is no net to worry about so strength and diligence with your body position becomes less important to maintain a position.
    There is stability in speed and it is easier on your body to fly fast.

     
    Understanding how to use your limbs important  
    So, in the sky things feel a little looser and jumps tend to fly a little faster. This is great when applying things you have learned in the tube, as once you remember to be subtle you will have it nailed to the wall - but it is important to be aware that the same adaptation in reverse means it is easy to develop sloppiness and wind up battling with inefficient and tiring technique when you go back inside. The way to avoid this is always consider your body position as part of your pre and post jump process. When running through the plan in your brain, picture yourself flying in a proud, efficient position and break down the movements you are aiming for into each surface you will bring to bear on the wind. Afterwards, include analysis of not only what you did, but of how you did it as part of your personal de-brief. if there is video of the jump go through it frame by frame and deconstruct exactly what is happening with your body and how the changes you make effect your movement.

    By joelstrickland, in Disciplines,

    Indoors Outdoors - Translating Between The Tunnel & The Sky

    Part One: Where Are We Now?

    Bodyflight has undergone significant evolution over the past few years. There are many tunnels now, with many more on the way - and the very best flying from formalised competitions attracts a great deal of attention from the outside world across the various media that we absorb into our brains every day.
    The techniques used to teach flying skills both indoors and outdoors are myriad and complex.
    Whether you are brand new to flying or a bit further down the road, the amount of information you are required to process during a short time in a stressful environment can be a heavy burden.
    Once you fall down the freefly rabbit hole, flying quickly gets very technical, and although many of the concepts are fairly simple to understand during the briefing - remembering and applying them while you are doing it is a different game.
    Indoor flight has taught us how to squeeze every efficiency from our bodies, gradually trimming the fat from the training process to where a lot can be achieved in a relatively short space of time. However, when new to the mysteries of the tube it can be confounding to watch exactly what coaches are asking their students to perform and be left wondering exactly how the various drills and techniques on display are relevant and applicable to one’s skydiving skills.
    The articles that follow are designed to clarify somewhat how tunnel flying and skydiving crossover with each other and address some of the questions people generally have at the beginning of the training process.

     
    Generic Coaching Disclaimer
     
    While it is certainly possible to learn some useful things from articles such as this, there is no substitute for good quality tuition. A coaching fee on top of what you are already paying for tunnel time or jump tickets will likely make things feel extra spendy, but for the amount it costs to employ someone with both the right knowledge and the means to convey it into your head will get you much further than the equivalent cash thrown at just trying to figure things out for yourself.
    Bodyflight is evolving quickly and expanding into every corner of the world. There are lots of coaches and many different opinions out there as to what exactly is the correct way to teach things. After reading this someone may well trot up to you and pontificate about how much of an unbearable ass I am and that what I say doesn’t count for shit all. Different approaches work for different people - and the more sources of information there are available to you the better equipped you can be to winnow the wheat from the chaff. I am writing from the position of eight years as a tunnel professional and have attempted to structure these words in a way that represents that which people most want to pick my brains about.
    Low Speed, High Speed, and the Follow Me Game
    The driving force behind how things have changed is the space available in which to fly. Some years ago tunnels were mostly smaller in diameter. Learning to fly used to be about getting the wind speed up as soon as could be, and that learning moves on lower speeds was a tedium to be rattled through as quickly as possible until you battled your way to head-down flying.
    As a general rule, tunnels then started getting bigger and as a result people began to discover a couple of very important things. The extra space meant that not only was it possible to present bigger, flatter, more efficient body positions to the wind - you could do so with more than one person (crucially - a coach and a student) at the same time.
    At this point, coaching via leading and following around the tunnel was already a thing, but bringing the format forward to the very beginning of the training process meant that a student could learn more things faster. A coach now had the room to quickly demonstrate something next to the student without more than the very minimum of time consumption and fuss, which is of tangible value in a place where very seconds mean monies, but also when leading and following is added into the process the student would then be approaching all the main concepts of getting shit done in the tunnel from day one.
    Following a coach from one position in the tunnel to another and performing structured moves in the same spot that they do engages the key elements of understanding how dynamic flying works. Not only are you practicing the moves themselves, you are learning lines and programming the management of space into your body, coaxing your awareness outwards to the environment you occupy. Good awareness is just as important for safe flying and a healthy learning curve in the tunnel as it is up in the sky.

     
    Low Speed and High Speed Training
     
    An unsophisticated way to think of the difference between low speed flying and high speed flying is as an indoor and outdoor skill set. In the simplest imaginable terms, low speed training teaches you how to fly all pretty in the tube and high speed training is where you learn skills to be better at skydiving. This is pretty reductive as while these things are not untrue, there is so much more value in understanding exactly where, why and how things cross over. The beautiful part is that the symbiosis between the two ways of doing things is so total that end result is greater than the sum of its parts. If bodyflight has put the hooks in you then chances are you desire to be a good flyer in both the sky and the tube - which is where the benefits really start to show. There are differences between the two environments which reveal themselves the more you learn. Adapting you skills from one place to the other takes a minute and does not happen automatically, but lots of what you learn translates from one environment to the other in valuable ways.
    The chapters that follow each represent one of the main orientations in which we fly - broken down into elements where attention is paid to the similarities and differences between indoor and outdoor zooming, and how to approach transitioning concepts and body positions successfully between the two environments.

    By joelstrickland, in Disciplines,

    From Tunnel to Sky

    Training Wind Tunnel Students to be Great Skydiving Students
    by Kirk Verner and Gary Peek
    Photos by Michael Breweri
    Tunnel student Emily Young
      The advent of vertical wind tunnels has created not only an incredible new air sport, but has also provided us with a very realistic simulation of freefall skydiving. This simulation can be used to provide both accurate and efficient training for skydiving students.
    As wind tunnels proliferate around the world, more and more people are going to begin skydiving having already experienced flight in a wind tunnel. Many of them will come to skydiving having performed maneuvers that skydiving students experience not only in their initial skydives, but in their more advanced training jumps as well.
    At some point, nearly every dropzone and skydiving instructor will need to plan how to use this technology to both enhance and replace traditional training for freefall.
    Advice for the tunnel instructor:
    Keep in mind that the sport of skydiving and the skydiving industry are extremely concerned about legal issues and liability. Trusting a student's instruction outside of the normal skydiving channels is a huge leap of faith for both dropzones and skydiving instructors. It may be a long time before tunnel training for skydiving gains widespread acceptance, so have patience and try to cover all the bases during this transition.
    In all likelihood, a tunnel instructor is going to have to hold a skydiving instructional rating from a national organization in order for their instruction to be used toward skydiving, for example, an USPA AFF instructional rating in the US.
    Logging tunnel skills and experience
    In order for a person trained in a tunnel to transfer their skills and experience to skydiving, they are going to need some reasonable verification of their training. Tunnel management and tunnel instructors would do well to create their own logbook to help their students take proof of their time and skills to dropzones and skydiving instructors. This logbook should include items like the date, location, flight time, maneuvers, and instructor signature, but could also include multiple ways to contact the instructor, since using proof of tunnel training will be new to many dropzones and skydiving instructors. They will likely feel much more comfortable with their skydiving student if they can discuss their tunnel training with the tunnel instructor if needed. If a specialized tunnel logbook is not available, a skydiving logbook could be used just as well, with the advantage of the student already having a logbook when they start skydiving.
    Suggested progression for a tunnel student working toward being a skydiving student
      In order to allow an AFF instructor who does not have tunnel flying experience to feel comfortable with the progression of students you have trained in the tunnel, there are a number of skills that the student should be able to demonstrate. These can range from basic stability all the way to advanced maneuvers, depending on the amount of time spent on instruction in the tunnel.
    In most cases, a single phase of tunnel training will be all that a potential skydiving student will need. If the goal of the tunnel student is to skydive, they may be eager to do that as soon as possible.
    In some cases however, a tunnel student may have begun tunnel flying without the goal of skydiving in mind, and may have accumulated significant time in the tunnel before deciding to skydive. Or, they may prefer the efficiency of the tunnel to learn the more advanced maneuvers before skydiving. If the skills outlined in a second phase of training are learned, the student may be able to advance very quickly in their skydiving progression.
    Phase 1 -
    Phase 1 training would include basic stability, neutral body position, heading control, fall rate control, forward and backward motion, docking, simulated altimeter checks, and simulated pilot chute throws. This training can be used to provide the student with the basic stability and maneuvers to allow them to jump with a single AFF instructor and to quickly advance to skydives and aircraft exits that will deliberately introduce instability.
    Phase 2 -
    Phase 2 training would include controlled turns, intentional unstable maneuvers, "delta" and tracking body positions, and the backslide body position. This additional training can be used to allow the student to quickly perform the maneuvers necessary to advance to the "coached" phase of skydiving training.
      Ways to add realism to skydiving training in a tunnel
    In order to provide a more realistic simulation of skydiving, a tunnel instructor may have their student wear a skydiving rig along with one of the "Tunnel Wrap" or "Rig Condom" devices, used to enclose skydiving rigs in order to prevent accidental deployments when worn in tunnels. Also, a simulated altimeter training device can be helpful to allow the student to practice the position of their arm when checking altitude.
    Advice for the skydiving instructor:
    For legal liability reasons, all skydiving students need to be given instruction in all areas related to making a skydive. However, most of us realize that students that have been trained in a wind tunnel, especially in skills related to skydiving, are going to progress through the skydiving freefall skills at a rate that no traditional skydiving student could. This may allow for a considerable savings to the student in time and number of jumps.
    In all likelihood, a skydiving instructor is going to have to hold an instructional rating from a national organization in order to be be allowed to train students, for example, an USPA AFF instructional rating in the US.
    Aircraft
    A skydiving student of any kind may have no knowledge at all about aircraft and the dangers that they can present. Students need to know how to avoid propellers, enter the aircraft and position themselves properly, to protect their handles, and to find and wear their seatbelts. Remember that tunnel students are probably not used to having a rig on their back and may not realize what the flaps are rubbing up against.
    Since most skydiving exits from aircraft are difficult to simulate in a tunnel, a skydiving instructor will need to tell the student what to expect for a particular exit. The advantage for a tunnel trained student is that if an exit causes instability, the student will be able to correct this almost immediately and quickly continue with the skydive.
    Gear
    One thing that many tunnel students are unlikely to have experienced is having a parachute system on their back while flying. If the student rig is sized well for the student and adjusted well on their back, this will likely not be an issue at all since they have learned and felt a great deal of stability in their body during tunnel flight. However, if your dropzone is one of those who still uses one-size-fits-all student rigs with large parachute for all students you will need to pay close attention to the adjustment of the rig if the student is a small person.
    If a tunnel student has been flying in a tunnel for a while, or is very serious about tunnel flying, they may already have their own jumpsuit, helmet, and goggles. Their jumpsuit may or may not have grippers, so an instructor may not be able to easily take a grip on the student, but then again, why might they need to? If the student has enough tunnel time it is very unlikely that the instructor would need to take grips to control the student, but perhaps they would feel uncomfortable without grippers. If the student is required to wear the dropzone's jumpsuit it should be appropriately sized and probably be rather tight unless they are a larger student.
    If the student's personal helmet and eye protection is appropriate for skydiving then having them use their own gear would be best. But if the student is required to wear a radio for canopy guidance there might be some serious tradeoffs. If the dropzone uses radios that are mounted on the helmet, the student may need to wear the dropzone helmet and goggles. However, if the radio is mounted on the student's chest strap, then perhaps telling the student to raise the face shield on their helmet once under canopy to hear the radio better might be sufficient.
    Where will they be placed in our progression?
    One of the first questions that your student or your dropzone owner may ask about a tunnel trained student is "With their experience flying their body, what "level" or what "category" are we going to have them start with?" (In reality, you may need to create a level or category specifically for them for at least a few jumps.)
    Realize that there will be a huge difference between a student that has 15 minutes in a tunnel compared to one that has several hours. If the student's tunnel instructors have done specific training in preparation for their student learning to skydive, there may actually be only a few freefall related skills for the student to learn and demonstrate.
    Body Position
    When you are initially training your student and practicing a skydive on a creeper or other training device, you may see your tunnel trained student use a body position that is different than what you would normally train your skydiving student to use. Well, if your student has more than a few minutes of tunnel time using that body position, then you should usually just let them continue to use it. Trying to make them do something different that what they were initially trained to do will waste time and may make their performance worse. This also includes some maneuvers such as turns, which may be taught differently by tunnel instructors.
    Freefall maneuvers
    Most freefall maneuvers used in skydiving can be simulated and practiced in a tunnel, perhaps with the exception of the lengthy movements made during tracking or backsliding. Although tracking can be simulated in a tunnel, the skydiving instructor will still need to make sure that the student can track in a straight line in order to provide separation before deploying a parachute.
    Most skydiving instructors will be concerned with the altitude awareness of their tunnel trained student, and perhaps for good reason, given the extended period of working time provided by a tunnel. However, the normal training given to skydiving students regarding the dive flow should give the student sufficient time and altitude awareness. A simulated altimeter training device with an altitude that can be set to count down would be extremely valuable.
    Canopy control
    Knowledge of parachutes and how to fly them safely is something that no tunnel student will know until they are trained on it. All of the normal canopy training subjects will need to be taught. The good news is that the increased confidence that a tunnel trained student has in their freefall skills will allow them to relax and to use more of their energy and thought learning canopy skills.
    If your tunnel student turned skydiver is not catching on to canopy control after having mastered the freefall skills, you can always do what you would do to a student that started as a skydiver. They can always do a number of clear-and-pulls and concentrate on improving their canopy skills. This may also provided them with more opportunity to practice spotting in the aircraft.
    About the Authors
    Kirk Verner and Gary Peek have known each other for over 30 years. They both learned to skydive in the early 1980's at Archway Skydiving Centre in Sparta, Illinois, owned by Kirk's father Dave Verner. Both Kirk and Gary are on the United States Parachute Association Board of Directors, Kirk as a National Director and Gary as the Central Regional Director.
    Kirk managed the Paraclete wind tunnel for 10 years and now manages the Paraclete dropzone. Kirk is an active AFF instructor and teaches students trained in the tunnel to be skydivers using Paracletes' tunnel to skydiving program. Kirk is also a world champion formation skydiver, having been on the Arizona Airspeed teams for 13 years.
    Gary is an active Tandem and AFF instructor, and teaches students locally, as well as when he visits dropzones in the region. He is also a Master Parachute Rigger, a Commercial Pilot, and Cessna 182 jump pilot.

    By admin, in Disciplines,

    Health gymnasiums

    Two other advantages offered by good gymnasium are constant supervision, which enables you to exercise with safety confidence, and a congenial atmosphere. Exercising with people who share common purpose can provide extra enjoyment and incentive.
    It is necessary first of all to distinguish between the different types of gymnasium. Training gymnasium are essentially for athletes and other men and women who wish to develop their skills for particular athletic activities. They provide facilities for athletes to keep themselves for their chosen sports. Health gymnasium provide advice, instruction and facilities for everyone who wishes to become or keep fit, whatever his or her initial physical condition. Their clients range from professional athletes to office workers who wish only to make the best use of their lunch hours.
    Health gymnasium vary widely in quality. When choosing one of yourself, you should check that is staffed by qualified and responsible instructors. You may feel flattered to be attended by a sports celebrity, but professionally trained physiotherapists and physical education instructors can be equally, if not more, beneficial to an unfit person. You should expect to be asked details of your medical history, and to be carefully examined before being allowed to use all the facilities.
    Three types of exercise
    The accessories provided in health gymnasium to help you exercise range form simple wights and benches to more sophisticated equipment such aș pulleys and rowing machine. These accessories are appropriate for different kinds of exercises.
    Isometric exercises, the simple type involve a applying muscular strength by pulling or pushing immovable objects. The muscles are tensed and this tension is sustained for short periods of time. Because little movement is involved in these exercises, they develop static rather than dynamic strength.
    Isotonic exercises involve pulling or lifting an object to certain position and then returning it to its original position. They cause the muscles to contract as you move but, because the weight or force employed is to the same degree throughout the exercise. The weight or force used can only be that which you can lift or pull at the weakest point in the range of motion involved and at other points your muscles are not sufficiently strained to develop in strength.
    The third type of exercise, known as isokinethic, requires more sophisticated equipment. Isokinetic exercises can be designed for particular needs. For example, a person who is training for a particular sport can do exercises that stimulate exactly the demands of this sport, and also developed precisely the muscles he or she most needs.
    Massage
    Facilities for massage may be available at health gymnasium or sauna baths. Massage is used in physical therapy as a means of rehabilitating patients who are suffering from certain physical pain or aliments but, as a mean of getting or keeping fit, its value is very limited.
    Sauna baths
    Sauna baths may be attached to health gymnasium or may exist as separate establishments. Most sauna baths are organized according to similar basic principles, although Finnish sauna baths retain their original national characteristics. They have an invigorating effect on the whole body and aid physical and mental relaxation, but their effect on the whole body and aid physical and mental relaxation, but their effect are temporary rather than long-term.
    Sauna baths provide a healthy and enjoyable means of relaxation, but the sudden rise and pulse rate can be dangerous. Pregnant women and people with high or low blood pressure, should therefore avoid them.

    By admin, in Disciplines,

0